地铁网站建设特点/qq引流推广平台
一、axios ⚡️ ⚡️ ⚡️
1、是什么 ❓ ❓ ❓
axios是一个基于Promise的HTTP网络请求库,可以用于浏览器和node.js。在服务端它使用原生node.js http模块, 而在客户端 (浏览端) 则使用XMLHttpRequest。它可以帮助我们更轻松、简单地发出 AJAX 请求。
2、为什么选择它 🙋 🙋 🙋
1、它支持Promise API,能够处理异步请求,降低了回调地狱的问题。
2、它支持取消请求,可以在请求未完成时取消请求,避免浪费资源。
3、高开发效率,简化代码逻辑。
4、它提供了拦截器可以拦截请求和响应,可以在发送请求或接收响应之前对它们进行拦截和修改,从而实现统一处理或添加公共参数等功能。比如我们要做的同一接口防重复提交功能。
二、安装axios 💪 💪 💪
这里我的项目已经提前搭建好了,还没有搭建的小伙伴可以看看👉👉Vite4+Pinia2+vue-router4+ElmentPlus搭建Vue3项目(组件、图标等按需引入)
yarn add axios三、axios的使用方法 😜 😜 😜
1、创建一个axios实例的方法如下 👇 👇
import axios from 'axios';const instance = axios.create({// 你的api地址 将自动加在 `url` 前面,除非 `url` 是一个绝对 URL。baseURL: 'http:********/api/',// 请求超时的毫秒数(0 表示无超时时间)timeout: 1000,// 自定义请求头headers: {'X-Custom-Header': 'foobar'}
});
2、拦截器的使用 👇 👇
// 添加请求拦截器
instance.interceptors.request.use(function (config) {// 在发送请求之前做些什么return config;
}, function (error) {// 对请求错误做些什么return Promise.reject(error);
});// 添加响应拦截器
instance.interceptors.response.use(function (response) {// 对响应数据做点什么return response;
}, function (error) {// 对响应错误做点什么return Promise.reject(error);
});
3、使用 cancel token 取消请求 👇 👇
可以使用 CancelToken.source 工厂方法创建 cancel token,像这样:
const CancelToken = axios.CancelToken;
const source = CancelToken.source();axios.get('/user/12345', {cancelToken: source.token
}).catch(function(thrown) {if (axios.isCancel(thrown)) {console.log('Request canceled', thrown.message);} else {// 处理错误}
});axios.post('/user/12345', {name: 'new name'
}, {cancelToken: source.token
})// 取消请求(message 参数是可选的)
source.cancel('Operation canceled by the user.');
还可以通过传递一个 executor 函数到 CancelToken 的构造函数来创建 cancel token:
const CancelToken = axios.CancelToken;
let cancel;axios.get('/user/12345', {cancelToken: new CancelToken(function executor(c) {// executor 函数接收一个 cancel 函数作为参数cancel = c;})
});// cancel the request
cancel();
四、封装axios 👍 👍 👍
为什么还要封装axios,因为它默认情况下不知道我们的业务需求,所以封装它最大的目的是适应项目需求。其次封装它可以将重复的代码抽象成一个方法,减少代码量,提高代码的可读性和可维护性以及复用性。统一处理响应错误、全局loading、设置请求头、请求超时处理等。
1、新建文件src/utils/http/request.ts 👇 👇
代码中基本上该注释的地方我都有写注释,因为我这里是demo,有些代码我并没有去实现。比如判断用户有没有登录,将X-Access-Token添加到每个请求等,都会在相应的位置写上注释,自己根据自己项目的需求去完成就好。
import axios, {AxiosError, AxiosInstance, AxiosResponse, Canceler, InternalAxiosRequestConfig} from 'axios';
import {errorCodeType} from "@/utils/http/error-code-type";export class Interceptors {requestQueue: {createTime: numberurl: stringmethod: stringcancel: Canceler}[] = [];instance: AxiosInstance;constructor() {this.instance = axios.create({// 你的api地址 将自动加在 `url` 前面,除非 `url` 是一个绝对 URL。// 这里的话我的baseURL是存放在项目环境变量文件中// vite获取env环境变量的方式是import.meta.envbaseURL: import.meta.env.VITE_APP_BASE_API,// 请求超时的毫秒数(0 表示无超时时间)timeout: import.meta.env.VITE_APP_PREVENT_DUPLICATE_SUBMISSIONS});this.init();}init() {// 添加请求拦截器this.instance.interceptors.request.use((config:InternalAxiosRequestConfig) => {// 在这里的话你就可以去设置自己的请求头// 比如用户登录以后就能拿到一个token 这个token比如格式是data: {token: '*****'}// if (data.token) {//     config.headers['Authorization'] = `Bearer ${data.token}`//     config.headers['X-Access-Token'] = data.token// }// 防止一个接口在没有响应之前进行重新提交即重复提交验证,默认不校验 duplicateRequestValidation为true时开启if (config.url && config.duplicateRequestValidation) {this.removeRequestQueue(config)this.addRequestQueue(config)}return config;},(error) => {// 对请求错误做些什么 直接抛出错误Promise.reject(error)});// 添加响应拦截器this.instance.interceptors.response.use((response: AxiosResponse) => {// 在这里的话你就可以去处理你响应成功的自定义逻辑// 根据后端返回的code值。比如约定的是20000代表登录过期// const res: any = response.data // 获取响应值// if (res.code === 20000) {//     // 清楚token 跳转登录页面// }// 比如10000表示请求成功,约定40000~50000不做拦截// const filterCode = Math.abs(parseInt(res.code)) >= 40000 && Math.abs(parseInt(res.code)) < 50000// if (res.code !== 10000 && !filterCode) {//     // 这里去处理请求失败的逻辑// } else {//     return response.data// }this.removeRequestQueue(response.config)return response.data;},(error: AxiosError) => {// 对响应错误做点什么// 一般响应错误后端都会返回一个错误码和错误信息比如404 401等等// 为了让用户更能直观的知道是什么原因  你可以把常见的错误做一个转换然后提示一下 404就是访问资源不存在,401就是没有权限等等// 我演示的接口使用的是http://www.7timer.info/全球天气预测系统的接口// 判断重复提交// 转换错误编码为文字 进行提示让客户有更好的体验 超时要进行一个单独的处理let message:string = error.messageif (message.includes("Duplicate request")) {ElMessage({type: 'error',showClose: true,message: '禁止重复提交',duration: 3 * 1000})return Promise.reject(error);} else if (message.includes("timeout of")) {message = "系统接口请求超时"this.removeOverTimeRequest()} else if (error.response?.status) {message = errorCodeType(error.response?.status)}ElMessage({type: 'error',showClose: true,message,duration: 3 * 1000})return Promise.reject(error);});}private addRequestQueue(config: InternalAxiosRequestConfig) {config.cancelToken = new axios.CancelToken((cancel: Canceler) => {this.requestQueue.push({url: config.url!,method: config.method!,cancel,createTime: Date.now()})})}private removeRequestQueue(target: InternalAxiosRequestConfig) {for (const [index, p] of Object.entries(this.requestQueue)) {if (p.url === target.url && p.method === target.method) {p.cancel(`Duplicate request`)this.requestQueue.splice(Number(index), 1)}}}private removeOverTimeRequest() {const nowDate = Date.now()for (const p in this.requestQueue) {const { createTime } = this.requestQueue[p]const time = nowDate - createTimeif (time >= (import.meta.env.VITE_APP_TIMEOUT || 10000)) {this.requestQueue.splice(Number(p), 1)}}}// 返回一下getInterceptors() {return this.instance;}
}
上面import.meta.env.**的配置文件,根据环境的不同获取不同的参数,自己根据自己项目的需求去修改相应的值就好。
.env.development
VITE_NODE_ENV=development
VITE_APP_SERVER_URL=http://www.7timer.info/
VITE_APP_BASE_API=/api
VITE_APP_TIMEOUT=10000
VITE_APP_PREVENT_DUPLICATE_SUBMISSIONS=2000
.env.production
VITE_NODE_ENV=production
VITE_APP_BASE_API=/api
VITE_APP_PREVENT_DUPLICATE_SUBMISSIONS=2000
2、新建src/utils/http/shims.axios.d.ts文件 👇 👇
因为InternalAxiosRequestConfig是没有duplicateRequestValidation属性的,TypeScript会报错,所以需要我们手动加一下。
import { AxiosRequestConfig } from 'axios'
declare module 'axios' {export interface AxiosRequestConfig {duplicateRequestValidation?: boolean}
}
3、新建src/utils/http/error-code-type.ts文件 👇 👇
export const errorCodeType = function(code:number):string{let message = '未知错误,请联系管理员处理!'switch (code) {case 302:message = '接口重定向了!'breakcase 400:message = '(错误请求)Bad Request请求包含语法错误!'breakcase 401:message = '未授权,当前请求需要用户验证!'breakcase 403:message = '服务器已理解请求,但拒绝访问,您可能没有权限操作!'breakcase 404:message = '请求错误,服务器未找到该资源!'breakcase 405:message = '请求方法未允许!'breakcase 408:message = '服务器等候请求时发生超时!'breakcase 409:message = '系统已存在相同数据!'breakcase 410:message = '该资源已被删除!'breakcase 413:message = '请求实体过大!'breakcase 414:message = '请求的 URI 过长!'breakcase 500:message = '服务器端出错!'breakcase 501:message = '服务器不具备完成请求的功能!'breakcase 502:message = '错误网关!'breakcase 503:message = '由于临时的服务器维护或者过载,服务器当前无法处理请求!'breakcase 504:message = '网络超时!'breakcase 505:message = '服务器不支持请求中所用的 HTTP 协议版本!'breakdefault:message = `其他错误 -- ${code}`}return message
}
4、新建src/utils/http/index.ts文件 👇 👇
import {AxiosPromise, AxiosResponse, InternalAxiosRequestConfig} from "axios";
import { Interceptors } from "./request";// 请求配置
export class HttpServer {axios: any;// 初始化对象 获取axios实例constructor() {this.axios = new Interceptors().getInterceptors();}// 简单封装一下方法request(config:InternalAxiosRequestConfig): AxiosPromise {return new Promise((resolve, reject) => {this.axios(config).then((res: AxiosResponse) => {resolve(res);}).catch((err: any) => {reject(err)});});}post(config:InternalAxiosRequestConfig): AxiosPromise {return new Promise((resolve, reject) => {this.axios.post(config.url, config.data, config).then((res: AxiosResponse) => {resolve(res);}).catch((err: any) => {reject(err)});});}get(config:InternalAxiosRequestConfig): AxiosPromise {return new Promise((resolve, reject) => {this.axios.get(config.url, config).then((res: AxiosResponse) => {resolve(res);}).catch((err: any) => {reject(err)});});}delete(config:InternalAxiosRequestConfig): AxiosPromise {return new Promise((resolve, reject) => {this.axios.delete(config.url, config).then((res: AxiosResponse) => {resolve(res);}).catch((err: any) => {reject(err)});});}put(config:InternalAxiosRequestConfig): AxiosPromise {return new Promise((resolve, reject) => {this.axios.put(config.url, config.data, config).then((res: AxiosResponse) => {resolve(res);}).catch((err: any) => {reject(err)});});}patch(config:InternalAxiosRequestConfig): AxiosPromise {return new Promise((resolve, reject) => {this.axios.patch(config.url, config.data, config).then((res: AxiosResponse) => {resolve(res);}).catch((err: any) => {reject(err)});});}
}const http = new HttpServer()export default http
五、使用 🍄 🍄 🍄
1、vite.config.ts文件中配置代理 👇 👇
这个代理的话我们只会在开发环境中去使用,所以前端开发的小伙伴不用考虑后续发布会用到这里的配置。后面部署到nginx只会和我们的baseURL有关联。
server: {host: '0.0.0.0', // 指定服务器应该监听哪个 IP 地址port: 9527, // 指定开发服务器端口strictPort: true, // 若端口已被占用则会直接退出open: false, // 启动时自动在浏览器中打开应用程序proxy: {'/api': {target: loadEnv(mode, process.cwd()).VITE_APP_SERVER_URL, // 后端服务实际地址changeOrigin: true, //开启代理rewrite: (path) => path.replace(/^\/api/, '')}}
},
2、根目录下修改.env.development 👇 👇
VITE_NODE_ENV=development
VITE_APP_SERVER_URL=http://www.7timer.info/
VITE_APP_BASE_API=/
VITE_APP_TIMEOUT=10000
VITE_APP_PREVENT_DUPLICATE_SUBMISSIONS=2000
3、vue页面中直接使用 👇 👇
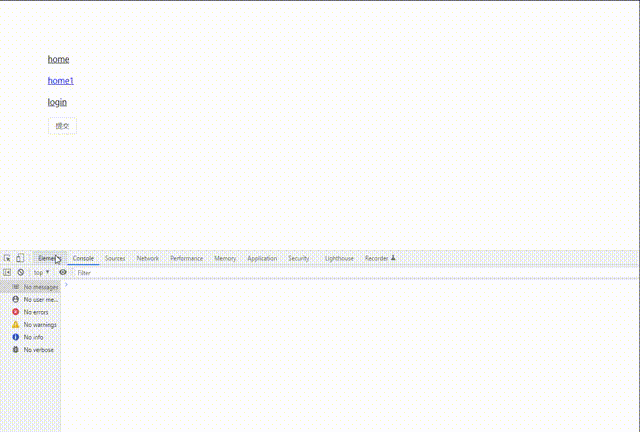
失败 😣 😣 😣
<template><div><el-button @click="submit">提交</el-button></div>
</template><script lang="ts">
import http from "@/utils/http";export default defineComponent({setup() {const submit = () => {http.post({url: 'api/bin1/astro.php?lon=113.2&lat=23.1&ac=0&unit=metric&output=json&tzshift=0',duplicateRequestValidation: true}).then(ts => {console.log(ts)}).catch(e => {console.error(e.message)console.log()})}return {submit}}
})
</script>
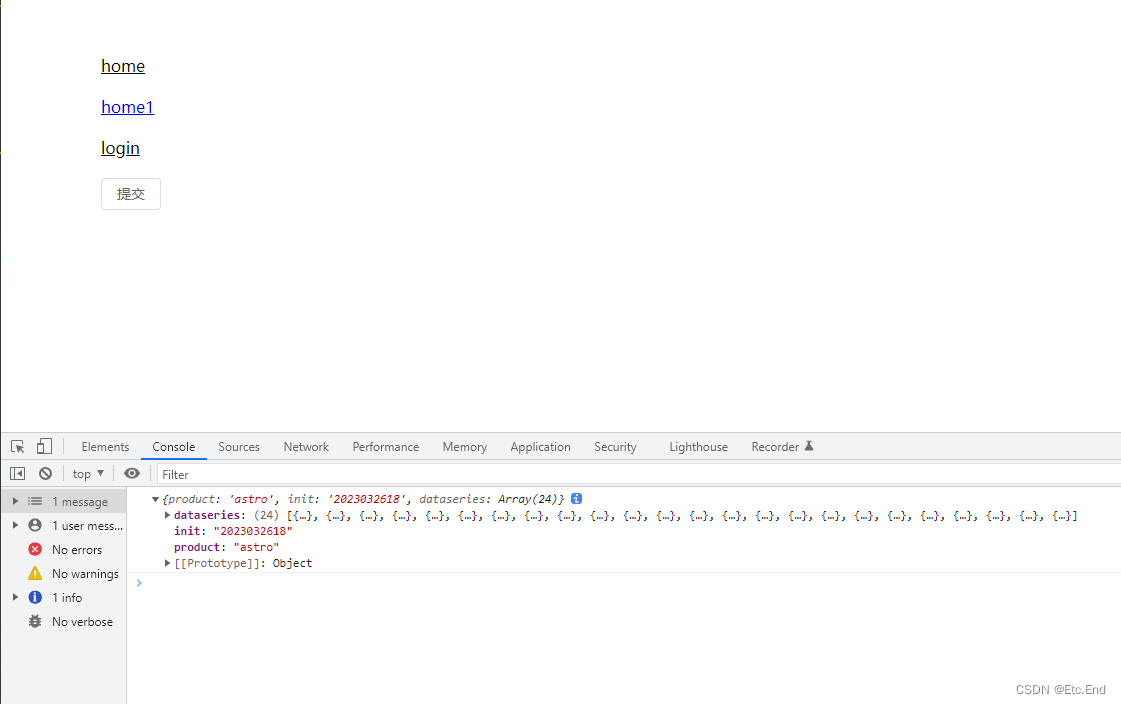
成功!就更改url为正确的路径 👍 👍 👍
<template><div><el-button @click="submit">提交</el-button></div>
</template><script lang="ts">
import http from "@/utils/http";export default defineComponent({setup() {const submit = () => {http.post({url: 'api/bin/astro.php?lon=113.2&lat=23.1&ac=0&unit=metric&output=json&tzshift=0',duplicateRequestValidation: true}).then(ts => {console.log(ts)}).catch(e => {console.error(e.message)console.log()})}return {submit}}
})
</script>
我是Etc.End。如果文章对你有所帮助,能否帮我点个免费的赞和收藏😍。同时欢迎各位小伙伴一起学习,一起成长WX:SH--TS
❤️ 💓 💗 💖 ✨ ⭐️ 🌟 💥 💥