做网站霸屏公司销售好做吗/申请域名的方法和流程
〇、介绍一下任务情况
部分参考了这篇文章的想法,如果看我的过程不理解可以参考一下这位作者。
labelme是一个用于对数据进行标记的软件,对图像进行标记后会得到json文件,包含相应标签的轮廓位置和标签名称等信息,可以用内置的相应函数进行提取,如使用这个作者的想法进行提取信息,那么会生成如下图所示的文件,其中imgs是原图像,labels是标记后的图像,最后是和原图进行比较生成标签图,都是调用内置的函数生成的。
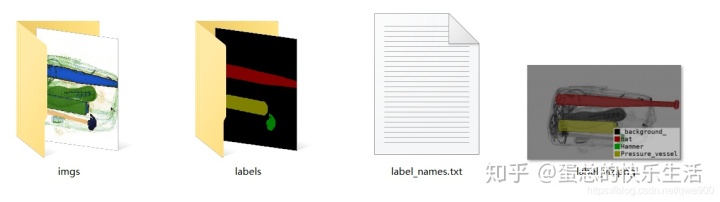
但实际上,我们不仅需要提取全部的label,我们还需要提取特定的label,即如上图三个label的情况,我们希望生成这样分别标注的结果。

一、 配置labelme环境
- 安装anaconda 建立一个环境名为labelme,版本为3.7的环境。
conda create -n labelme python=3.7- 切换到该环境
conda activate labelme- 安装pyqt5和labelme
pip install pyqt5
pip install labelme- 在该环境下输入labelme即可
(labelme) PS C:UsersXXX> labelme二、 用labelme标记数据得到json文件
这里简要说明一下,首先打开图片,点击Create Polygons创
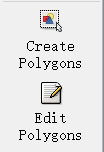
然后就可以对图片进行标记了,类似于PS的钢笔工具,相应的Ctrl可以退到上一个点的位置,方便实时修改,最后标记差不多了可以双击自动的连线也可以手动连线让区域闭环。
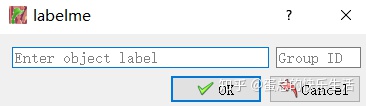
然后输入此时的label名称和group ID(需要的话可以写,不需要可以先空着),保存后就生成了对应的json文件。
三、提取json文件出相应标签的信息
这里采用的思路是这样的,我们通过json得到了这样的图片。
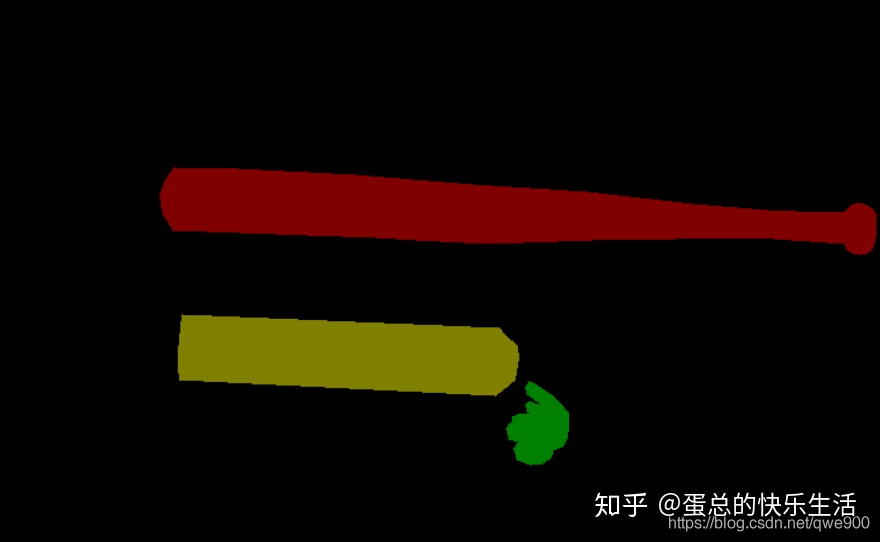
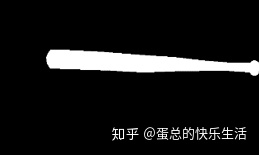
- 首先将其二值化,变成黑色和白色的部分,黑色部分是0,白色部分是1,
- 应用下面介绍的函数,可以提取指定的label边框,如此时是棒球棒
- 将这个棒球棒的黑白图和原来的背景图做位与运算,由于黑色是0,外面部分就没有了,而里面是1,与完还是本身,因此提取出来下面的图像
- 但别着急!我们不能直接注入进去,如直接将该图片和新背景叠加是不行的,效果很差,为什么在第四部分说明。

import json
import matplotlib.pyplot as plt
import cv2
import  sys
sys.path.append('D:anaconda3envslabelmeeLibsite-packages')
from labelme import utils
import numpy as np
from labelme.utils import imagejson_file='D:jsonjson100914729.json'
# 100914729.json
data = json.load(open(json_file))
img = utils.img_b64_to_arr(data['imageData'])label_name_to_value = {'_background_': 0}for shape in data['shapes']:label_name = shape['label']if label_name in label_name_to_value:label_value = label_name_to_value[label_name]else:label_value = len(label_name_to_value)label_name_to_value[label_name] = label_valuelbl, lbl_names = utils.shapes_to_label(img.shape, data['shapes'], label_name_to_value)mask=[]
class_id=[]
for i in range(1,len(label_name_to_value)):mask.append((lbl==i).astype(np.uint8)) class_id.append(i)
mask=np.asarray(mask,np.uint8)
mask=np.transpose(np.asarray(mask,np.uint8),[1,2,0])all_mask=0for i in range(0,len(class_id)):retval, im_at_fixed = cv2.threshold(mask[:,:,i], 0, 255, cv2.THRESH_BINARY) cv2.imwrite("D:jsonjsonmask_out_{}.png".format(i), im_at_fixed)all_mask = all_mask + im_at_fixedcv2.imwrite("D:jsonjsonmask_together.png", all_mask)label0 = cv2.imread('D:jsonjsonmask_out_0.png')label1 = cv2.imread('D:jsonjsonmask_out_1.png')label2 = cv2.imread('D:jsonjsonmask_out_2.png')label_together = cv2.imread('D:jsonjsonmask_together.png')oldbackground = cv2.imread(r'D:jsonlabels100914729imgs100914729.png')
oldbackground = cv2.cvtColor(oldbackground,cv2.COLOR_BGR2RGB)Pressure_vessel = cv2.bitwise_and(label0,oldbackground)
Hammer = cv2.bitwise_and(label1,oldbackground)
Bat = cv2.bitwise_and(label2,oldbackground)
Together = cv2.bitwise_and(label_together,oldbackground)newbackground = cv2.imread(r'D:jsonbackground1.jpg')  # 读取图片img2
newbackground = cv2.cvtColor(newbackground,cv2.COLOR_BGR2RGB)newbackground = cv2.resize(newbackground,(730,448))  # 为图片重新指定尺寸imgBat = Bat + newbackground
imgHammer = Hammer + newbackground
imgPressure_vessel = Pressure_vessel + newbackground
imgTogether = Together + newbackground这样我们就会生成mask_out_0/1/2三张图片,分别是三个标签的黑白图片,和一个mask_together,由于我看懂内置函数怎么用,用了个比较笨的方法,将三个标签的图像直接加起来,如下图所示。 注:all_mask = all_mask + im_at_fixed每次循环的im_at_fixed是一个label的二值化,那么给他们加一块就是所有的标记图片。
四、注入到新的背景
4.1 直接相加
imgBat = Bat + newbackground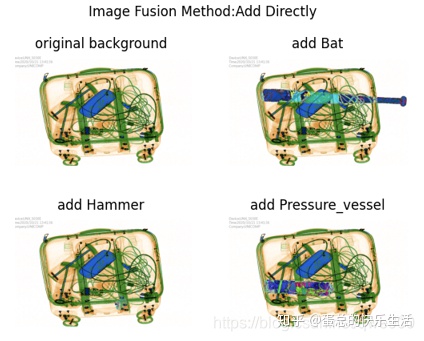
4.2 先移除背景图的该区域再相加
Inverse_label2 = 255 - label2
Remove_Bat = cv2.bitwise_and(Inverse_label0,newbackground)
imgnew1Bat = Bat + Remove_Bat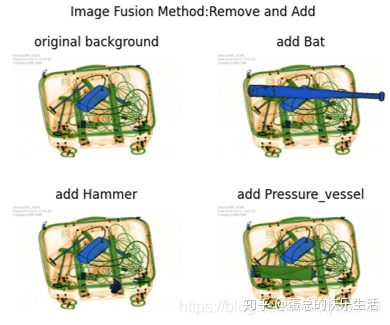
即先给注入的背景图的部位,涂黑了(根据抠出来的图片大小),然后再把图片放进去,这样就不会出现重叠了。
4.3 线性的叠加对应区域
主要思想是如下公式: OPENCV中有权重函数cv2.addWeighted,通过调节a,b,c三个参数,其公式为 X=a×object+b×background+c
a=[0.6,0.6,0.9];b=[0.4,0.4,0.4];c=[0.1,0.1,0.1];## img=a*object+b*background+c
imgnew2Bat= cv2.addWeighted(imgnew1Bat,a[0],newbackground,b[0],c[0])
imgnew2Hammer= cv2.addWeighted(imgnew1Hammer,a[1],newbackground,b[1],c[1])
imgnew2Pressure_vessel= cv2.addWeighted(imgnew1Pressure_vessel,a[2],newbackground,b[2],c[2])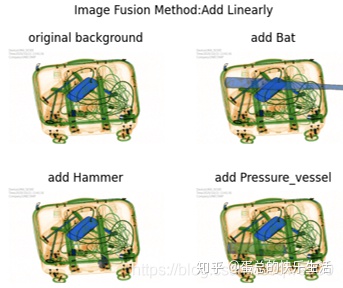
四、批量注入
由于比较懒,一堆图片注入要累死人...解放双手的想法来了! 相关程序自己慢慢想的,可能有的步骤写麻烦了,一些操作很不熟悉,有的可能写复杂了,但最后也能调试成功了。
- 填写当前的append,似乎要切换到该环境的对应目录下,不用也行
- datanames1是标记后文件生成的json文件的路径
- datanames2是要融入的背景所在的路径
- datanames3是原来图像的路径
- abc等权重参数可以自己调整
- 循环的次数根据可以调整一下,我写的20,根据读入列表的长度写更好
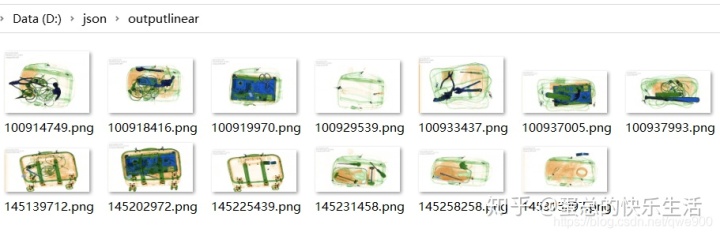
- 建立相应的文件夹,一共有三个,分别是
label的文件夹,output的文件夹和outputlinear的文件夹
4.1 代码
import json
import matplotlib.pyplot as plt
import cv2
import sys
import os
sys.path.append('D:anaconda3envslabelmeeLibsite-packages')
from labelme import utils
import numpy as np#########################################################################################################################################
# 1) enter the environment for label me , using os to set the above path, such as D:anaconda3envsXXXLibsite-packages              #                                 #
# 2) datanames1 is the json path,after you labeled the image, the labelme will generate a json file and you put them together in a path#
# 3) datanames2 is the newbackground path, you want to label the object and make the fusion of the label and this background.           #
# 4) datanames3 is the background path, the original image is the background, and you also put them together in a path                   #
# 5)Finally, this code will generate 2 kinds of output,the first kind of output is the normal add the object and the background,       #
#    the second kind of output is the linear addion of the object and the background, it has 3 parameters using the following formula:  #
#                                                                                                                                       #
#                            X=a*label+b*background+c                                                                                   #
#                                                                                                                                       #
#    you can generate this by the folling two methods:                                                                                  #
#    cv2.imwrite("D:jsonoutput{}.png".format(",".join(json_name[j])),imgnew1Together)                                              #
#    cv2.imwrite("D:jsonoutputoutputlinear{}.png".format(",".join(json_name[j])),imgnew1Together)                                #
#6) ATTENTION: When you set the path, you had better use '' instead of '' to avoid some problems,                                    #
#    such as the system can think of 'background' as 'x08ackground' ,so the system cannot find the right path.                        #
#7)  'num' is the number of the image, and can be used for initializing and the loop                                                     #
#########################################################################################################################################num = 20 ## 文件的个数
json_data = np.zeros([num,1]).astype(np.str) ## ['100937993.json']
background_data = np.zeros([num,1]).astype(np.str) ## ['10.jpg'] 新的注入的背景
oldbackground_data = np.zeros([num,1]).astype(np.str) ## ['100914729.jpg']
json_name = np.zeros([num,1]).astype(np.str)datanames1 = os.listdir('D:jsonjson')
datanames2 = os.listdir('D:jsonbackground')
databanes3 = os.listdir('D:jsonoldbackground')
i = 0
j = 0
m = 0
for dataname in datanames1:if os.path.splitext(dataname)[1] == '.json':#目录下包含.json的文件json_data[i] = datanamejson_name[i], suffix = os.path.splitext(",".join(json_data[i]))i+=1# print(json_data)for dataname in datanames2:if os.path.splitext(dataname)[1] == '.jpg':#目录下包含.jpg的文件background_data[j] = datanamej+=1
# print(background_data)for dataname in databanes3:if os.path.splitext(dataname)[1] == '.jpg':#目录下包含.jpg的文件oldbackground_data[m]=datanamem+=1
# print(oldbackground_data)for j in range(1,num): ##for循环开始先默认值为1,这里20可以换成文件的数目json_file='D:jsonjson{}'.format(",".join(json_data[j]))print(json_file)# 100914729.jsondata = json.load(open(json_file))img = utils.img_b64_to_arr(data['imageData'])label_name_to_value = {'_background_': 0}for shape in data['shapes']:label_name = shape['label']if label_name in label_name_to_value:label_value = label_name_to_value[label_name]else:label_value = len(label_name_to_value)label_name_to_value[label_name] = label_valuelbl, lbl_names = utils.shapes_to_label(img.shape, data['shapes'], label_name_to_value)mask = []class_id = []for i in range(1,len(label_name_to_value)):mask.append((lbl==i).astype(np.uint8)) class_id.append(i) mask = np.asarray(mask,np.uint8)mask = np.transpose(np.asarray(mask,np.uint8),[1,2,0])all_mask = 0for i in range(0,len(class_id)):retval, im_at_fixed = cv2.threshold(mask[:,:,i], 0, 255, cv2.THRESH_BINARY) all_mask = all_mask + im_at_fixed# plt.imshow(all_mask)cv2.imwrite("D:jsonlabel{}.png".format(",".join(json_name[j])), all_mask)label_together = cv2.imread('D:jsonlabel{}.png'.format(",".join(json_name[j])))oldbackground = cv2.imread('D:jsonoldbackground{}'.format(",".join(oldbackground_data[j])))oldbackground = cv2.cvtColor(oldbackground,cv2.COLOR_BGR2RGB)Together = cv2.bitwise_and(label_together,oldbackground) #两个图片一个是彩色,另一个是彩色,不能做位与运算,需要将第一个图灰度话后再操作newbackground = cv2.imread('D:jsonbackground{}'.format(",".join(background_data[j]))) # 读取图片img2newbackground = cv2.cvtColor(newbackground,cv2.COLOR_BGR2RGB)[x,y,z] = np.shape(Together)newbackground = cv2.resize(newbackground,(y,x)) # 为图片重新指定尺寸imgTogether = Together + newbackgroundInverse_label_together = 255 - label_togetherRemove_label_together = cv2.bitwise_and(Inverse_label_together,newbackground)imgnew1Together = Together + Remove_label_togetherimgnew1Together = cv2.cvtColor(imgnew1Together,cv2.COLOR_BGR2RGB)cv2.imwrite("D:jsonoutput{}.png".format(",".join(json_name[j])),imgnew1Together)a=[0.4,0.4,0.4,0.4]b=[0.6,0.6,0.6,0.6]c=[0,0,0,0.1]# img=a*object+b*background+cimgnew2Together = cv2.addWeighted(imgnew1Together,a[3],newbackground,b[3],c[3])imgnew2Together = cv2.cvtColor(imgnew2Together,cv2.COLOR_BGR2RGB)cv2.imwrite("D:jsonoutputlinear{}.png".format(",".join(json_name[j])),imgnew1Together)稍微解释一下这几行代码,默认的label里通过标注,背景是0,也就是background,那么通过下面这个遍历,这个label_name_to_value会遍历所有的label并且给它对应的数字,比如是这样的:
label_name_to_value = {'_background_': 0,'pig': 1, 'dog: 2'}
label_name_to_value = {'_background_': 0}for shape in data['shapes']:label_name = shape['label']if label_name in label_name_to_value:label_value = label_name_to_value[label_name]else:label_value = len(label_name_to_value)label_name_to_value[label_name] = label_value遍历的话我是想,把遍历的文件名存起来,然后用format给他们依次更新。
imgnew2Together = cv2.cvtColor(imgnew2Together,cv2.COLOR_BGR2RGB)如果写入的话,图片没有问题,但如果此时plt后如果不适用这句话将RGB转换为BGR,那么颜色会不正常。
4.2 一些路径
- json是可以用visio打开的,可以查看详细信息 这个文件夹和下面的输出文件夹都需要预先建立一个空文件夹。

而且输出后的文件名和原来一致,这样方便管理数据。
4.3 总结
有个细节注意一下, 由于原来的图像和背景图不一定大小一样,这里可以调整一下,强制让背景图改成原图的大小,而且这里resize填的是(y,x)需要交换一下位置。 比如你原图像是448*610的,那么就要写(610,448)
[x,y,z]=np.shape(Together)newbackground = cv2.resize(newbackground,(y,448)) # 为图片重新指定尺寸此外,循环里的20我直接设的,因为有20张图,对应的或者用读取文件然后取len也能得到循环的次数,最好文件夹里不要有其他东西(虽然写了一个判断来取,大多数情况都没问题)。
还有个没有解决的问题,就是读取图片后乱序了,我还没太看懂如何调整读取后按名称排序,这是可以改进的地方。
顺便说一下几个文件的用法吧,比如
oldbackground = cv2.imread('D:jsonoldbackground{}'.format(",".join(oldbackground_data[j])))format就是替换{}的位置,这个format应该转换一下形式比如:

五、一些BUG
老生常谈的bug了,‘’和‘’和‘/’,起始在前面加个r就能解决...哎。 我以为不会出错,结果我就发现background就写不进去,我以为电脑坏了。 然后我检查了一下写入的字符串如下: 'background' 被系统当作 'x08ackground' 怪不得找不到该路径。
旧版labelme那个labelme_shapes_to_label会有警告,看了shapes_to_label的方法后对应修改下即可,utils.shapes_to_label相应的用法(输入参数变成了三个)都在labelme文件夹里的shape.py等有说明。