佛山正规网站建设报价/重庆森林讲了什么故事
如果我的博客能够帮到大家能够点个赞,关注一下,以后还会更新更过JavaWeb的高级技术,大家的支持就是我继续更新的动力。谢谢。
我前边的博客,写了有关于Spring和mybaitis、jpa、springData 的整合等,今天呢,使用SpringBoot和Mybatis 整合,支持2种方式的配置
- mybatis 注解版
- xml配置方式
接下来,我就将这俩种方式介绍给大家,仅供参考,如有错误,请大家多多指教。
一、搭建工程
步骤:
- 创建SpringBoot的工程
- 导入依赖
- 编写配置文件
- 编写application.yml文件
- 编写实体和Mapper接口
- 编写Mybatis配置文件
- 测试
1.创建SpringBoot工程工程,大家都会,略
2.导入依赖:pom.xml
<?xml version="1.0" encoding="UTF-8"?>
<project xmlns="http://maven.apache.org/POM/4.0.0" xmlns:xsi="http://www.w3.org/2001/XMLSchema-instance"xsi:schemaLocation="http://maven.apache.org/POM/4.0.0 http://maven.apache.org/xsd/maven-4.0.0.xsd"><modelVersion>4.0.0</modelVersion><parent><groupId>org.springframework.boot</groupId><artifactId>spring-boot-starter-parent</artifactId><version>2.1.1.RELEASE</version><relativePath/> <!-- lookup parent from repository --></parent><groupId>com.nyist</groupId><artifactId>spring-boot-06-mybatis</artifactId><version>0.0.1-SNAPSHOT</version><name>spring-boot-06-mybatis</name><description>Demo project for Spring Boot</description><properties><java.version>1.8</java.version></properties><dependencies><!--引入jdbc依赖--><dependency><groupId>org.springframework.boot</groupId><artifactId>spring-boot-starter-jdbc</artifactId></dependency><dependency><groupId>org.springframework.boot</groupId><artifactId>spring-boot-starter-web</artifactId></dependency><dependency><groupId>org.mybatis.spring.boot</groupId><artifactId>mybatis-spring-boot-starter</artifactId><version>1.3.2</version></dependency><!--引入mysql驱动包依赖--><dependency><groupId>mysql</groupId><artifactId>mysql-connector-java</artifactId><scope>runtime</scope></dependency><dependency><groupId>org.springframework.boot</groupId><artifactId>spring-boot-starter-test</artifactId><scope>test</scope></dependency><!--引入druid 数据源--><dependency><groupId>com.alibaba</groupId><artifactId>druid</artifactId><version>1.1.12</version></dependency></dependencies><build><plugins><plugin><groupId>org.springframework.boot</groupId><artifactId>spring-boot-maven-plugin</artifactId></plugin></plugins></build>
</project>
3.编写配置文件
MyBatisConfig.java
package com.nyist.springboot06mybatis.config;import org.apache.ibatis.session.Configuration;
import org.mybatis.spring.boot.autoconfigure.ConfigurationCustomizer;
import org.springframework.context.annotation.Bean;@org.springframework.context.annotation.Configuration
public class MyBatisConfig {@Beanpublic ConfigurationCustomizer configurationCustomizer(){return new ConfigurationCustomizer() {@Overridepublic void customize(Configuration configuration) {//开启 驼峰命名法  规则configuration.setMapUnderscoreToCamelCase(true);}};}
}
DruidConfig.java
package com.nyist.springboot06mybatis.config;import com.alibaba.druid.pool.DruidDataSource;
import com.alibaba.druid.support.http.StatViewServlet;
import com.alibaba.druid.support.http.WebStatFilter;
import org.springframework.boot.context.properties.ConfigurationProperties;
import org.springframework.boot.web.servlet.FilterRegistrationBean;
import org.springframework.boot.web.servlet.ServletRegistrationBean;
import org.springframework.context.annotation.Bean;
import org.springframework.context.annotation.Configuration;import javax.sql.DataSource;
import java.util.Arrays;
import java.util.HashMap;
import java.util.Map;
@Configuration
public class DruidConfig {//@ConfigurationProperties 是将 阿里巴巴druid 的数据源 配置的属性和 属性文件绑定在一起@ConfigurationProperties(prefix = "spring.datasource")@Beanpublic DataSource druid(){return new DruidDataSource();}//配置 Druid 的监控//1.配置一个管理后台的Servlet@Beanpublic ServletRegistrationBean statViewServlet(){ServletRegistrationBean bean = new ServletRegistrationBean(new StatViewServlet(),"/druid/*");Map<String,String> map = new HashMap<>();map.put("loginUsername","admin");map.put("loginPassword","123456");map.put("allow","localhost");       //不写 或者为null 默认允许所有map.put("deny","192.168.1.122");bean.setInitParameters(map);return  bean;}//2.配置一个监控的Filter@Beanpublic FilterRegistrationBean webStatFilter(){FilterRegistrationBean initParam = new FilterRegistrationBean();initParam.setFilter(new WebStatFilter());Map<String,String> map = new HashMap<>();//初始化不拦截请求的参数map.put("exclusions","*.css,*.png,*.jpg,*.js,/druid/*");initParam.setInitParameters(map);//监控所有的请求initParam.setUrlPatterns(Arrays.asList("/*"));return initParam;}
}
4.编写application.yml
spring:datasource:username: rootpassword: rooturl: jdbc:mysql://localhost:3306/springdata_jdbc?useUnicode=true&characterEncoding=utf-8&serverTimezone=GMT%2B8type: com.alibaba.druid.pool.DruidDataSource#druid 数据源配置initialSize: 5minIdle: 5maxActive: 20maxWait: 60000timeBetweenEvictionRunsMillis: 60000minEvictableIdleTimeMillis: 300000validationQuery: SELECT 1 FROM DUALtestWhileIdle: truetestOnBorrow: falsetestOnReturn: falsepoolPreparedStatements: true#   配置监控统计拦截的filters,去掉后监控界面sql无法统计,'wall'用于防火墙filters: stat,wall,logback-springmaxPoolPreparedStatementPerConnectionSize: 20useGlobalDataSourceStat: trueconnectionProperties: druid.stat.mergeSql=true;druid.stat.slowSqlMillis=500#运行数据源建表语句
#    schema:
#      - classpath:sql/department.sql
#      - classpath:sql/employee.sql
mybatis:#指定  mybatis 全局配置文件config-location: classpath:mybatis/mybatis-config.xml#指定 mybatis 的mapper 文件所在位置mapper-locations: classpath:mybatis/mapper/*.xml
5.编写实体和Mapper接口
DepartmentMapper.xml
package com.nyist.springboot06mybatis.Mapper;import com.nyist.springboot06mybatis.Entity.Department;
import org.apache.ibatis.annotations.*;//注解方式 代理  配置文件xml
//@Mapper表明这是一个数据库的Mapper
public interface DepartmentMapper {@Select("select * from department where id = #{id}")public Department getDeptById(Integer id);@Delete("delete from department where id = #{id}")public Integer deleteDeptById(Integer id);//@Option用来返回 生成的主键,指定主键的生成方式 是否为自增 true 那个主键 id@Options(useGeneratedKeys = true,keyProperty = "id")@Insert("insert into department(departmentName) values(#{departmentName})")public Integer insertDept(Department department);@Update("update department set departmentName = #{departmentName} where id = #{id}")public Integer updateDept(Department department);
}
EmployeeMapper.java
package com.nyist.springboot06mybatis.Mapper;import com.nyist.springboot06mybatis.Entity.Employee;public interface EmployeeMapper {public Employee getEmpById(Integer id);void insertEmp(Employee employee);
}
6.编写MyBatis配置文件
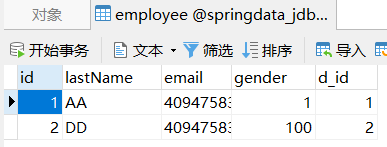
在resource 下创建一个mybatis 的包,在该包下创建mapper包,在Mappre包下放MyBatis的mapper配置文件,在mybatis下放mybatis-config.xml主配置文件。Employee使用的xml配置文件测试,所以只有Employee实体类有Mapper配置文件。
EmployeeMapper.xml
<?xml version="1.0" encoding="UTF-8" ?>
<!DOCTYPE mapperPUBLIC "-//mybatis.org//DTD Mapper 3.0//EN""http://mybatis.org/dtd/mybatis-3-mapper.dtd">
<mapper namespace="com.nyist.springboot06mybatis.Mapper.EmployeeMapper"><select id="getEmpById" parameterType="java.lang.Integer" resultType="com.nyist.springboot06mybatis.Entity.Employee">select * from employee where id = #{id}</select><insert id="insertEmp" parameterType="com.nyist.springboot06mybatis.Entity.Employee">insert  into employee(lastName,gender,email,d_id) values(#{lastName},#{gender},#{email},#{dId})</insert>
</mapper>
mybatis-config.xml
<?xml version="1.0" encoding="UTF-8" ?>
<!DOCTYPE configurationPUBLIC "-//mybatis.org//DTD Config 3.0//EN""http://mybatis.org/dtd/mybatis-3-config.dtd">
<configuration><!--mybatis 全局配置文件--><settings><!--开启 驼峰命名--><setting name="mapUnderscoreToCamelCase" value="true"/></settings>
</configuration>
8.测试
主程序:
package com.nyist.springboot06mybatis;import org.mybatis.spring.annotation.MapperScan;
import org.springframework.boot.SpringApplication;
import org.springframework.boot.autoconfigure.SpringBootApplication;
//如果在以后工程中有很多个mapper 在每个mapper上添加一个@Mapper 这种方式很麻烦,我们只需要使用@MapperScan(value="主包名")
//开启Mapper 扫面  扫面到的文件默认加上@Mapper 注解
//使用@MapperScan 开启批量扫描
@MapperScan(value = "com.nyist.springboot06mybatis.Mapper")
@SpringBootApplication
public class SpringBoot06MybatisApplication {public static void main(String[] args) {SpringApplication.run(SpringBoot06MybatisApplication.class, args);}}
测试有俩种测试,以中测试注解版mybatis,另一种测试xml版mybatis。DepartmentMapper为注解版,Employee为xml配置方式。
测试mybatis注解版本
编写DeptController.java
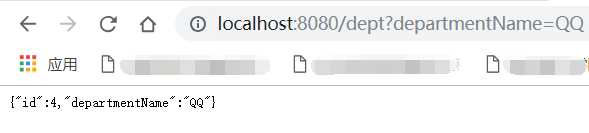
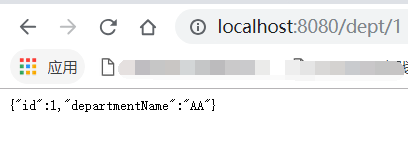
package com.nyist.springboot06mybatis.controller;import com.nyist.springboot06mybatis.Entity.Department;
import com.nyist.springboot06mybatis.Mapper.DepartmentMapper;
import org.springframework.beans.factory.annotation.Autowired;
import org.springframework.web.bind.annotation.GetMapping;
import org.springframework.web.bind.annotation.PathVariable;
import org.springframework.web.bind.annotation.RestController;@RestController
public class DeptController {@Autowiredprivate DepartmentMapper departmentMapper;@GetMapping("/dept/{id}")public Department getDepartment(@PathVariable("id") Integer id){return departmentMapper.getDeptById(id);}@GetMapping("/dept")public Department insertDept(Department department){departmentMapper.insertDept(department);return department;}
}
测试添加:

测试mybatis xml 版本
EmployeeController.java
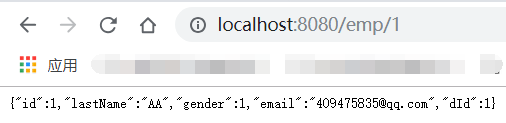
package com.nyist.springboot06mybatis.controller;import com.nyist.springboot06mybatis.Entity.Employee;
import com.nyist.springboot06mybatis.Mapper.EmployeeMapper;
import org.springframework.beans.factory.annotation.Autowired;
import org.springframework.web.bind.annotation.GetMapping;
import org.springframework.web.bind.annotation.PathVariable;
import org.springframework.web.bind.annotation.RestController;@RestController
public class EmployeeController {@Autowiredprivate EmployeeMapper employeeMapper;@GetMapping("/emp/{id}")public Employee getEmpById(@PathVariable("id") Integer id){return employeeMapper.getEmpById(id);}@GetMapping("/emp")public Employee insertEmp(Employee employee){System.out.println("***********"+employee);employeeMapper.insertEmp(employee);return employee;}
}
测试结果: