1.ASIHttpRequest网络请求库
2.MBProgressHUD指示层库
3.Toast+UIView提示库
4.SDWebImage图片缓存库
5.MGSwipeTableCell单元格侧滑库
6.MJRefresh下拉刷新(上拉加载)
7.UIResponder+Router进行事件分发
8.FMDB进行数据库操作
9.CMPopTipView泡泡风格的提示界面
10.CustomIOSAlertView自定义AlertView
11.Masonry自动布局
12.JDStatusBarNotification自定义状态栏通知
13.WMPageController类似网易频道导航控制器
14.MJExtension数据模型转换库
15.AFNetworking网络请求库
16.IQKeyboardManager输入框键盘控制插件
ASIHttp库下载地址:https://github.com/pokeb/asi-http-request
ASIHTTP类库依赖于以下5个框架或库:
CFNetwork, SystemConfiguration, MobileCoreServices, CoreGraphics 和 libz1.2.5
-fno-objc-arc 让非ARC类在ARC工程中适配运行
//TKOpenBankService.h文件
//
//  TKOpenBankService.h
//  TKBankOriginalPlugin
//
//  Created by Vie on 15/9/18.
//  Copyright (c) 2015年 Vie. All rights reserved.
//

#import <Foundation/Foundation.h>//请求结果回调
typedef void(^CallBackASIRepose)(NSMutableDictionary *reposeParam);/***  @Author Vie, 2015-09-18 16:44:20*  描述:网络请求插件服务类*  @since 1.0*/
@interface TKOpenBankService : NSObject/***  @Author Vie, 2015-09-18 17:03:42*  上传单向视频*  @param url               url*  @param reqParam          上传参数*  @param callBackASIRepose 回调函数**  @since 1.0*/
-(void)upLoadOneVideoWithURL:(NSString *)url param:(NSMutableDictionary*)reqParam callBackFunc:(CallBackASIRepose)callBackASIRepose;/***  @Author Vie, 2015-09-22 13:57:25**  @param url               url*  @param reqParam          请求参数*  @param callBackImgRepose 回到参数**  @since 1.0*/
-(void)upLoadPhotoWithURL:(NSString *)url param:(NSMutableDictionary *)reqParam callBackImgFunc:(CallBackASIRepose)callBackImgRepose;/***  @Author Vie, 2015-09-22 13:54:08*  底层请求方法*  @param url               请求url*  @param reqParam          请求参数*  @param callBackASIRepose 回调函数**  @since 1.0*/
-(void)asiRequestWithURL:(NSURL *)url param:(NSMutableDictionary *)reqParam callBackFunc:(CallBackASIRepose)callBackASIRepose;@end
//TKOpenBankService.m文件
//
//  TKOpenBankService.m
//  TKBankOriginalPlugin
//
//  Created by Vie on 15/9/18.
//  Copyright (c) 2015年 Vie. All rights reserved.
//

#import "TKOpenBankService.h"
#import "ASIFormDataRequest.h"@implementation TKOpenBankService
//上传文件
-(void)upLoadOneVideoWithURL:(NSString *)url param:(NSMutableDictionary*)reqParam callBackFunc:(CallBackASIRepose)callBackASIRepose{NSURL *postURL=[NSURL URLWithString:url];[self asiRequestWithURL:postURL param:reqParam callBackFunc:callBackASIRepose];
}//上传照片
-(void)upLoadPhotoWithURL:(NSString *)url param:(NSMutableDictionary *)reqParam callBackImgFunc:(CallBackASIRepose)callBackImgRepose{NSURL *postURL=[NSURL URLWithString:url];[self asiRequestWithURL:postURL param:reqParam callBackFunc:callBackImgRepose];
}//asi请求处理
-(void)asiRequestWithURL:(NSURL *)url param:(NSMutableDictionary *)reqParam callBackFunc:(CallBackASIRepose)callBackASIRepose{ASIFormDataRequest *request=[ASIFormDataRequest requestWithURL:url];for (id key in reqParam) {NSString *str=key;if ([str hasSuffix:@"@@F"]) {str=[str stringByReplacingOccurrencesOfString:@"@@F" withString:@""];[request setData:[reqParam objectForKey:key] forKey:str];}else{[request setPostValue:[reqParam objectForKey:key] forKey:key];NSLog(@"key:%@",key);}}//发送异步请求
    [request startAsynchronous];//用于存储请求结果NSMutableDictionary *repParam=[[NSMutableDictionary alloc] init];//请求失败回调[request setFailedBlock:^{[repParam setObject:@"-1" forKey:@"error_no"];[repParam setObject:@"请求异常" forKey:@"error_info"];callBackASIRepose(repParam);}];//请求完成回调[request setCompletionBlock:^{NSLog(@"返回的数据--%@",request.responseString);//请求返回字符串转换为NSDataNSData *curData=[request.responseStringdataUsingEncoding:NSUTF8StringEncoding];//解析成JSONNSError *error;NSDictionary *dic = [NSJSONSerialization JSONObjectWithData:curData options:kNilOptions error:&error];NSString *tempLog = [NSString stringWithUTF8String:curData.bytes];NSLog(@"return :\n%@",tempLog);int errNo;NSString *errMsg=nil;if(dic){@try {errNo=[[dic objectForKey:@"error_no"] intValue];[repParam setObject:[dic objectForKey:@"error_no"] forKey:@"error_no"];if (errNo!=0) {errMsg=[dic objectForKey:@"error_info"];[repParam setObject:errMsg forKey:@"error_info"];}else{NSArray *arr=(NSArray *)[dic objectForKey:@"results"];if (arr.count>0) {NSDictionary *result=[arr  objectAtIndex:0];[repParam setObject:result forKey:@"result"];}}}@catch (NSException *exception) {NSLog(@"%@ error:[%@]",@"501506",exception);}}callBackASIRepose(repParam);}];
}
@end
第三方库之MBProgressHUD下载地址:https://github.com/jdg/MBProgressHUD
//例
_mbHud = [[MBProgressHUD alloc] initWithView:self.view];[self.view addSubview:_mbHud];_mbHud.labelText = @"Loading";//是否遮罩_mbHud.dimBackground = YES;
//页面加载方法
-(void)webViewDidStartLoad:(UIWebView *)webView{//显示指示层
[_mbHud show:YES];
}//页面加载完成方法
-(void)webViewDidFinishLoad:(UIWebView *)webView{//隐藏指示层
    [_mbHud hide:YES];_mbHud = nil;_mbHud = nil;
}
//其他示例
- (IBAction)showTextDialog:(id)sender {  //初始化进度框,置于当前的View当中  HUD = [[MBProgressHUD alloc] initWithView:self.view];  [self.view addSubview:HUD];  //如果设置此属性则当前的view置于后台  HUD.dimBackground = YES;  //设置对话框文字  HUD.labelText = @"请稍等";  //显示对话框  [HUD showAnimated:YES whileExecutingBlock:^{  //对话框显示时需要执行的操作  sleep(3);  } completionBlock:^{  //操作执行完后取消对话框
        [HUD removeFromSuperview];  [HUD release];  HUD = nil;  }];
}

- (IBAction)showProgressDialog:(id)sender {  HUD = [[MBProgressHUD alloc] initWithView:self.view];  [self.view addSubview:HUD];  HUD.labelText = @"正在加载";  //设置模式为进度框形的  HUD.mode = MBProgressHUDModeDeterminate;  [HUD showAnimated:YES whileExecutingBlock:^{  float progress = 0.0f;  while (progress < 1.0f) {  progress += 0.01f;  HUD.progress = progress;  usleep(50000);  }  } completionBlock:^{  [HUD removeFromSuperview];  [HUD release];  HUD = nil;  }];
}

- (IBAction)showProgressDialog2:(id)sender {  HUD = [[MBProgressHUD alloc] initWithView:self.view];  [self.view addSubview:HUD];  HUD.labelText = @"正在加载";  //设置为圆圈进度条HUD.mode = MBProgressHUDModeAnnularDeterminate;  [HUD showAnimated:YES whileExecutingBlock:^{  float progress = 0.0f;  while (progress < 1.0f) {  progress += 0.01f;  HUD.progress = progress;  usleep(50000);  }  } completionBlock:^{  [HUD removeFromSuperview];  [HUD release];  HUD = nil;  }];
}

- (IBAction)showCustomDialog:(id)sender {  HUD = [[MBProgressHUD alloc] initWithView:self.view];  [self.view addSubview:HUD];  HUD.labelText = @"操作成功";  HUD.mode = MBProgressHUDModeCustomView;  HUD.customView = [[[UIImageView alloc] initWithImage:[UIImage imageNamed:@"Checkmark"]] autorelease];  [HUD showAnimated:YES whileExecutingBlock:^{  sleep(2);  } completionBlock:^{  [HUD removeFromSuperview];  [HUD release];  HUD = nil;  }];
}

下载地址:https://github.com/scalessec/Toast
//防止提示被键盘遮挡,直接展示到最高,屏幕底部
UIWindow *win=[[UIApplication sharedApplication].windows objectAtIndex:([UIApplication sharedApplication].windows.count-1)];
[win makeToast:@"发送消息内容超长,请分条发送。" duration:2 position:@"middle"];
github托管地址https://github.com/rs/SDWebImage
#import "SDWebImage.h"@property(nonatomic,strong) UIImageView *imgView;_imgView=[[UIImageView alloc] initWithFrame:self.view.frame];//设置图片缓存下载[self.imgView sd_setImageWithURL:[NSURL URLWithString:@"http://imgsrc.baidu.com/forum/w%3D580/sign=64e98b6bc511728b302d8c2af8fec3b3/4300f03b5bb5c9eaa0270719dd39b60038f3b394.jpg"]];//用block 可以在图片加载完成之后做些事情[self.imgView sd_setImageWithURL:[NSURL URLWithString:@"http://imgsrc.baidu.com/forum/w%3D580/sign=64e98b6bc511728b302d8c2af8fec3b3/4300f03b5bb5c9eaa0270719dd39b60038f3b394.jpg"] completed:^(UIImage *image, NSError *error, SDImageCacheType cacheType, NSURL *imageURL) { NSLog(@"这里可以在图片加载完成之后做些事情");}];//给一张默认图片,先使用默认图片,当图片加载完成后再替换[self.imgView sd_setImageWithURL:[NSURL URLWithString:@"http://imgsrc.baidu.com/forum/w%3D580/sign=64e98b6bc511728b302d8c2af8fec3b3/4300f03b5bb5c9eaa0270719dd39b60038f3b394.jpg"] placeholderImage:[UIImage imageNamed:@"1.jpg"]];//使用默认图片,而且用block 在完成后做一些事情[self.imgView sd_setImageWithURL:[NSURL URLWithString:@"http://imgsrc.baidu.com/forum/w%3D580/sign=64e98b6bc511728b302d8c2af8fec3b3/4300f03b5bb5c9eaa0270719dd39b60038f3b394.jpg"] placeholderImage:[UIImage imageNamed:@"1.jpg"] completed:^(UIImage *image, NSError *error, SDImageCacheType cacheType, NSURL *imageURL) {NSLog(@"图片加载完成后做的事情");}];//options 选择方式[self.imgView sd_setImageWithURL:[NSURL URLWithString:@"http://imgsrc.baidu.com/forum/w%3D580/sign=64e98b6bc511728b302d8c2af8fec3b3/4300f03b5bb5c9eaa0270719dd39b60038f3b394.jpg"] placeholderImage:[UIImage imageNamed:@"1.jpg"] options:SDWebImageProgressiveDownload];[self.view addSubview:_imgView];
options所有选项:
//失败后重试
SDWebImageRetryFailed = 1 << 0,
//UI交互期间开始下载,导致延迟下载比如UIScrollView减速。
SDWebImageLowPriority = 1 << 1,
//只进行内存缓存
SDWebImageCacheMemoryOnly = 1 << 2,
//这个标志可以渐进式下载,显示的图像是逐步在下载
SDWebImageProgressiveDownload = 1 << 3,
//刷新缓存
SDWebImageRefreshCached = 1 << 4,
//后台下载
SDWebImageContinueInBackground = 1 << 5,
//NSMutableURLRequest.HTTPShouldHandleCookies = YES;
SDWebImageHandleCookies = 1 << 6,
//允许使用无效的SSL证书
SDWebImageAllowInvalidSSLCertificates = 1 << 7,
//优先下载
SDWebImageHighPriority = 1 << 8,
//延迟占位符
SDWebImageDelayPlaceholder = 1 << 9,
//改变动画形象
SDWebImageTransformAnimatedImage = 1 << 10,
//覆盖方法,指哪打哪,这个方法是下载imagePath2的时候响应SDWebImageManager *manager = [SDWebImageManager sharedManager];[manager downloadImageWithURL:imagePath2 options:SDWebImageRetryFailed progress:^(NSInteger receivedSize, NSInteger expectedSize) {NSLog(@"显示当前进度");} completed:^(UIImage *image, NSError *error, SDImageCacheType cacheType, BOOL finished, NSURL *imageURL) {NSLog(@"下载完成");}];
// SDWebImage改写后支持gif动态图
//读取图片
NSString *retinaPath = [[NSBundle mainBundle] pathForResource:@"ker" ofType:@"gif"];
//图片转换为data
NSData *data = [NSData dataWithContentsOfFile:retinaPath];
_imgView.image=[UIImage sd_animatedGIFWithData:data];
[self.view addSubview:_imgView];
//修改UIImage+GIF.m方法支持gif播放
//修改下面方法
/**播放静态图或gif动态图@param data 图片数据源@return 返回图片*/
+ (UIImage *)sd_animatedGIFWithData:(NSData *)data {if (!data) {return nil;}CGImageSourceRef source = CGImageSourceCreateWithData((__bridge CFDataRef)data, NULL);size_t count = CGImageSourceGetCount(source);UIImage *animatedImage;if (count <= 1) {animatedImage = [[UIImage alloc] initWithData:data];} else {NSMutableArray *images = [NSMutableArray array];NSTimeInterval duration = 0.0f;for (size_t i = 0; i < count; i++) {CGImageRef image = CGImageSourceCreateImageAtIndex(source, i, NULL);duration += [self frameDurationAtIndex:i source:source];[images addObject:[UIImage imageWithCGImage:image scale:[UIScreen mainScreen].scale orientation:UIImageOrientationUp]];CGImageRelease(image);}if (!duration) {duration = (1.0f / 10.0f) * count;}animatedImage = [UIImage animatedImageWithImages:images duration:duration];}CFRelease(source);return animatedImage;
}
//增加下面方法
/**计算图片显示时间@param index  图片位置@param source 当前图片@return 返回播放时间*/
+ (float)frameDurationAtIndex:(NSUInteger)index source:(CGImageSourceRef)source {float frameDuration = 0.1f;CFDictionaryRef cfFrameProperties = CGImageSourceCopyPropertiesAtIndex(source, index, nil);NSDictionary *frameProperties = (__bridge NSDictionary *)cfFrameProperties;NSDictionary *gifProperties = frameProperties[(NSString *)kCGImagePropertyGIFDictionary];NSNumber *delayTimeUnclampedProp = gifProperties[(NSString *)kCGImagePropertyGIFUnclampedDelayTime];if (delayTimeUnclampedProp) {frameDuration = [delayTimeUnclampedProp floatValue];}else {NSNumber *delayTimeProp = gifProperties[(NSString *)kCGImagePropertyGIFDelayTime];if (delayTimeProp) {frameDuration = [delayTimeProp floatValue];}}if (frameDuration < 0.011f) {frameDuration = 0.100f;}CFRelease(cfFrameProperties);return frameDuration;
}
github下载地址:https://github.com/MortimerGoro/MGSwipeTableCell
//TestMGSwipeTableCell.h文件定义一个单元格继承自MGSwipeTableCell
//
//  TestMGSwipeTableCell.h
//  UseMGSwipeTableCell
//
//  Created by Vie on 2016/10/21.
//  Copyright © 2016年 Vie. All rights reserved.
//

#import "MGSwipeTableCell.h"@interface TestMGSwipeTableCell : MGSwipeTableCell
@property(nonatomic,strong)  UILabel *titleLable;
-(instancetype)initWithStyle:(UITableViewCellStyle)style reuseIdentifier:(NSString *)reuseIdentifier;
@end
//TestMGSwipeTableCell.m文件
//
//  TestMGSwipeTableCell.m
//  UseMGSwipeTableCell
//
//  Created by Vie on 2016/10/21.
//  Copyright © 2016年 Vie. All rights reserved.
//

#import "TestMGSwipeTableCell.h"@implementation TestMGSwipeTableCell-(instancetype)initWithStyle:(UITableViewCellStyle)style reuseIdentifier:(NSString *)reuseIdentifier{self=[super initWithStyle:style reuseIdentifier:reuseIdentifier];if (self) {[self drawView];}return self;
}-(void)drawView{[self.contentView addSubview:self.titleLable];
}-(UILabel *)titleLable{if (!_titleLable) {_titleLable=[[UILabel alloc] initWithFrame:CGRectMake(0, 0, [UIScreen mainScreen].bounds.size.width, 44)];_titleLable.textAlignment=NSTextAlignmentCenter;}return _titleLable;
}
@end
//ViewController.h文件
//  ViewController.h
//  UseMGSwipeTableCell
//
//  Created by Vie on 2016/10/21.
//  Copyright © 2016年 Vie. All rights reserved.
//

#import <UIKit/UIKit.h>@interface ViewController : UIViewController@end
//ViewController.m文件
//  ViewController.m
//  UseMGSwipeTableCell
//
//  Created by Vie on 2016/10/21.
//  Copyright © 2016年 Vie. All rights reserved.
//

#import "ViewController.h"
#import "TestMGSwipeTableCell.h"@interface ViewController ()<UITableViewDelegate,UITableViewDataSource>
@property(nonatomic,strong) UITableView *tableView;
@property(nonatomic,strong) NSArray *dataArry;
@end@implementation ViewController- (void)viewDidLoad {[super viewDidLoad];// Do any additional setup after loading the view, typically from a nib.
_dataArry=[[NSArray alloc] initWithObjects:@"Vie",@"Joker",@"King",@"Tracer",@"Monkey",@"Mimi",@"Loli", nil];_tableView=[[UITableView alloc] initWithFrame:self.view.frame];_tableView.delegate=self;_tableView.dataSource=self;[self.view addSubview:_tableView];
}-(UITableViewCell *)tableView:(UITableView *)tableView cellForRowAtIndexPath:(NSIndexPath *)indexPath{TestMGSwipeTableCell *cell=[tableView dequeueReusableCellWithIdentifier:[NSString stringWithFormat:@"%ld",(long)indexPath.row]];if (!cell) {cell =[[TestMGSwipeTableCell alloc] initWithStyle:UITableViewCellStyleSubtitle reuseIdentifier:[NSString stringWithFormat:@"%ld",(long)indexPath.row]];}cell.titleLable.text=[_dataArry objectAtIndex:indexPath.row];//置顶按钮MGSwipeButton *toTopBtn=[MGSwipeButton buttonWithTitle:@"置顶" backgroundColor:[UIColor lightGrayColor]  callback:^BOOL(MGSwipeTableCell * _Nonnull cell) {NSLog(@"置顶按钮");//重载数据,侧滑会还原
        [self.tableView reloadData];return NO;}];//删除按钮MGSwipeButton *deleteBtn=[MGSwipeButton buttonWithTitle:@"删除" backgroundColor:[UIColor redColor]  callback:^BOOL(MGSwipeTableCell * _Nonnull cell) {NSLog(@"删除按钮");//重载数据,侧滑会还原
        [self.tableView reloadData];return NO;}];//添加按钮到右侧cell.rightButtons=@[deleteBtn,toTopBtn];//备注按钮MGSwipeButton *noteBtn=[MGSwipeButton buttonWithTitle:@"备注" backgroundColor:[UIColor blueColor] callback:^BOOL(MGSwipeTableCell * _Nonnull cell) {NSLog(@"备注按钮");//重载数据,侧滑会还原
        [self.tableView reloadData];return NO;}];//更多按钮MGSwipeButton *moreBtn=[MGSwipeButton buttonWithTitle:@"更多" backgroundColor:[UIColor greenColor] callback:^BOOL(MGSwipeTableCell * _Nonnull cell) {NSLog(@"更多按钮");//重载数据,侧滑会还原
        [self.tableView reloadData];return NO;}];//添加按钮到左侧cell.leftButtons=@[noteBtn,moreBtn];return cell;
}//返回分区数量
-(NSInteger)numberOfSectionsInTableView:(UITableView *)tableView{return 1;
}//返回每个分区的单元格数量
-(NSInteger)tableView:(UITableView *)tableView numberOfRowsInSection:(NSInteger)section{return _dataArry.count;
}
@end
github地址:https://github.com/CoderMJLee/MJRefresh
#import "MJRefresh.h"
//添加头部刷新控件方法
MJRefreshNormalHeader *mjHeader=[MJRefreshNormalHeader headerWithRefreshingTarget:self refreshingAction:@selector(mjHeaderRefresh)];
//修改状态提示语
[mjHeader setTitle:@"松开进行刷新" forState:MJRefreshStatePulling];//松开就可以进行刷新的状态
[mjHeader setTitle:@"正在刷新" forState:MJRefreshStateRefreshing];//正在刷新中的状态
[mjHeader setTitle:@"下拉刷新" forState:MJRefreshStateIdle];//普通闲置状态
//修改提示语颜色
mjHeader.stateLabel.textColor=[UIColor blueColor];
//修改头部提示时间语颜色
mjHeader.lastUpdatedTimeLabel.textColor=[UIColor blueColor];
//隐藏头部时间提示语
mjHeader.lastUpdatedTimeLabel.hidden=YES;
self.tableView.mj_header=mjHeader;
//添加底部加载控件方法
MJRefreshBackNormalFooter *mjFooter=[MJRefreshBackNormalFooter footerWithRefreshingTarget:self refreshingAction:@selector(mjFooterRefresh)];
//修改状态提示语
[mjFooter setTitle:@"松开进行加载" forState:MJRefreshStatePulling];//松开就可以进行刷新的状态
[mjFooter setTitle:@"正在加载" forState:MJRefreshStateRefreshing];//正在刷新中的状态
[mjFooter setTitle:@"上拉加载" forState:MJRefreshStateIdle];//普通闲置状态
//修改提示语颜色
mjFooter.stateLabel.textColor=[UIColor blackColor];
self.tableView.mj_footer=mjFooter;
下拉刷新-动画图片
//设置回调(一旦进入刷新状态,就调用 targett 的 action,即调用 self 的 loadNewData 方法)
MJRefreshGifHeader *header = [MJRefreshGifHeader headerWithRefreshingTarget:self refreshingAction:@selector(loadNewData)];
// 设置普通状态的动画图片
NSArray *idleImages = @[@"图片1", @"图片2", @"图片3"];
[header setImages:idleImages forState:MJRefreshStateIdle];
// 设置即将刷新状态的动画图片(一松开就会刷新的状态)
NSArray *pullingImages = @[@"图片1", @"图片2", @"图片3"];
[header setImages:pullingImages forState:MJRefreshStatePulling];
// 设置正在刷新状态的动画图片
NSArray *refreshingImages = @[@"图片1", @"图片2", @"图片3"];
[header setImages:refreshingImages forState:MJRefreshStateRefreshing];
// 设置 header
self.tableView.mj_header = header;
上拉刷新-动画图片
// 设置回调(一旦进入刷新状态,就调用 target 的 action,即调用 self 的 loadMoreData 方法)
MJRefreshAutoGifFooter *footer = [MJRefreshAutoGifFooter footerWithRefreshingTarget:self refreshingAction:@selector(loadMoreData)];
//设置刷新图片
NSArray *refreshingImages = @[@"图片1", @"图片2", @"图片3"];
[footer setImages:refreshingImages forState:MJRefreshStateRefreshing];
//设置尾部
self.tableView.mj_footer = footer;
给UIResponder类创建了一个分类,并添加了一个新的分发事件的分发:
//UIResponder+Router.h文件
/*************************************************************  * EaseMob CONFIDENTIAL * __________________ * Copyright (C) 2013-2014 EaseMob Technologies. All rights reserved. *  * NOTICE: All information contained herein is, and remains * the property of EaseMob Technologies.* Dissemination of this information or reproduction of this material * is strictly forbidden unless prior written permission is obtained* from EaseMob Technologies.*/#import <UIKit/UIKit.h>@interface UIResponder (Router)/***  发送一个路由器消息, 对eventName感兴趣的 UIResponsder 可以对消息进行处理**  @param eventName 发生的事件名称*  @param userInfo  传递消息时, 携带的数据, 数据传递过程中, 会有新的数据添加**/
- (void)routerEventWithName:(NSString *)eventName userInfo:(NSObject *)userInfo;@end
//UIResponder+Router.m文件
/*************************************************************  * EaseMob CONFIDENTIAL * __________________ * Copyright (C) 2013-2014 EaseMob Technologies. All rights reserved. *  * NOTICE: All information contained herein is, and remains * the property of EaseMob Technologies.* Dissemination of this information or reproduction of this material * is strictly forbidden unless prior written permission is obtained* from EaseMob Technologies.*/#import "UIResponder+Router.h"@implementation UIResponder (Router)- (void)routerEventWithName:(NSString *)eventName userInfo:(NSObject *)userInfo
{[[self nextResponder] routerEventWithName:eventName userInfo:userInfo];
}@end
事件传递:响应者链
当你设计你的app 时候,经常动态地响应事件对不对。比如,屏幕上的许多对象都会触发一个触摸的事件,你必须决定让谁来响应这个时间并且要明白这个对象怎么接收到事件。
当一个用户产生的事件发生时,UIKit 创建了包含处理该事件所需要的信息。然后这个事件对象进入 一个app对应的事件队列。 对于触摸事件来说,该对象是一系UItouches对象的打包。对于手势来说,该对象则是手势的类型。
一个事件是经由特定的路径到达能处理的对象的。一开始是UIApplication,其次是key window, 其次到initial object.
对于触摸事件来说, window 会传到 发生触摸的view,被称之为hit-test view。此过程叫 hit-testing。
对于手势和远程控制,这个第一响应被发到 first responder.
最终响应者链要找到处理事件的对象。规则如下。
1 Hit_testing (检测的过程实际上是自上而下的)
1 此触摸被检测抖到在A的边界内,所以继续检测B和C。
2 同样的道理,继续检测C的子类D和E。
3 最后排除了D,检测E。
View E已经是最低层的View,所以它使hit-Test找到的对象。

hitTest:withEvent: 参数为CGpoint 和 UiEvent。
hitTest:withEvent: 的实现都是以pointInside:withEvent:为检验的,先检验自己然后再检验subview,所以触摸点是必须在superview然后同时在view才会被传下来,如果都没有在superview检测到是不会被传下来的。这种情况适用于cliptobounds的情况。
然后就是nextresponder了。响应者链的组成部分是Responder, Responder的
nextResponder方法决定了传递的规则,然后苹果公布的规则是这样子的

我知道了当事触摸事件发生,通过一层层找到的这个View ,找到这个View 后先判断这个view能不能响应这个事件,如果不能那就继续找nextResponder我们看上面图可以看出如果一个View有SuperView 那么这个View的nextResponder 就是他的SuperView,如果没有SuperView 那么它的nextResponder 就是他所在ViewController 然后就这样一直找下去,直到找到或抛出异常。
我们了解这机制后那我们怎么把这个UIButton Click 事件传递出来呢,我们先来给UIResponder 添加一个我们自定义的事件,我就让它传递我们这个事件出去。
//ViewController.h文件
//
//  ViewController.h
//  UIResponder事件分发
//
//  Created by Vie on 2016/10/28.
//  Copyright © 2016年 Vie. All rights reserved.
//

#import <UIKit/UIKit.h>@interface ViewController : UIViewController@end
//ViewController.m文件
//
//  ViewController.m
//  UIResponder事件分发
//
//  Created by Vie on 2016/10/28.
//  Copyright © 2016年 Vie. All rights reserved.
//

#import "ViewController.h"
#import "RouterView1.h"@interface ViewController ()@end@implementation ViewController- (void)viewDidLoad {[super viewDidLoad];// Do any additional setup after loading the view, typically from a nib.RouterView1 *view=[[RouterView1 alloc] initWithFrame:CGRectMake(0, 50, self.view.frame.size.width, 50)];view.backgroundColor=[UIColor blueColor];[self.view addSubview:view];}//实现UIResponder+Router
-(void)routerEventWithName:(NSString *)eventName userInfo:(NSDictionary *)userInfo
{if ([eventName isEqualToString:@"TestSuperRouter"]) {NSLog(@"测试2的名称:%@",userInfo[@"name"]);}}
@end
// RouterView1.h文件
//
//  RouterView1.h
//  UIResponder事件分发
//
//  Created by Vie on 2016/10/28.
//  Copyright © 2016年 Vie. All rights reserved.
//

#import <UIKit/UIKit.h>@interface RouterView1 : UIView@end
// RouterView1.m文件
//
//  RouterView1.m
//  UIResponder事件分发
//
//  Created by Vie on 2016/10/28.
//  Copyright © 2016年 Vie. All rights reserved.
//

#import "RouterView1.h"
#import "UIResponder+Router.h"
@implementation RouterView1/*
// Only override drawRect: if you perform custom drawing.
// An empty implementation adversely affects performance during animation.*/
- (void)drawRect:(CGRect)rect {// Drawing code
    UIButton *btn=[[UIButton alloc] initWithFrame:CGRectMake(0, 0, 100, 50)];[btn setTitle:@"测试转发" forState:UIControlStateNormal];[btn addTarget:self action:@selector(testRouter) forControlEvents:UIControlEventTouchUpInside];[self addSubview:btn];UIButton *btn2=[[UIButton alloc] initWithFrame:CGRectMake(200, 0, 100, 50)];[btn2 setTitle:@"super转发" forState:UIControlStateNormal];[btn2 addTarget:self action:@selector(testSuperRouter) forControlEvents:UIControlEventTouchUpInside];[self addSubview:btn2];}
-(void)testRouter{NSMutableDictionary *dic=[NSMutableDictionary dictionary];dic[@"name"]=@"King";dic[@"id"]=@"10010";//分发相关事件[self routerEventWithName:@"TestRouter" userInfo:dic];
}-(void)testSuperRouter{NSMutableDictionary *dic=[NSMutableDictionary dictionary];dic[@"name"]=@"Super";dic[@"id"]=@"10011";[self routerEventWithName:@"TestSuperRouter" userInfo:dic];
}//实现UIResponder+Router,没有继续往SuperView发,
-(void)routerEventWithName:(NSString *)eventName userInfo:(NSDictionary *)userInfo
{if ([eventName isEqualToString:@"TestRouter"]) {NSLog(@"测试1的名称:%@",userInfo[@"name"]);}else{// 手动让响应者传递到下一个事件
        [self.nextResponder routerEventWithName:eventName userInfo:userInfo];}}
@end
FMDB库下载地址:https://github.com/ccgus/fmdb
依赖的框架或库:libsqlite3.tbd
//FMDBManager.h文件
//
//  FMDBManager.h
//  使用fmdb的数据库管理类
//
//  Created by Vie on 16/7/28.
//  Copyright © 2016年 Vie. All rights reserved.
//

#import <Foundation/Foundation.h>
#import "FMDB.h"@interface FMDBManager : NSObject#pragma  mark -属性
#pragma mark 数据库引用,使用它进行数据库操作
@property(nonatomic) FMDatabase *database;//一次只能执行一条sql#pragma mark -共有方法/***  @Author Vie, 2016-07-28 14:29:25**  @param dbName 数据库名**  @return null**  @since 重写初始化方法,打开对应数据库。如果打开失败返回null*/
-(instancetype)initWithDB:(NSString *)dbName;/***  @Author Vie, 2016-07-28 14:34:24**  @param sql SQL语句**  @return 返回执行结果**  @since 执行无返回的sql语句*/
-(BOOL)executeNonQuery:(NSString *)sql;/***  @Author Vie, 2016-07-28 14:35:25**  @param sql SQL语句**  @return 查询结果**  @since 执行有返回的sql语句*/
-(NSMutableArray *)executeQuery:(NSString *)sql;@end
// FMDBManager.m
//
//  FMDBManager.m
//  使用fmdb的数据库管理类
//
//  Created by Vie on 16/7/28.
//  Copyright © 2016年 Vie. All rights reserved.
//

#import "FMDBManager.h"@interface FMDBManager ()@end@implementation FMDBManager#pragma mark重写初始化方法,如果打开数据库失败就返回nil
-(instancetype)initWithDB:(NSString *)dbName{self=[super init];if (self) {if (![self openDb:dbName]) {self=nil;}}return self;
}/***  @Author Vie, 2016-07-28 14:39:33**  @param dbname 数据库名称**  @return 返回打开数据库结果**  @since 打开数据库*/
-(BOOL)openDb:(NSString *)dbname{NSString *filePath=[NSHomeDirectory() stringByAppendingString:[NSString stringWithFormat:@"/Documents/%@",dbname]];NSLog(@"数据库路径|:%@",filePath);//创建fmdbatabase对象_database=[FMDatabase databaseWithPath:filePath];//打开数据库上if ([_database open]) {NSLog(@"数据库%@打开成功",dbname);return YES;}else{NSLog(@"数据库%@打开失败",dbname);return NO;}
}#pragma mark -执行无返回结果的sql,将执行结果返回通知
-(BOOL)executeNonQuery:(NSString *)sql{//执行更新sql语句,用于插入、修改。删除if (![_database executeUpdate:sql]) {NSLog(@"执行sql语句过程中发生错误");return NO;}else{return YES;}
}#pragma mark -执行有结果返回的sql,将查询结果数据返回
-(NSMutableArray *)executeQuery:(NSString *)sql{NSMutableArray *rows=[NSMutableArray array];//执行查询sql语句FMResultSet *result=[_database executeQuery:sql];//查询结果可能不止一条while (result.next) {NSMutableDictionary *dic=[NSMutableDictionary dictionary];for (int i=0; i<result.columnCount; i++) {dic[[result columnNameForIndex:i]]=[result stringForColumnIndex:i];}[rows addObject:dic];}return rows;
}-(void)dealloc{[_database close];
}
@end
// FMDBQueueManager.h
//
//  FMDBQueueManager.h
//  使用fmdb的数据库管理类,支持并发和事物
//
//  Created by Vie on 16/7/28.
//  Copyright © 2016年 Vie. All rights reserved.
//

#import <Foundation/Foundation.h>
#import "FMDB.h"@interface FMDBQueueManager : NSObject#pragma  mark -属性
#pragma mark 数据库引用,使用它进行数据库操作
@property(nonatomic) FMDatabaseQueue *database;//一次只能执行一条sql#pragma mark -共有方法/***  @Author Vie, 2016-07-28 14:29:25**  @param dbName 数据库名**  @return null**  @since 重写初始化方法,打开对应数据库。如果打开失败返回null*/
-(instancetype)initWithDB:(NSString *)dbName;/***  @Author Vie, 2016-07-28 14:34:24**  @param sql SQL语句**  @return 返回执行结果**  @since 执行无返回的sql语句*/
-(BOOL)executeNonQuery:(NSString *)sql;/***  @Author Vie, 2016-07-28 14:35:25**  @param sql SQL语句**  @return 查询结果**  @since 执行有返回的sql语句*/
-(NSMutableArray *)executeQuery:(NSString *)sql;/***  @Author Vie, 2016-07-28 18:14:26**  @param sql 多条sql数组**  @return 返回执行结果**  @since 将多条sql当成事务处理*/
-(BOOL)executeTransaction:(NSMutableArray *)sqlArray;
@end
// FMDBQueueManager.m
//
//  FMDBQueueManager.m
//  使用fmdb的数据库管理类,支持并发和事物
//
//  Created by Vie on 16/7/28.
//  Copyright © 2016年 Vie. All rights reserved.
//

#import "FMDBQueueManager.h"@interface FMDBQueueManager ()@end@implementation FMDBQueueManager
#pragma mark重写初始化方法,如果打开数据库失败就返回nil
-(instancetype)initWithDB:(NSString *)dbName{self=[super init];if (self) {if (![self openDb:dbName]) {self=nil;}}return self;
}/***  @Author Vie, 2016-07-28 14:39:33**  @param dbname 数据库名称**  @return 返回打开数据库结果**  @since 打开数据库*/
-(BOOL)openDb:(NSString *)dbname{NSString *filePath=[NSHomeDirectory() stringByAppendingString:[NSString stringWithFormat:@"/Documents/%@",dbname]];NSLog(@"数据库路径|:%@",filePath);//创建fmdbatabase对象,这里不需要打开数据库操作_database=[FMDatabaseQueue databaseQueueWithPath:filePath];if (_database) {NSLog(@"数据库%@打开成功",dbname);return YES;}else{NSLog(@"数据库%@打开失败",dbname);return NO;}
}#pragma mark -执行无返回结果的sql,将执行结果返回通知
-(BOOL)executeNonQuery:(NSString *)sql{NSMutableArray *rows=[NSMutableArray array];[_database inDatabase:^(FMDatabase *db) {if (![db executeUpdate:sql]) {NSLog(@"执行sql语句过程中发生错误");[rows addObject:@"1"];}else{[rows addObject:@"0"];}}];return [[rows objectAtIndex:0] isEqualToString:@"0"]?YES:NO;
}#pragma mark -执行有结果返回的sql,将查询结果数据返回
-(NSMutableArray *)executeQuery:(NSString *)sql{NSMutableArray *rows=[NSMutableArray array];[_database inDatabase:^(FMDatabase *db) {//执行查询sqlFMResultSet *result=[db executeQuery:sql];while (result.next) {NSMutableDictionary *dic=[NSMutableDictionary dictionary];for (int i=0; i<result.columnCount; ++i) {dic[[result columnNameForIndex:i]]=[result stringForColumnIndex:i];}[rows addObject:dic];}}];return rows;
}
#pragma mark -将多条sql当做事务处理,返回执行结果
-(BOOL)executeTransaction:(NSMutableArray *)sqlArray{__block BOOL whoopsSomethingWrongHappened = true;[_database inTransaction:^(FMDatabase *db, BOOL *rollback) {for (int i=0;i<sqlArray.count ; i++) {BOOL executeFlag=[db executeUpdate:[sqlArray objectAtIndex:i]];if (!executeFlag) {NSLog(@"---sql执行失败:%@",[sqlArray objectAtIndex:i]);}//记录操作结果,&= 同为1才结果为1,一个1一个0结果为0whoopsSomethingWrongHappened&=executeFlag;}if (!whoopsSomethingWrongHappened) {//当最后*rollback的值为YES的时候,事务回退,如果最后*rollback为NO,事务提交*rollback = YES;NSLog(@"数据库操作失败");return;}else{NSLog(@"数据库操作成功");}}];return whoopsSomethingWrongHappened;
}-(void)dealloc{[_database close];
}
@end
//使用测试
    // Do any additional setup after loading the view, typically from a nib.FMDBQueueManager *dbManager=[[FMDBQueueManager alloc] initWithDB:@"Newdb.db"];//如果打开数据库成功就执行下面操作if (dbManager) {NSString *createTableSQL=@"create table if not exists  user(id integer primary key autoincrement not null,name  varchar(10),tel  varchar(11),address varchar(50));";if ([dbManager executeNonQuery:createTableSQL]) {NSLog(@"创建USER表成功");//fmdb sql要一条一条执行NSString *insertRows=@"insert into user(name,tel,address) values('Vie','18777777777','深圳');";[dbManager executeNonQuery:@"insert into user(name,tel,address) values('Jack','18666666666','广州'); "];[dbManager executeNonQuery:@"insert into user(name,tel,address) values('Musk','15777777777','东莞');"];[dbManager executeNonQuery:@"insert into user(name,tel,address) values('Mark','15888888888','武汉'); "];[dbManager executeNonQuery:@"insert into user(name,tel,address) values('Tom','17777777777','孝感');"];
//   NSString *insertRows=@"insert into user(name,tel,address) values('Vie','18777777777','深圳'); insert into user(name,tel,address) values('Jack','18666666666','广州'); insert into user(name,tel,address) values('Musk','15777777777','东莞'); insert into user(name,tel,address) values('Mark','15888888888','武汉'); insert into user(name,tel,address) values('Tom','17777777777','孝感');";if ([dbManager executeNonQuery:insertRows]) {NSLog(@"插入数据成功");NSString *updateSQL=@"update user set address ='仙桃',name='哇哈哈'   where id=5;";if ([dbManager executeNonQuery:updateSQL]) {NSLog(@"修改数据成功");NSString *deleteSQL=@"delete from user where id=1;";if ([dbManager executeNonQuery:deleteSQL]) {NSLog(@"删除数据成功");//查询数据NSString *queryRow=@"select * from user ";NSMutableArray *array=[dbManager executeQuery:queryRow];if (array.count>0) {NSLog(@"查询到了数据");}}}}}}
CMPopTipView下载地址:https://github.com/chrismiles/CMPopTipView
它会显示一个圆角矩形“弹出视图带指示”,类似QQ会话界面+号点击后展示视图
// ViewController.m
//
//  ViewController.m
//  UseCMPopTipView
//
//  Created by Vie on 2017/1/16.
//  Copyright © 2017年 Vie. All rights reserved.
//

#import "ViewController.h"
#import "CMPopTipView.h"@interface ViewController ()
@property (nonatomic ,strong) CMPopTipView *popTipView;
@end@implementation ViewController- (void)viewDidLoad {[super viewDidLoad];// Do any additional setup after loading the view, typically from a nib.self.navigationItem.rightBarButtonItem=[[UIBarButtonItem alloc] initWithTitle:@"..." style:UIBarButtonItemStylePlain target:self action:@selector(popView)];[self.view setBackgroundColor:[UIColor yellowColor]];
}-(void)popView{if (!_popTipView) {UIView *customView=[[UIView alloc] initWithFrame:CGRectMake(0, 0, 150, 44*4)];NSArray *titleArray=[NSArray arrayWithObjects:@"One",@"Two",@"Three",@"Four", nil];for (int i=0; i<titleArray.count; i++) {//设置按钮UIButton *btn=[UIButton buttonWithType:UIButtonTypeSystem];btn.frame=CGRectMake(0, i*44, 150, 43);btn.tag=110+i;[btn addTarget:self action:@selector(popViewAction:) forControlEvents:UIControlEventTouchUpInside];//设置按钮文本和颜色
            [btn setTitle:[titleArray objectAtIndex:i] forState:UIControlStateNormal];[btn setTintColor:[UIColor blackColor]];//设置分格边线UIView *line=[[UIView alloc] initWithFrame:CGRectMake(0, 44*(i+1), 150, 1)];line.backgroundColor=[UIColor colorWithRed:220./255 green:220./255 blue:220./255 alpha:1];[customView addSubview:btn];[customView addSubview:line];}//初始化泡泡风格弹出页面内容_popTipView=[[CMPopTipView alloc] initWithCustomView:customView];//设置弹出页面背景色_popTipView.backgroundColor=[UIColor whiteColor];//设置边框线颜色_popTipView.borderColor = [UIColor colorWithRed:220./255 green:220./255 blue:220./255 alpha:1];//点击其他地方事是否隐藏改弹出页面_popTipView.dismissTapAnywhere = YES;//是否3d效果_popTipView.has3DStyle=NO;//是否允许自定义视图填充_popTipView.shouldEnforceCustomViewPadding=NO;//是否有阴影_popTipView.hasShadow=NO;}//指定弹出itme,给到弹出页面定位
    [_popTipView presentPointingAtBarButtonItem:self.navigationItem.rightBarButtonItem animated:YES];
}
-(void)popViewAction:(UIButton *)sender{//隐藏弹出界面
    [_popTipView dismissAnimated:NO];if (sender.tag==110) {NSLog(@"One");}else if (sender.tag==111){NSLog(@"Two");}else if (sender.tag==112){NSLog(@"Three");}else if (sender.tag==113){NSLog(@"Four");}
}@end
CustomIOSAlertView自定义AlertView
CustomIOSAlertView下载地址:https://github.com/wimagguc/ios-custom-alertview
// ViewController.m
//
//  ViewController.m
//  UseCustomIOSAlertView
//
//  Created by Vie on 2017/1/18.
//  Copyright © 2017年 Vie. All rights reserved.
//

#import "ViewController.h"
#import "CustomIOSAlertView.h"@interface ViewController ()@end@implementation ViewController- (void)viewDidLoad {[super viewDidLoad];// Just a subtle background color[self.view setBackgroundColor:[UIColor colorWithRed:0.8f green:0.8f blue:0.8f alpha:1.0f]];// A simple button to launch the demoUIButton *launchDialog = [UIButton buttonWithType:UIButtonTypeCustom];[launchDialog setFrame:CGRectMake(10, 30, self.view.bounds.size.width-20, 50)];[launchDialog addTarget:self action:@selector(launchDialog:) forControlEvents:UIControlEventTouchDown];[launchDialog setTitle:@"Launch Dialog" forState:UIControlStateNormal];[launchDialog setBackgroundColor:[UIColor whiteColor]];[launchDialog setTitleColor:[UIColor blueColor] forState:UIControlStateNormal];[launchDialog.layer setBorderWidth:0];[launchDialog.layer setCornerRadius:5];[self.view addSubview:launchDialog];}
- (IBAction)launchDialog:(id)sender
{CustomIOSAlertView *alertView=[[CustomIOSAlertView alloc] init];alertView.tag=103;float containeWidth=290;//提示标题NSString *titleText=@"新版本升级提示";float titleLableHeight=66;UILabel *titleLable=[[UILabel alloc] initWithFrame:CGRectMake(0, 0, containeWidth, titleLableHeight)];titleLable.font = [UIFont systemFontOfSize:20];titleLable.textColor = [UIColor blackColor];titleLable.backgroundColor = [UIColor clearColor];titleLable.lineBreakMode =NSLineBreakByWordWrapping;titleLable.numberOfLines =0;titleLable.textAlignment =NSTextAlignmentCenter;titleLable.text=titleText;//提示内容float textLabelX=20;NSString *messageText=@"000000000000000000000000000000\n11111111\n2222222222222222222\n23412412312321321312321312312312312312312312312321321312\n43424123123sjdfjdsklfjksjf\n000000000000000000000000000000\n11111111\n2222222222222222222\n23412412312321321312321312312312312312312312312321321312\n43424123123sjdfjdsklfjksjf\n";CGSize messageSize=[messageText boundingRectWithSize:CGSizeMake(containeWidth-textLabelX-5, 10000) options:NSStringDrawingUsesLineFragmentOrigin attributes:@{NSFontAttributeName:[UIFont systemFontOfSize:15]} context:nil].size;UILabel *textLabel = [[UILabel alloc] initWithFrame:CGRectMake(textLabelX, titleLableHeight, messageSize.width, messageSize.height)];textLabel.font = [UIFont systemFontOfSize:15];textLabel.textColor = [UIColor blackColor];textLabel.backgroundColor = [UIColor clearColor];textLabel.lineBreakMode =NSLineBreakByWordWrapping;textLabel.numberOfLines =0;textLabel.textAlignment =NSTextAlignmentLeft;textLabel.text=messageText;//自定义提示背景视图UIView *containeView=[[UIView alloc] initWithFrame:CGRectMake(0, 0, containeWidth, CGRectGetMaxY(textLabel.frame))];[containeView addSubview:titleLable];[containeView addSubview:textLabel];//设置提示视图
    [alertView setContainerView:containeView];//设置按钮[alertView setButtonTitles:@[@"取消",@"确定"]];//实现按钮回调事件[alertView setOnButtonTouchUpInside:^(CustomIOSAlertView *alertView, int buttonIndex) {NSLog(@"点击按钮下标:%d,按钮tag:%ld",buttonIndex,(long)alertView.tag);[alertView close];}];[alertView setUseMotionEffects:true];[alertView show];
}
@end
Masonry库下载地址:https://github.com/SnapKit/Masonry
简介:
Masonry是一个对系统NSLayoutConstraint进行封装的第三方自动布局框架,采用链式编程的方式提供给开发者API。系统AutoLayout支持的操作,Masonry都支持,相比系统API功能来说,Masonry是有过之而无不及。Masonry是同时支持Mac和iOS两个平台的,在这两个平台上都可以使用Masonry进行自动布局。
在使用Masonry进行约束时,有一些是需要注意的。
1.在使用Masonry添加约束之前,需要在addSubview之后才能使用,否则会导致崩溃。
2.在添加约束时初学者经常会出现一些错误,约束出现问题的原因一般就是两种:约束冲突和缺少约束。对于这两种问题,可以通过调试和log排查(建议x,y,width,height分开添加)。
| mas_makeConstraints() | 添加约束 |
| mas_remakeConstraints() | 移除之前的约束,重新添加新的约束 |
| mas_updateConstraints() | 更新约束 |
| equalTo() | 参数是对象类型,一般是视图对象或者mas_width这样的坐标系对象 |
| mas_equalTo() | 和上面功能相同,参数可以传递基础数据类型对象,可以理解为比上面的API更强大 |
| width() | 用来表示宽度,例如代表view的宽度 |
| mas_width() | 用来获取宽度的值。和上面的区别在于,一个代表某个坐标系对象,一个用来获取坐标系对象的值 |
上面例如equalTo或者width这样的,有时候需要涉及到使用mas_前缀,这在开发中需要注意作区分。
如果在当前类引入#import "Masonry.h"之前,用下面两种宏定义声明一下,就不需要区分mas_前缀。
// 定义这个常量,就可以不用在开发过程中使用"mas_"前缀。
#define MAS_SHORTHAND
// 定义这个常量,就可以让Masonry帮我们自动把基础数据类型的数据,自动装箱为对象类型。
#define MAS_SHORTHAND_GLOBALS
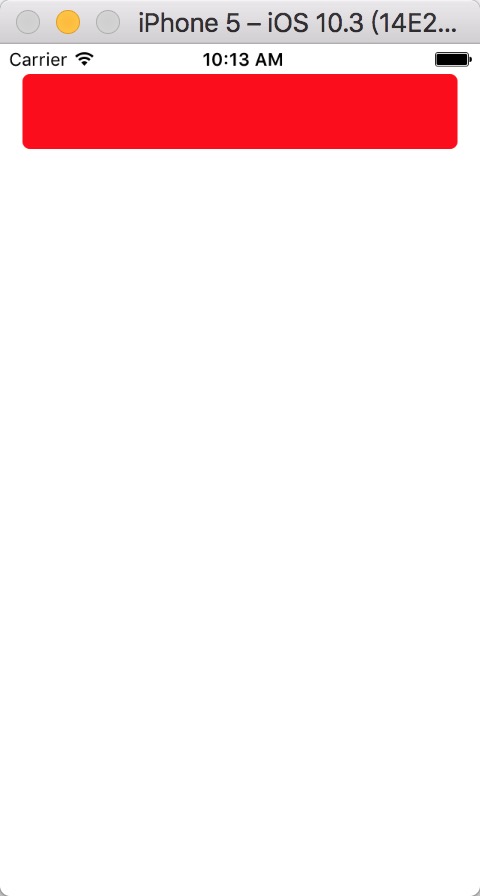
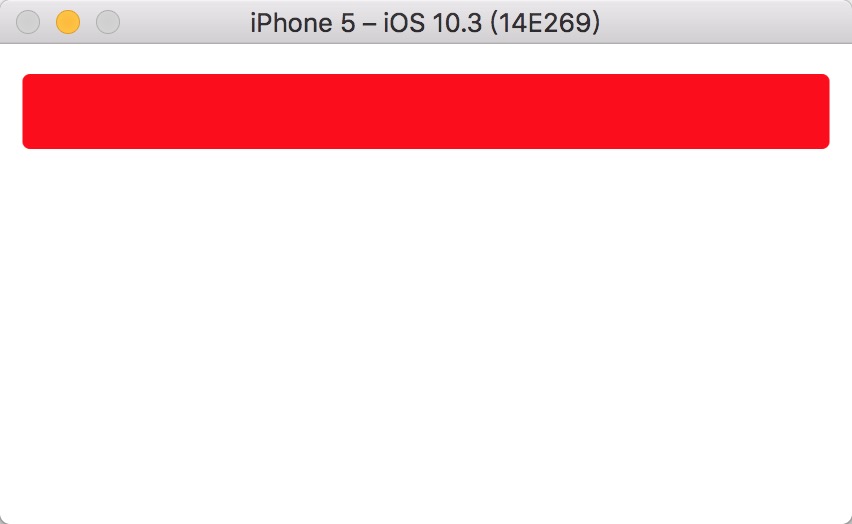
//例
//ViewController.m文件
//
//  ViewController.m
//  MasonnyLearn
//
//  Created by Vie on 2017/5/10.
//  Copyright © 2017年 Vie. All rights reserved.
//

#import "ViewController.h"
// 定义这个常量,就可以不用在开发过程中使用"mas_"前缀。
#define MAS_SHORTHAND
// 定义这个常量,就可以让Masonry帮我们自动把基础数据类型的数据,自动装箱为对象类型。
#define MAS_SHORTHAND_GLOBALS#import "Masonry.h"@interface ViewController ()
@property(nonatomic, strong) UIView *testView;
@end@implementation ViewController#pragma mark  懒加载
-(UIView *)testView{if (!_testView) {_testView=[[UIView alloc] init];[_testView setBackgroundColor:[UIColor redColor]];[_testView.layer setCornerRadius:5.0f];}return _testView;
}- (void)viewDidLoad {[super viewDidLoad];// Do any additional setup after loading the view, typically from a nib.//在使用Masonry添加约束之前,需要在addSubview之后才能使用,否则会导致崩溃。
    [self.view addSubview:self.testView];[self.testView mas_makeConstraints:^(MASConstraintMaker *make) {make.width.equalTo(self.view.width).offset(-30);//设置宽度约束为self.view的宽度-30make.height.equalTo(50);//设置高度约束make.left.equalTo(self.view.left).offset(15);//设置x轴约束make.top.equalTo(self.view.top).offset(20);//设置y轴约束
    }];
}@end
//效果
//让约束从导航栏底部开始算起
self.edgesForExtendedLayout = UIRectEdgeNone;
self.extendedLayoutIncludesOpaqueBars = NO;
self.modalPresentationCapturesStatusBarAppearance = NO;
JDStatusBarNotification自定义状态栏通知
JDStatusBarNotification下载
//简单实用示例,更多实用看下载介绍
[JDStatusBarNotification addStyleNamed:@"1111" prepare:^JDStatusBarStyle *(JDStatusBarStyle *style) {style.barColor = [UIColor yellowColor];style.textColor = [UIColor blackColor];style.font = [UIFont systemFontOfSize:14.0f];style.textShadow = nil;style.animationType = JDStatusBarAnimationTypeNone;style.progressBarColor = [UIColor orangeColor];style.progressBarHeight = 20;return style;}];//显示一条通知[JDStatusBarNotification showWithStatus:@"Hahah" styleName:@"1111"];[JDStatusBarNotification showProgress:0.1];
WMPageController下载
//示例
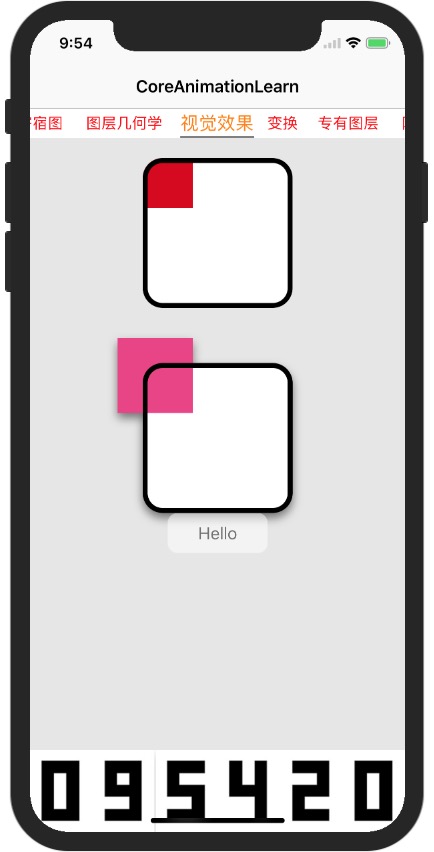
//
//  ViewController.m
//  CoreAnimationLearn
//
//  Created by Vie on 2017/6/20.
//  Copyright © 2017年 Vie. All rights reserved.
//

#import "ViewController.h"
#import "WMPageController.h"@interface ViewController ()<WMPageControllerDelegate,WMPageControllerDataSource>
@property (nonatomic, strong)   NSArray *infoArray;//单元格描述数组
@property (nonatomic, strong)   NSArray *classNameArray;//单元格要调用的类名数组
@property (nonatomic, strong)   WMPageController *pageCtl;//类似网页频道翻页控制
@end@implementation ViewController#pragma mark Lazy loading
-(WMPageController *)pageCtl{if (!_pageCtl) {_pageCtl=[[WMPageController alloc] init];_pageCtl.dataSource=self;_pageCtl.delegate=self;_pageCtl.automaticallyCalculatesItemWidths=YES;//字段计算每个频道的字符串宽度_pageCtl.titleColorNormal=[UIColor redColor];//频道栏默认标题颜色_pageCtl.titleColorSelected = [UIColor orangeColor];//频道栏选中标题颜色_pageCtl.menuViewStyle=WMMenuViewStyleLine;//频道栏选中样式_pageCtl.progressColor=[UIColor grayColor];//选中后的下划线颜色_pageCtl.itemMargin=10;//设置每个Item之间的间隙统一值}return _pageCtl;
}-(NSArray *)infoArray{if (!_infoArray) {_infoArray=@[@"图层的树状结构",@"寄宿图",@"图层几何学",@"视觉效果",@"变换",@"专有图层",@"隐式动画",@"显式动画",@"图层时间",@"缓冲",@"基于定时器的动画",@"性能调优",@"高效绘图",@"图像IO",@"图层性能"];}return _infoArray;
}-(NSArray *)classNameArray{if (!_classNameArray) {_classNameArray=@[@"LayerTreeViewController",@"BoardingFigureViewController",@"LayerGeometryViewController",@"VisualEffectViewController",@"TransformViewController",@"ProprietaryLayerViewController",@"ImplicitAnimationViewController",@"ExplicitAnimationViewController",@"LayerOfTimeViewController",@"BufferViewController",@"AnimationBasedTimerViewController",@"PerformanceTuningViewController",@"EfficientMappingViewController",@"ImageIOViewController",@"LayerPropertiesViewController"];}return _classNameArray;
}
#pragma mark 视图控制器回调
- (void)viewDidLoad {[super viewDidLoad];[self.view setBackgroundColor:RGB_ALPHA_COLOR(230, 230, 230, 1)];self.title=[[[NSBundle mainBundle] infoDictionary] objectForKey:@"CFBundleName"];[self addChildViewController:self.pageCtl];[self.view addSubview:self.pageCtl.view];}#pragma mark WMPageControllerDataSource
//设置频道数量
-(NSInteger)numbersOfChildControllersInPageController:(WMPageController *)pageController{return self.infoArray.count;
}//设置频道对应控制器
-(UIViewController *)pageController:(WMPageController *)pageController viewControllerAtIndex:(NSInteger)index{Class class=NSClassFromString(self.classNameArray[index]);id classInstance=[[class alloc] init];return classInstance;
}//设置频道标题
-(NSString *)pageController:(WMPageController *)pageController titleAtIndex:(NSInteger)index{return [self.infoArray objectAtIndex:index];
}#pragma mark WMPageControllerDataSource@end
运行效果
MJExtension下载
MJExtension是一套字典和模型之间互相转换的超轻量级框架,不需要你的模型类继承任何特殊基类,毫无污染,毫无侵入性;MJExtension能完成的功能:
字典(JSON) --> 模型(Model)
模型(Model) --> 字典(JSON)
字典数组(JSON Array) --> 模型数组(Model Array)
模型数组(Model Array) --> 字典数组(JSON Array)
//MyinfoModel.h模型文件
//
//  MyinfoModel.h
//  RuntimeTest
//
//  Created by Vie on 2017/2/14.
//  Copyright © 2017年 Vie. All rights reserved.
//

#import <Foundation/Foundation.h>@interface MyinfoModel : NSObject
@property(nonatomic,strong) NSString *name;//姓名
@property(nonatomic,assign) NSNumber   *age;//年龄
@property(nonatomic,strong) NSArray *array;//获奖集合
@property(nonatomic,strong) NSDictionary *dic;//获奖描述
@property(nonatomic,strong) MyinfoModel *mySon;//我的仔
@end
//MyinfoModel.m模型文件
//
//  MyinfoModel.m
//  RuntimeTest
//
//  Created by Vie on 2017/2/14.
//  Copyright © 2017年 Vie. All rights reserved.
//

#import "MyinfoModel.h"@implementation MyinfoModel@end
//使用代码
#import "MyinfoModel.h"
#import "MJExtension.h"NSDictionary  *dictionary = @{@"xxxx":@"xxxx",@"name":@"Vie",@"age":@24,@"array":@[@"优秀少先队员",@"优秀共青团员",@"优秀党员"],@"dic":@{@"info1":@"五年级获得优秀少先队员称号",@"info2":@"初三获得优秀共青团员称号",@"info3":@"大三获得优秀党员称号",},@"mySon":@{@"name":@"Vieson",@"age":@3,@"array":@[@"乖宝宝",@"精灵鬼"],@"dic":@{@"info1":@"小宝宝很可爱",},},};//将字典转模型MyinfoModel *modelForMJ=[MyinfoModel mj_objectWithKeyValues:dictionary];//将模型转字典NSMutableDictionary *dicByModelForMJ=[modelForMJ mj_keyValues];//将字典数组转模型数组NSArray *modelArray = [MyinfoModel mj_objectArrayWithKeyValuesArray:@[dictionary,dictionary,dictionary]];//将模型数组转成字典数组NSMutableArray *dicArray=[MyinfoModel mj_keyValuesArrayWithObjectArray:modelArray];
下载地址:https://github.com/AFNetworking/AFNetworking
3.0版本:
使用 AFHTTPSessionManager这个网络管理者
//示例
//
//  ViewController.m
//  AFNetWorkingLearn
//
//  Created by Vie on 2017/12/19.
//  Copyright © 2017年 Vie. All rights reserved.
//

#import "ViewController.h"
#import "AFNetworking.h"@interface ViewController ()<NSXMLParserDelegate>
@property (strong, nonatomic) NSURLSession *session;
@end@implementation ViewController- (void)viewDidLoad {[super viewDidLoad];
}/**@author Vie,2017年12月19日09:22:11get请求测试*/
-(void)get
{//1.创建会话管理者AFHTTPSessionManager *manager = [AFHTTPSessionManager manager];//2.封装参数NSDictionary *dic= @{@"username":@"Vie",@"pwd":@"123456",};//3.发送GET请求/*第一个参数:请求路径(NSString)+ 不需要加参数第二个参数:发送给服务器的参数数据第三个参数:progress 进度回调第四个参数:success  成功之后的回调(此处的成功或者是失败指的是整个请求)task:请求任务responseObject:注意!!!响应体信息--->(json--->oc))task.response: 响应头信息第五个参数:failure 失败之后的回调*/[manager GET:@"需要请求的URL" parameters:dic progress:nil success:^(NSURLSessionDataTask * _Nonnull task, id  _Nullable responseObject) {NSLog(@"success--%@--%@",[responseObject class],responseObject);} failure:^(NSURLSessionDataTask * _Nullable task, NSError * _Nonnull error) {NSLog(@"failure--%@",error);}];
}/**@author Vie,2017年12月19日09:22:11post请求测试*/
-(void)post
{//1.创建会话管理者AFHTTPSessionManager *manager = [AFHTTPSessionManager manager];//2.封装参数NSDictionary *dic= @{@"username":@"Vie",@"pwd":@"123456",};//3.发送POST请求/*第一个参数:请求路径(NSString)+ 不需要加参数第二个参数:发送给服务器的参数数据第三个参数:progress 进度回调第四个参数:success  成功之后的回调(此处的成功或者是失败指的是整个请求)task:请求任务responseObject:注意!!!响应体信息--->(json--->oc))task.response: 响应头信息第五个参数:failure 失败之后的回调*/[manager POST:@"需要请求的URL" parameters:dic progress:nil success:^(NSURLSessionDataTask * _Nonnull task, id  _Nullable responseObject) {NSLog(@"success--%@--%@",[responseObject class],responseObject);} failure:^(NSURLSessionDataTask * _Nullable task, NSError * _Nonnull error) {NSLog(@"failure--%@",error);}];
}/**@author Vie,2017年12月19日09:22:11下载操作*/
-(void)download
{//1.创建会话管理者AFHTTPSessionManager *manager = [AFHTTPSessionManager manager];//2.确定请求路径NSURL *url = [NSURL URLWithString:@"需要请求的URL"];//3.创建请求对象NSURLRequest *request = [NSURLRequest requestWithURL:url];//4.发送网络请求下载文件/*第一个参数:请求对象第二个参数:progress 进度回调downloadProgress@property int64_t totalUnitCount;@property int64_t completedUnitCount;第三个参数:destination 让我们告诉系统应该把文件存放到什么地方内部自动的完成剪切处理第四个参数: completionHandler 完成之后的回调response 响应头信息filePath  文件最终的存储路径error 错误信息*/[[manager downloadTaskWithRequest:request progress:^(NSProgress * _Nonnull downloadProgress) {//下载进度NSLog(@"%f",1.0 * downloadProgress.completedUnitCount / downloadProgress.totalUnitCount);} destination:^NSURL * _Nonnull(NSURL * _Nonnull targetPath, NSURLResponse * _Nonnull response) {//拼接文件的全路径NSString *fullpath = [[NSSearchPathForDirectoriesInDomains(NSCachesDirectory, NSUserDomainMask, YES) lastObject] stringByAppendingPathComponent:response.suggestedFilename];NSLog(@"fullpath == %@",fullpath);return [NSURL fileURLWithPath:fullpath];} completionHandler:^(NSURLResponse * _Nonnull response, NSURL * _Nullable filePath, NSError * _Nullable error) {NSLog(@"%@",filePath);}] resume];}/**@author Vie,2017年12月19日09:22:11上传操作*/
-(void)upload
{//1.创建会话管理者AFHTTPSessionManager *manager = [AFHTTPSessionManager manager];//2.发送请求上传文件/*第一个参数:请求路径(NSString)第二个参数:非文件参数第三个参数:constructingBodyWithBlock 拼接数据(告诉AFN要上传的数据是哪些)第四个参数:progress 进度回调第五个参数:success 成功回调responseObject:响应体第六个参数:failure 失败的回调*/[manager POST:@"需要请求的URL" parameters:nil constructingBodyWithBlock:^(id<AFMultipartFormData>  _Nonnull formData) {NSData *data = UIImagePNGRepresentation([UIImage imageNamed:@"1.png"]);//拼接数据/*第一个参数:文件参数 (二进制数据)第二个参数:参数名~file第三个参数:该文件上传到服务器以什么名称来保存第四个参数:*/[formData appendPartWithFileData:data name:@"file" fileName:@"123.png" mimeType:@"image/png"];} progress:^(NSProgress * _Nonnull uploadProgress) {//上传进度NSLog(@"%f",1.0 * uploadProgress.completedUnitCount / uploadProgress.totalUnitCount);} success:^(NSURLSessionDataTask * _Nonnull task, id  _Nullable responseObject) {NSLog(@"success--%@",responseObject);} failure:^(NSURLSessionDataTask * _Nullable task, NSError * _Nonnull error) {NSLog(@"failure -- %@",error);}];
}/**@author Vie,2017年12月19日09:22:11NSURLSessionConfiguration配置信息*/
-(NSURLSession *)session
{if (_session == nil) {//设置配置信息NSURLSessionConfiguration *config = [NSURLSessionConfiguration defaultSessionConfiguration];//统一设置请求超时config.timeoutIntervalForRequest = 15.0;//设置是否允许蜂窝网络访问config.allowsCellularAccess = YES;_session = [NSURLSession sessionWithConfiguration:config delegate:self delegateQueue:[NSOperationQueue mainQueue]];}return _session;
}/**@author Vie,2017年12月19日09:46:44json处理*/
-(void)JSon
{//1.创建会话管理者AFHTTPSessionManager *manager = [AFHTTPSessionManager manager];/*1)afn内部默认已经完成了JSON解析工作优点:方便缺点:如果服务器返回的数据不是JSON会报错*/NSDictionary *dict = @{@"type":@"JSON"};//2.发请求[manager GET:@"需要请求的URL" parameters:dict progress:nil success:^(NSURLSessionDataTask * _Nonnull task, id  _Nullable responseObject) {NSLog(@"%@--%@",[responseObject class],responseObject);} failure:^(NSURLSessionDataTask * _Nullable task, NSError * _Nonnull error) {NSLog(@"%@---",error);}];
}/**@author Vie,2017年12月19日09:46:44XML处理*/
-(void)XML
{
//    <NSXMLParserDelegate>代理协议//1.创建会话管理者AFHTTPSessionManager *manager = [AFHTTPSessionManager manager];//设置以XML的方式来解析数据manager.responseSerializer = [AFXMLParserResponseSerializer serializer];NSDictionary *dict = @{@"type":@"XML"};//2.发请求[manager GET:@"需要请求的URL" parameters:dict progress:nil success:^(NSURLSessionDataTask * _Nonnull task, id  _Nullable responseObject) {NSLog(@"%@--%@",[responseObject class],responseObject);//1.创建解析器NSXMLParser *parser = (NSXMLParser *)responseObject;//2.设置代理parser.delegate = self;//3.开始解析
        [parser parse];} failure:^(NSURLSessionDataTask * _Nullable task, NSError * _Nonnull error) {NSLog(@"%@---",error);}];
}
#pragma mark NSXMLParserDelegate
-(void)parser:(NSXMLParser *)parser didStartElement:(NSString *)elementName namespaceURI:(NSString *)namespaceURI qualifiedName:(NSString *)qName attributes:(NSDictionary<NSString *,NSString *> *)attributeDict
{NSLog(@"%@--%@",elementName,attributeDict);
}/**@author Vie,2017年12月19日09:46:44其他数据类型处理*/
-(void)OtherData
{//1.创建会话管理者AFHTTPSessionManager *manager = [AFHTTPSessionManager manager];//设置不做处理manager.responseSerializer = [AFHTTPResponseSerializer serializer];//2.发请求[manager GET:@"需要请求的URL" parameters:nil progress:nil success:^(NSURLSessionDataTask * _Nonnull task, id  _Nullable responseObject) {NSLog(@"%@--%@",[responseObject class],responseObject);} failure:^(NSURLSessionDataTask * _Nullable task, NSError * _Nonnull error) {NSLog(@"%@---",error);}];
}/**@author Vie,2017年12月19日09:46:44网络状态监测*/
-(void)networkStatusChangeAFN
{//1.获得一个网络状态监听管理者AFNetworkReachabilityManager *manager =  [AFNetworkReachabilityManager sharedManager];//2.监听状态的改变(当网络状态改变的时候就会调用该block)[manager setReachabilityStatusChangeBlock:^(AFNetworkReachabilityStatus status) {/*AFNetworkReachabilityStatusUnknown          = -1,  未知AFNetworkReachabilityStatusNotReachable     = 0,   没有网络AFNetworkReachabilityStatusReachableViaWWAN = 1,    3G|4GAFNetworkReachabilityStatusReachableViaWiFi = 2,   WIFI*/switch (status) {case AFNetworkReachabilityStatusReachableViaWiFi:NSLog(@"wifi");break;case AFNetworkReachabilityStatusReachableViaWWAN:NSLog(@"蜂窝网络");break;case AFNetworkReachabilityStatusNotReachable:NSLog(@"没有网络");break;case AFNetworkReachabilityStatusUnknown:NSLog(@"未知");break;default:break;}}];//3.手动开启 开始监听
    [manager startMonitoring];
}@end
下载地址:https://github.com/hackiftekhar/IQKeyboardManager
//在 AppDelegate 中设置全局属性- (BOOL)application:(UIApplication *)application didFinishLaunchingWithOptions:(NSDictionary *)launchOptions {IQKeyboardManager *keyboardManager = [IQKeyboardManager sharedManager]; // 获取类库的单例变量
keyboardManager.enable = YES; // 控制整个功能是否启用
keyboardManager.shouldResignOnTouchOutside = YES; // 控制点击背景是否收起键盘
keyboardManager.shouldToolbarUsesTextFieldTintColor = YES; // 控制键盘上的工具条文字颜色是否用户自定义
keyboardManager.toolbarManageBehaviour = IQAutoToolbarBySubviews; // 有多个输入框时,可以通过点击Toolbar 上的“前一个”“后一个”按钮来实现移动到不同的输入框
keyboardManager.enableAutoToolbar = YES; // 控制是否显示键盘上的工具条
keyboardManager.shouldShowTextFieldPlaceholder = YES; // 是否显示占位文字
keyboardManager.placeholderFont = [UIFont boldSystemFontOfSize:17]; // 设置占位文字的字体
keyboardManager.keyboardDistanceFromTextField = 10.0f; // 输入框距离键盘的距离return YES;
}