一个做二维码问卷调查的网站/网络营销活动策划方案
A Basic Effect Material
理解材质系统结构最好的方法就是在应用程序中使用该系统。在这一节,我们将会创建一个material类用于表示BasicEffect.fx shader,并使用该类渲染一个sphere object。列表16.11列出了BasicMaterial类的声明代码,以及一个对应的BasicMaterialVertex结构体。列表16.11 The BasicMaterial.h Header File
#pragma once#include "Common.h"
#include "Material.h"namespace Library
{typedef struct _BasicMaterialVertex{XMFLOAT4 Position;XMFLOAT4 Color;_BasicMaterialVertex() { }_BasicMaterialVertex(XMFLOAT4 position, XMFLOAT4 color): Position(position), Color(color) { }} BasicMaterialVertex;class BasicMaterial : public Material{RTTI_DECLARATIONS(BasicMaterial, Material)MATERIAL_VARIABLE_DECLARATION(WorldViewProjection)public:BasicMaterial();virtual void Initialize(Effect* effect) override;		virtual void CreateVertexBuffer(ID3D11Device* device, const Mesh& mesh, ID3D11Buffer** vertexBuffer) const override;void CreateVertexBuffer(ID3D11Device* device, BasicMaterialVertex* vertices, UINT vertexCount, ID3D11Buffer** vertexBuffer) const;virtual UINT VertexSize() const override;};
}
BasicMaterialVertex结构体用于替代在之前所创建的几个示例中重复的BasicEffectVertex结构体。结构体的名称以及在BasicMaterial.h头文件中所处的位置表明了相应的用途。
在BasicMaterial类中,除了从Material基类继承的成员之外,几乎没有其他的成员变量或函数。首先使用MATERIAL_VARIABLE_DECLARATION宏声明了一个WorldViewProject shader变量。然后重写了继承而来的Material::Initialize()和Material::VertexSize()函数,以及mesh-version(通过Mesh对象创建vertex buffer)的Material::CreateVertexBuffer()函数。还增加一个新的CreateVertexBuffer()函数,用于从一个BasicMaterialVertex类对象数组创建一个vertex buffer。这些变量和函数声明是Material类的所有派生类的通常设计方法。
列表16.12列出了BasicMaterial类的实现代码。
列表16.12 The BasicMaterial.cpp File
#include "BasicMaterial.h"
#include "GameException.h"
#include "Mesh.h"
#include "ColorHelper.h"namespace Library
{RTTI_DEFINITIONS(BasicMaterial)	BasicMaterial::BasicMaterial(): Material("main11"),MATERIAL_VARIABLE_INITIALIZATION(WorldViewProjection){}MATERIAL_VARIABLE_DEFINITION(BasicMaterial, WorldViewProjection)void BasicMaterial::Initialize(Effect* effect){Material::Initialize(effect);MATERIAL_VARIABLE_RETRIEVE(WorldViewProjection)D3D11_INPUT_ELEMENT_DESC inputElementDescriptions[] ={{ "POSITION", 0, DXGI_FORMAT_R32G32B32A32_FLOAT, 0, 0, D3D11_INPUT_PER_VERTEX_DATA, 0 },{ "COLOR",    0, DXGI_FORMAT_R32G32B32A32_FLOAT, 0, D3D11_APPEND_ALIGNED_ELEMENT, D3D11_INPUT_PER_VERTEX_DATA, 0 }};CreateInputLayout("main11", "p0", inputElementDescriptions, ARRAYSIZE(inputElementDescriptions));}void BasicMaterial::CreateVertexBuffer(ID3D11Device* device, const Mesh& mesh, ID3D11Buffer** vertexBuffer) const{const std::vector<XMFLOAT3>& sourceVertices = mesh.Vertices();std::vector<BasicMaterialVertex> vertices;vertices.reserve(sourceVertices.size());if (mesh.VertexColors().size() > 0){std::vector<XMFLOAT4>* vertexColors = mesh.VertexColors().at(0);assert(vertexColors->size() == sourceVertices.size());for (UINT i = 0; i < sourceVertices.size(); i++){XMFLOAT3 position = sourceVertices.at(i);XMFLOAT4 color = vertexColors->at(i);vertices.push_back(BasicMaterialVertex(XMFLOAT4(position.x, position.y, position.z, 1.0f), color));}}else{XMFLOAT4 color = XMFLOAT4(reinterpret_cast<const float*>(&ColorHelper::White));for (UINT i = 0; i < sourceVertices.size(); i++){XMFLOAT3 position = sourceVertices.at(i);vertices.push_back(BasicMaterialVertex(XMFLOAT4(position.x, position.y, position.z, 1.0f), color));}}CreateVertexBuffer(device, &vertices[0], vertices.size(), vertexBuffer);}void BasicMaterial::CreateVertexBuffer(ID3D11Device* device, BasicMaterialVertex* vertices, UINT vertexCount, ID3D11Buffer** vertexBuffer) const{D3D11_BUFFER_DESC vertexBufferDesc;ZeroMemory(&vertexBufferDesc, sizeof(vertexBufferDesc));vertexBufferDesc.ByteWidth = VertexSize() * vertexCount;vertexBufferDesc.Usage = D3D11_USAGE_IMMUTABLE;		vertexBufferDesc.BindFlags = D3D11_BIND_VERTEX_BUFFER;D3D11_SUBRESOURCE_DATA vertexSubResourceData;ZeroMemory(&vertexSubResourceData, sizeof(vertexSubResourceData));vertexSubResourceData.pSysMem = vertices;if (FAILED(device->CreateBuffer(&vertexBufferDesc, &vertexSubResourceData, vertexBuffer))){throw GameException("ID3D11Device::CreateBuffer() failed.");}}UINT BasicMaterial::VertexSize() const{return sizeof(BasicMaterialVertex);}
}
在BasicMaterial类的构造函数中,使用字符串main11作为technique的默认名称,并使用MATERIAL_VARIABLE_INITIALIZATION宏初始化变量WorldViewProjection。然后使用MATERIAL_VARIABLE_DEFINITION宏定义了一个用于访问WorldViewProjection变量的成员函数BasciMaterail::WorldViewProjection()。所有以这种宏定义的方式创建的访问函数都返回一个Variable引用类型的对象,该对象存储在对应的Effect类中。通过使用MATERIAL_VARIABLE_RETRIVE宏可以从Effect类中检索World-ViewProjection变量值并存储到对应的成员变量中。以这种方式获取变量值有两点好处:第一,把检索到的变量值缓存可以重复的变量查找操作;第二,可以(在运行时)验证要查找的effect是否包含在effect中。
接下来,创建一个D3D11_INPUT_ELEMENT_DESC结构体对象数组,并使用该数组作为调用Material::CreateInputLayout()函数的参数。
下面开始分析BasicMaterial::CreateVertexBuffer()函数。这个mesh-version(通过Mesh对象创建vertex buffer)的函数与上一章的model和textured model示例代码具有相同的结构。把这些代码放到BasciMaterial类中,只是一种正确的封装方式。在mesh-version的BasciMaterial::CreateVertexBuffer()函数中,又调用了BasicMaterailVertex版本(通过BasicMaterialVertex创建vertex buffer)的BasicMaterial::CreateVertexBuffer()函数,该函数才是真正创建vertex buffer的地方。使用这个种方法就可以只使用三个CreateVertexBuffer()函数中的任何一个,创建一个vertex buffer用于BasicEffect.fx shader。(其中model-version的CreateVertexBuffer()函数继承自Material类)。
最后,在BasicMaterial类中实现了VertexSize()函数,该函数返回BasicMaterialVertex结构体的大小。
A Basic Material Demo
下面使用Material类材质系统重新编写上一章的model示例,可以减少大量代码。列表16.13列出了MaterialDemo类的声明代码。
列表16.13 The MaterialDemo.h Header File
#pragma once#include "DrawableGameComponent.h"using namespace Library;namespace Library
{class Effect;class BasicMaterial;
}namespace Rendering
{class MaterialDemo : public DrawableGameComponent{RTTI_DECLARATIONS(MaterialDemo, DrawableGameComponent)public:MaterialDemo(Game& game, Camera& camera);~MaterialDemo();virtual void Initialize() override;virtual void Draw(const GameTime& gameTime) override;private:MaterialDemo();MaterialDemo(const MaterialDemo& rhs);MaterialDemo& operator=(const MaterialDemo& rhs);	Effect* mBasicEffect;BasicMaterial* mBasicMaterial;ID3D11Buffer* mVertexBuffer;ID3D11Buffer* mIndexBuffer;UINT mIndexCount;XMFLOAT4X4 mWorldMatrix;	};
}
通过比较MaterialDemo类与上一章的ModelDemo类的声明代码,可以发现在MaterialDemo中已经完全去掉了mEffect,mTechnique,mPass,mWvpVariable和mInputLayout成员变量。同样,BasicEffectVertex结构体的声明代码也去掉了。
与声明代码一样,Material类的实现代码也是非常简单,如列表16.14所示。
列表16.14 The MaterialDemo.cpp File
#include "MaterialDemo.h"
#include "Game.h"
#include "GameException.h"
#include "MatrixHelper.h"
#include "Camera.h"
#include "Utility.h"
#include "Model.h"
#include "Mesh.h"
#include "BasicMaterial.h"namespace Rendering
{RTTI_DEFINITIONS(MaterialDemo)MaterialDemo::MaterialDemo(Game& game, Camera& camera): DrawableGameComponent(game, camera),  mBasicMaterial(nullptr), mBasicEffect(nullptr), mWorldMatrix(MatrixHelper::Identity),mVertexBuffer(nullptr), mIndexBuffer(nullptr), mIndexCount(0){}MaterialDemo::~MaterialDemo(){DeleteObject(mBasicMaterial);DeleteObject(mBasicEffect);	ReleaseObject(mVertexBuffer);ReleaseObject(mIndexBuffer);}void MaterialDemo::Initialize(){SetCurrentDirectory(Utility::ExecutableDirectory().c_str());// Load the modelstd::unique_ptr<Model> model(new Model(*mGame, "Content\\Models\\Sphere.obj", true));// Initialize the materialmBasicEffect = new Effect(*mGame);mBasicEffect->LoadCompiledEffect(L"Content\\Effects\\BasicEffect.cso");mBasicMaterial = new BasicMaterial();mBasicMaterial->Initialize(mBasicEffect);// Create the vertex and index buffersMesh* mesh = model->Meshes().at(0);mBasicMaterial->CreateVertexBuffer(mGame->Direct3DDevice(), *mesh, &mVertexBuffer);mesh->CreateIndexBuffer(&mIndexBuffer);mIndexCount = mesh->Indices().size();}void MaterialDemo::Draw(const GameTime& gameTime){ID3D11DeviceContext* direct3DDeviceContext = mGame->Direct3DDeviceContext();        direct3DDeviceContext->IASetPrimitiveTopology(D3D11_PRIMITIVE_TOPOLOGY_TRIANGLELIST);Pass* pass = mBasicMaterial->CurrentTechnique()->Passes().at(0);ID3D11InputLayout* inputLayout = mBasicMaterial->InputLayouts().at(pass);direct3DDeviceContext->IASetInputLayout(inputLayout);UINT stride = mBasicMaterial->VertexSize();UINT offset = 0;direct3DDeviceContext->IASetVertexBuffers(0, 1, &mVertexBuffer, &stride, &offset);		direct3DDeviceContext->IASetIndexBuffer(mIndexBuffer, DXGI_FORMAT_R32_UINT, 0);XMMATRIX worldMatrix = XMLoadFloat4x4(&mWorldMatrix);XMMATRIX wvp = worldMatrix * mCamera->ViewMatrix() * mCamera->ProjectionMatrix();mBasicMaterial->WorldViewProjection() << wvp;pass->Apply(0, direct3DDeviceContext);direct3DDeviceContext->DrawIndexed(mIndexCount, 0, 0);}
}
在MaterialDemo的实现代码中,已经删除了编译shader;查询techniques、passes和variables;以及创建vertex buffers的全部代码。但是该示例中依然保持了与Model示例的一样演示功能。这种新的设计模式将会用于后面所示的示例中。
A Skybox Material
最后通过创建一个skybox材质以及对应的示例程序,加强对本章知识点的理解。使用列表16.15中的代码创建一个SkyboxMaterial类。该类对应于第8章“Gleaming the Cube”中所编写的Skybox.fx shader。列表16.15 Declaration of the SkyboxMaterial Class
#pragma once#include "Common.h"
#include "Material.h"namespace Library
{class SkyboxMaterial : public Material{RTTI_DECLARATIONS(SkyboxMaterial, Material)MATERIAL_VARIABLE_DECLARATION(WorldViewProjection)MATERIAL_VARIABLE_DECLARATION(SkyboxTexture)public:SkyboxMaterial();virtual void Initialize(Effect* effect) override;virtual void CreateVertexBuffer(ID3D11Device* device, const Mesh& mesh, ID3D11Buffer** vertexBuffer) const override;void CreateVertexBuffer(ID3D11Device* device, XMFLOAT4* vertices, UINT vertexCount, ID3D11Buffer** vertexBuffer) const;virtual UINT VertexSize() const override;};
}
列表16.16中列出了SkyboxMaterial类的部分实现代码,其中为了简洁没有列出CreateVertexBuffer()和VertexSize()函数。在本书的配套网站上提供了完整的实现代码。
列表16.16 Implementation of the SkyboxMaterial Class (Abbreviated)
SkyboxMaterial::SkyboxMaterial(): Material("main11"),MATERIAL_VARIABLE_INITIALIZATION(WorldViewProjection), MATERIAL_VARIABLE_INITIALIZATION(SkyboxTexture)
{
}MATERIAL_VARIABLE_DEFINITION(SkyboxMaterial, WorldViewProjection)
MATERIAL_VARIABLE_DEFINITION(SkyboxMaterial, SkyboxTexture)void SkyboxMaterial::Initialize(Effect* effect)
{Material::Initialize(effect);MATERIAL_VARIABLE_RETRIEVE(WorldViewProjection)MATERIAL_VARIABLE_RETRIEVE(SkyboxTexture)D3D11_INPUT_ELEMENT_DESC inputElementDescriptions[] ={{ "POSITION", 0, DXGI_FORMAT_R32G32B32A32_FLOAT, 0, 0, D3D11_INPUT_PER_VERTEX_DATA, 0 }};CreateInputLayout("main11", "p0", inputElementDescriptions, ARRAYSIZE(inputElementDescriptions));
}
SkyboxMaterial类与BasicMaterial类的实现代码有很多相似的地方。不同之处是shader变量以及input layout,另外在SkyboxMaterial不用再创建vertex结构体,因为在里只有一个shader输入,即vertex position,这是一个XMFLOAT4类型的变量。
A Skybox Component
下面创建一个可复用的Skybox组件用于演示SkyboxMaterial类的用法,Skybox component的声明代码如列表16.7所示。列表16.17 Declaration of the Skybox Class
#pragma once#include "Common.h"
#include "DrawableGameComponent.h"namespace Library
{class Effect;class SkyboxMaterial;class Skybox : public DrawableGameComponent{RTTI_DECLARATIONS(Skybox, DrawableGameComponent)public:Skybox(Game& game, Camera& camera, const std::wstring& cubeMapFileName, float scale);~Skybox();virtual void Initialize() override;virtual void Update(const GameTime& gameTime) override;		virtual void Draw(const GameTime& gameTime) override;private:Skybox();Skybox(const Skybox& rhs);Skybox& operator=(const Skybox& rhs);std::wstring mCubeMapFileName;Effect* mEffect;SkyboxMaterial* mMaterial;ID3D11ShaderResourceView* mCubeMapShaderResourceView;ID3D11Buffer* mVertexBuffer;ID3D11Buffer* mIndexBuffer;UINT mIndexCount;XMFLOAT4X4 mWorldMatrix;XMFLOAT4X4 mScaleMatrix;};
}
Skybox类的构造函数中包含了用于初始化Skybox::mCubeMapFileName变量的参数cubeMapFileName,以及初始Skybox::mScaleMatrix变量的参数scale(通过调用XMMatrixScaling()函数)。其他的实现代码都包含在Initialize(),Update()和Draw()函数中(见列表16.18)。
列表16.18 Implementation of the Skybox Class (Abbreviated)
void Skybox::Initialize()
{SetCurrentDirectory(Utility::ExecutableDirectory().c_str());std::unique_ptr<Model> model(new Model(*mGame, "Content\\Models\\Sphere.obj", true));mEffect = new Effect(*mGame);mEffect->LoadCompiledEffect(L"Content\\Effects\\Skybox.cso");mMaterial = new SkyboxMaterial();mMaterial->Initialize(mEffect);Mesh* mesh = model->Meshes().at(0);mMaterial->CreateVertexBuffer(mGame->Direct3DDevice(), *mesh, &mVertexBuffer);mesh->CreateIndexBuffer(&mIndexBuffer);mIndexCount = mesh->Indices().size();HRESULT hr = DirectX::CreateDDSTextureFromFile(mGame->Direct3DDevice(), mCubeMapFileName.c_str(), nullptr, &mCubeMapShaderResourceView);if (FAILED(hr)){throw GameException("CreateDDSTextureFromFile() failed.", hr);}
}void Skybox::Update(const GameTime& gameTime)
{const XMFLOAT3& position = mCamera->Position();XMStoreFloat4x4(&mWorldMatrix, XMLoadFloat4x4(&mScaleMatrix) * XMMatrixTranslation(position.x, position.y, position.z));
}void Skybox::Draw(const GameTime& gametime)
{ID3D11DeviceContext* direct3DDeviceContext = mGame->Direct3DDeviceContext();direct3DDeviceContext->IASetPrimitiveTopology(D3D11_PRIMITIVE_TOPOLOGY_TRIANGLELIST);Pass* pass = mMaterial->CurrentTechnique()->Passes().at(0);ID3D11InputLayout* inputLayout = mMaterial->InputLayouts().at(pass);direct3DDeviceContext->IASetInputLayout(inputLayout);UINT stride = mMaterial->VertexSize();UINT offset = 0;direct3DDeviceContext->IASetVertexBuffers(0, 1, &mVertexBuffer, &stride, &offset);direct3DDeviceContext->IASetIndexBuffer(mIndexBuffer, DXGI_FORMAT_R32_UINT, 0);XMMATRIX wvp = XMLoadFloat4x4(&mWorldMatrix) * mCamera->ViewMatrix() * mCamera->ProjectionMatrix();mMaterial->WorldViewProjection() << wvp;mMaterial->SkyboxTexture() << mCubeMapShaderResourceView;pass->Apply(0, direct3DDeviceContext);direct3DDeviceContext->DrawIndexed(mIndexCount, 0, 0);
}
在Skybox::Initialize()函数中,加载了一个Skybox.cso文件,以及一个包含了cubemap的DDS格式文件。在Skybox::Update()函数中,通过把缩放矩阵和一个由camera的position创建的平移矩阵相乘得到world matrix(回顾一下前面讲过的,skybox必须总是位于camera的中心)。最后在Skybox::Draw()函数中完成渲染输出。其中,在使用SkyboxMaterial的两个公有函数WorldViewProjection()和SkyboxTexture(),修改对应的成员变量时使用了<<运算符语法。
使用下面的代码,在game components的vector容器中增加一个Skybox类的实例对象:
mSkybox = new Skybox(*this, *mCamera, L"Content\\Textures\\
Maskonaive2_1024.dds", 500.0f);
mComponents.push_back(mSkybox);
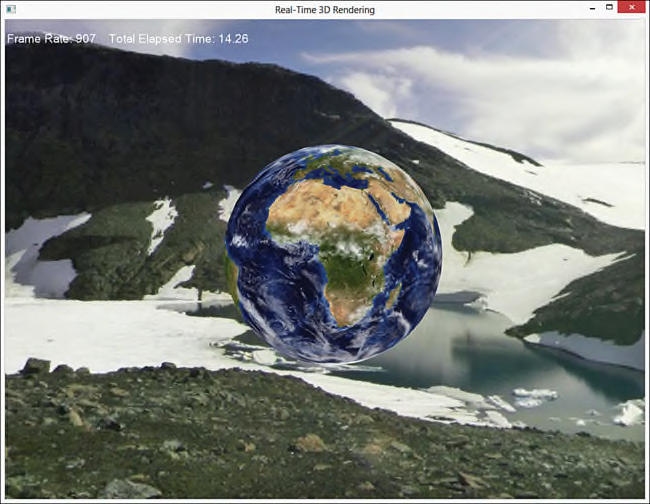
该示例程序的输出结果如图16.2所示。
总结
本章主要创建了一个材质系统用于更简单的完成应用程序与effects的交互。其中编写了一组类effects、techniques、passes、variables,用于封装Effects 11库中对应的接口类型,以及一个可扩展的Material类用于把这些类整合到一起。最后,通过两个示例程序演示了材质系统。在第一个示例中,重新编写了上一章的model示例。而在第二示例中,创建了一个可复用的skybox组件。在一下章,将会创建一组用于表示directional lights、point light以及spot-lights的类。并使用本章创建的材质系统支持第6章“Lighting Models”和第7章“Additional Lighting Models”所编写的lighting shaders,并编写对应的示例程序演示在场景中使用光照。
Exercises
1. From within the debugger, walk through the code to initialize the Effect, Technique, Pass, Variable, and Material classes in the MaterialDemo project. This exercise should help you better understand the design and implementation of these systems.2. Write a material class for the TextureMapping.fx effect. Then write a demo application to render the sphere.obj model mapped with a texture. Note: You can find many textures on the companion website.
2、编写一个material类(TextureMappingMaterial)用于处理TextureMapping.fx effect。然后缩写一个示例程序,使用一种纹理渲染sphere.obj模型。(也就是要使用材质系统重新编写上一章的TexturedModel示例)。注意:本书的配套网站上提供了大量的textures文件。