做ppt介绍网站/网络营销和传统营销的区别和联系
1. Jenkins项目构建类型
- 自由风格软件项目
- Maven项目
- 流水线项目
1.1 自由风格软件项目构建
下面演示创建一个自由风格项目来完成项目的集成过程:拉取代码->编译->打包
- 创建项目

image-20210815075032183.png
- 配置源码管理,从gitlab拉取代码
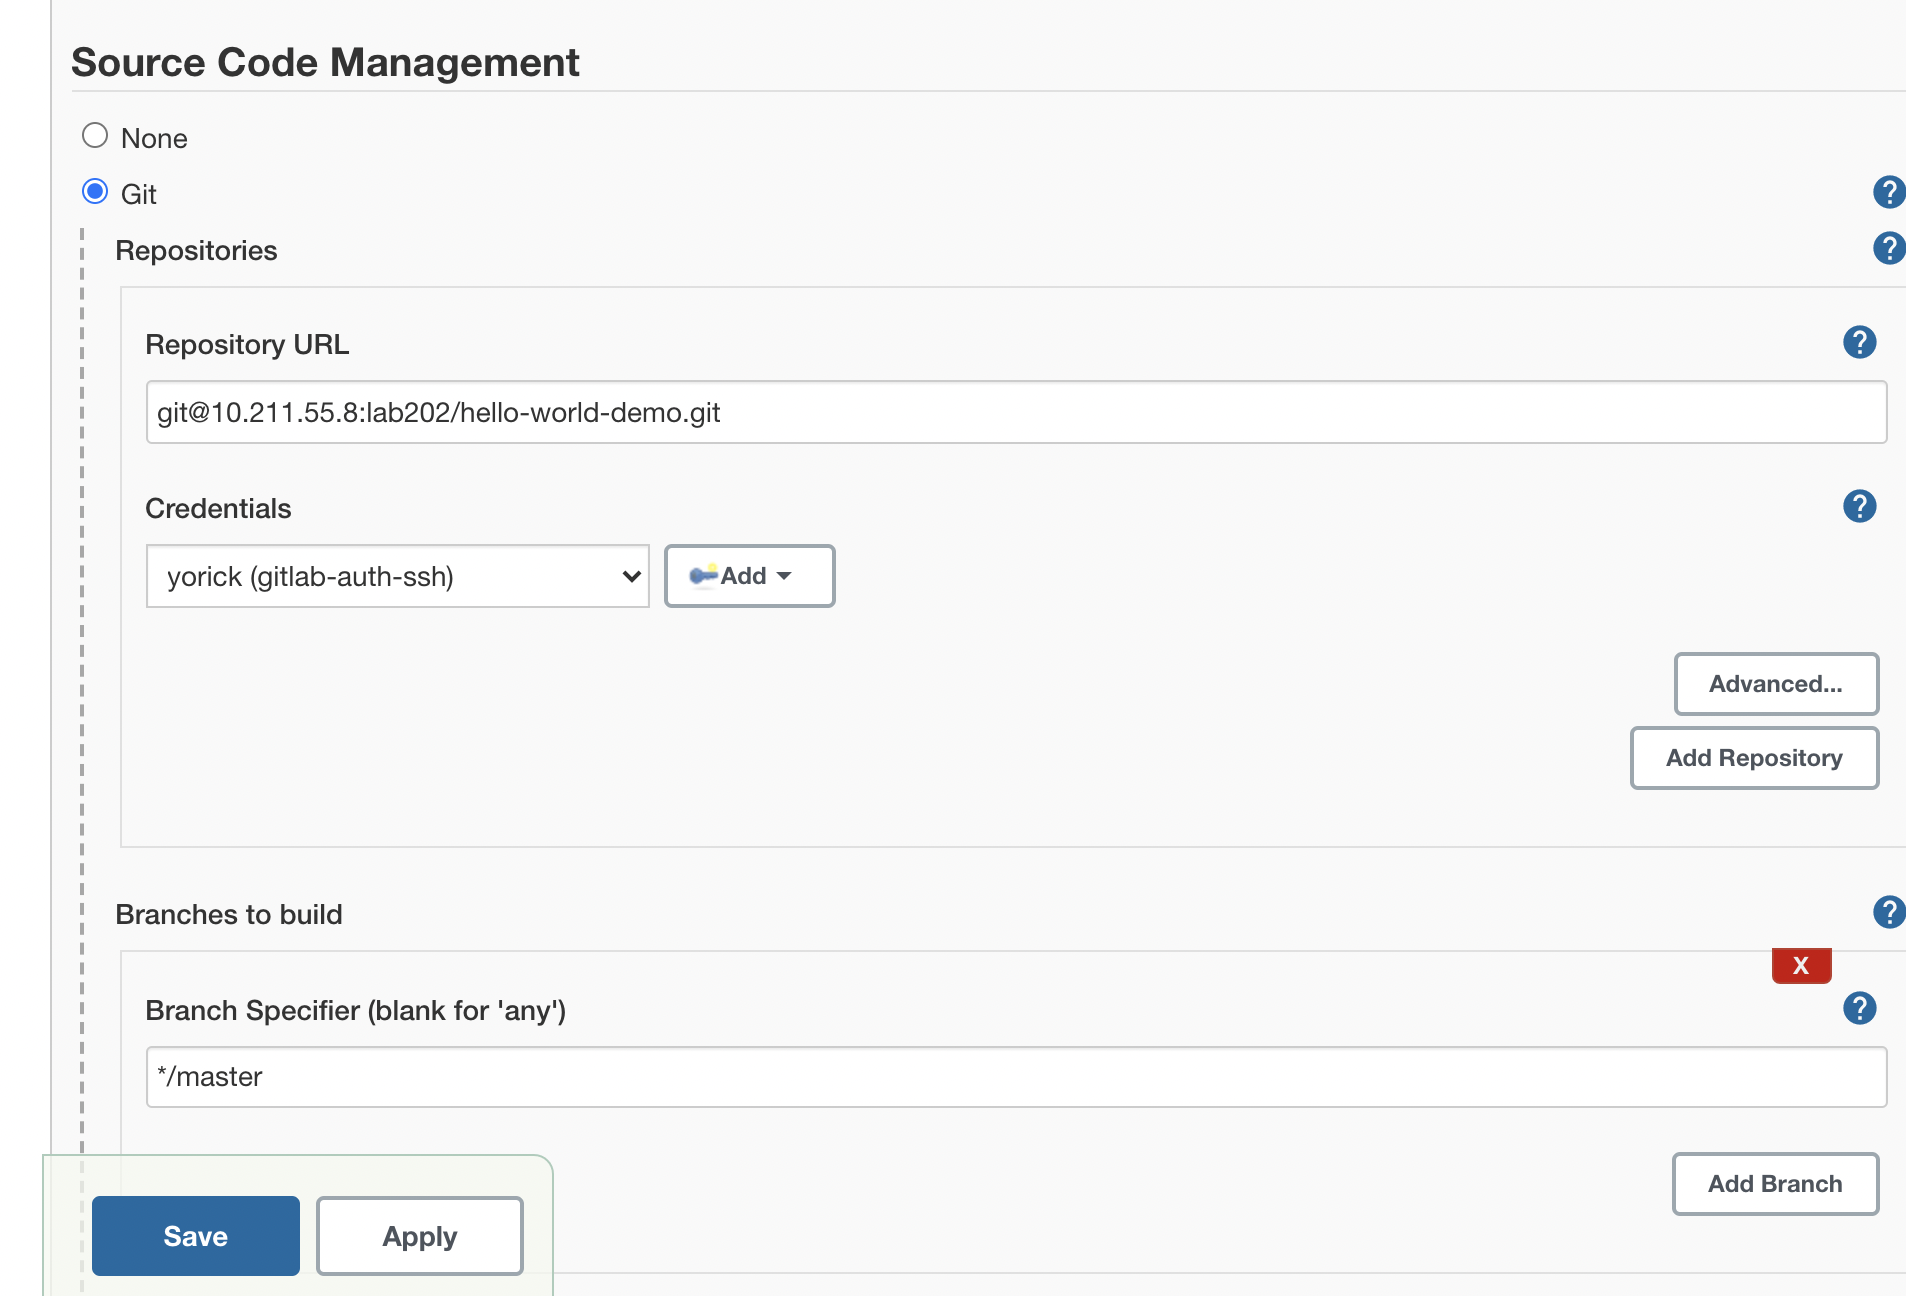
image-20210815075126202.png
- 构建->添加构建步骤->Executor Shell
echo "开始编译和打包"
mvn clean package
echo "编译和打包结束"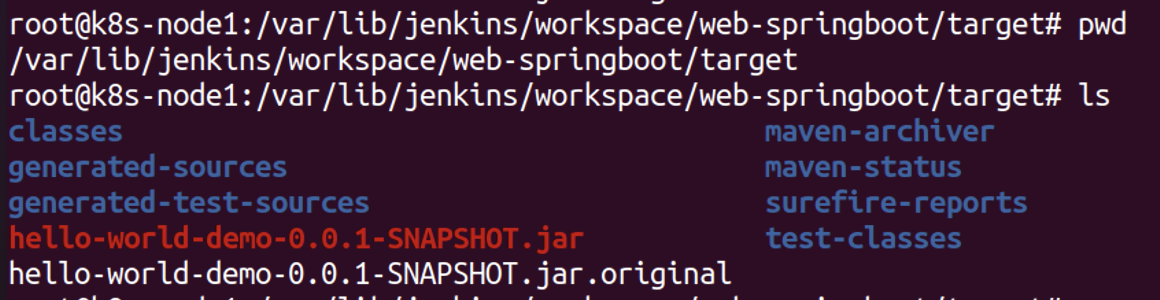
image-20210815075404912.png
1.2 Maven项目构建
- 安装 Maven Integration插件
- 创建Maven项目
image-20210815075800267.png
- 配置项目
拉取代码的过程和自由风格项目一样,只是"构建"部分不同
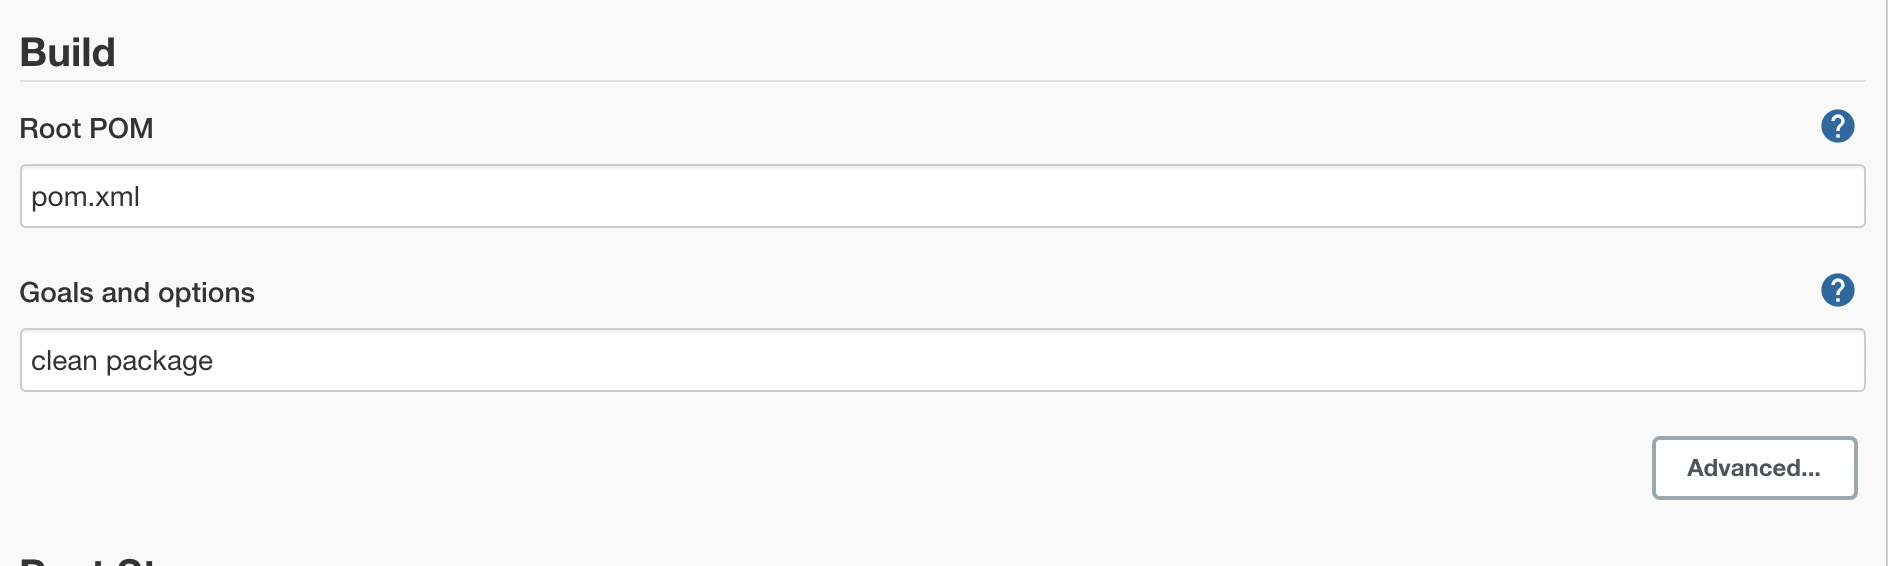
image-20210815075922118.png
image-20210815080032305.png
1.3 流水线项目构建
安装Pipeline插件
创建流水线任务
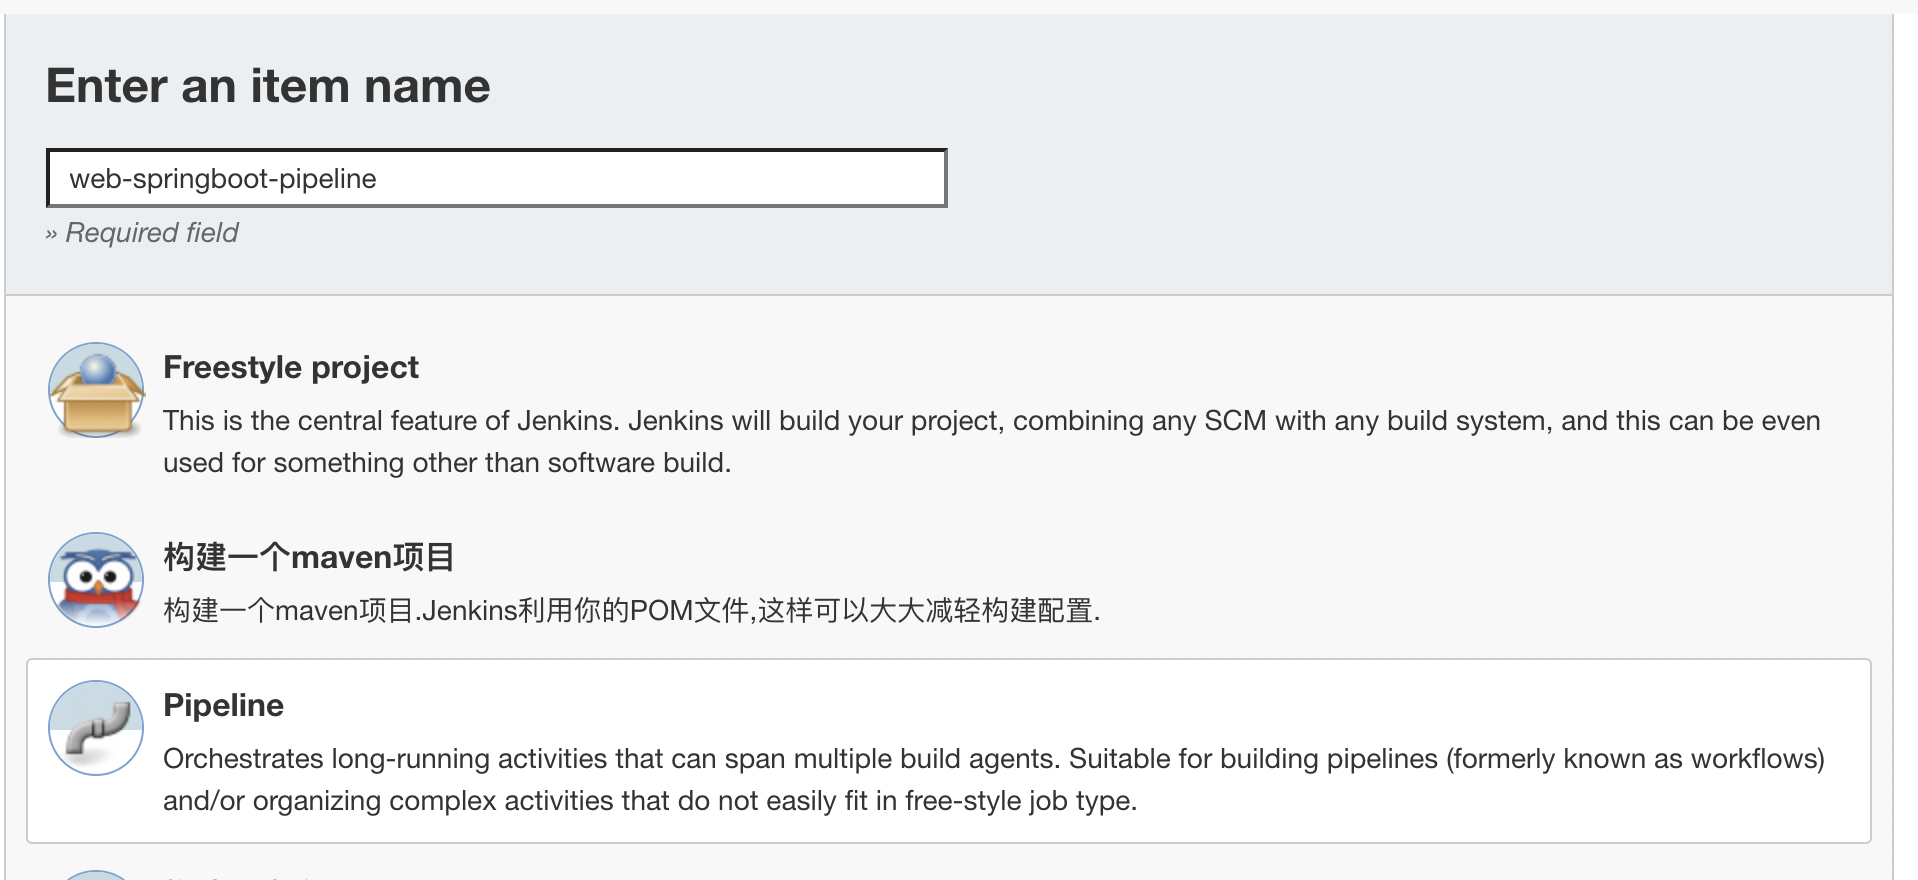
image-20210815080527461.png
- pipeline配置
方法一:Pipeline Script
流水线->选择HelloWorld模板,修改
//stages:代表整个流水线的所有执行阶段。通常stages只有1个,里面包含多个stage
//stage:代表流水线中的某个阶段,可能出现n个。一般分为拉取代码,编译构建,部署等阶段。
//steps:代表一个阶段内需要执行的逻辑。steps里面是shell脚本,git拉取代码,ssh远程发布等任意内容。
pipeline {agent anystages {stage('pull code') {steps {checkout([$class: 'GitSCM', branches: [[name: '*/master']], extensions: [], userRemoteConfigs: [[credentialsId: 'a8cfc168-b4d4-42f5-a5fc-88ab0101de8f', url: 'git@10.211.55.8:lab202/hello-world-demo.git']]])}}stage('bulid code') {steps {sh 'mvn clean package'}}}
}
方法二:Pipeline Script from SCM
- 在项目根目录建立
Jenkinsfile文件,把内容复制到该文件中,上传gitlab仓库
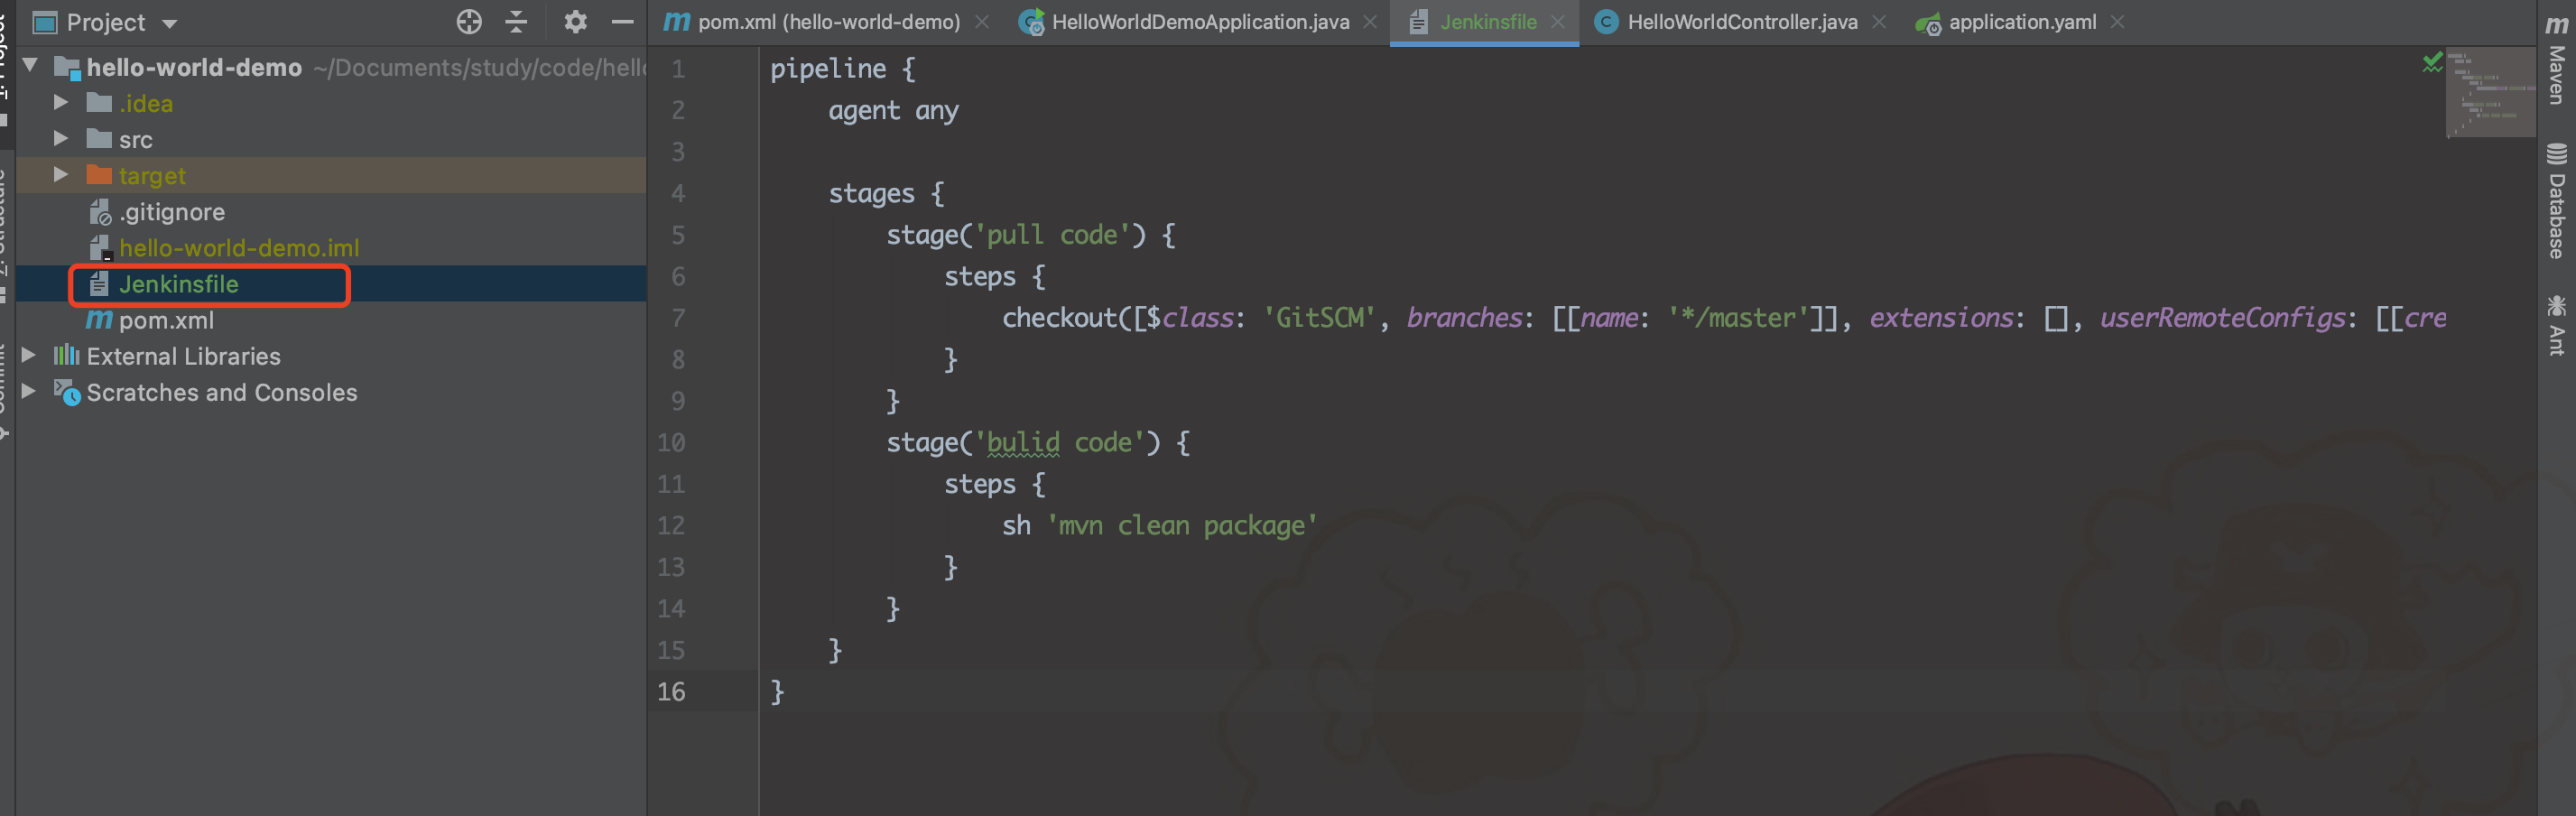
image-20210815081518403.png
- 在项目中引用该文件
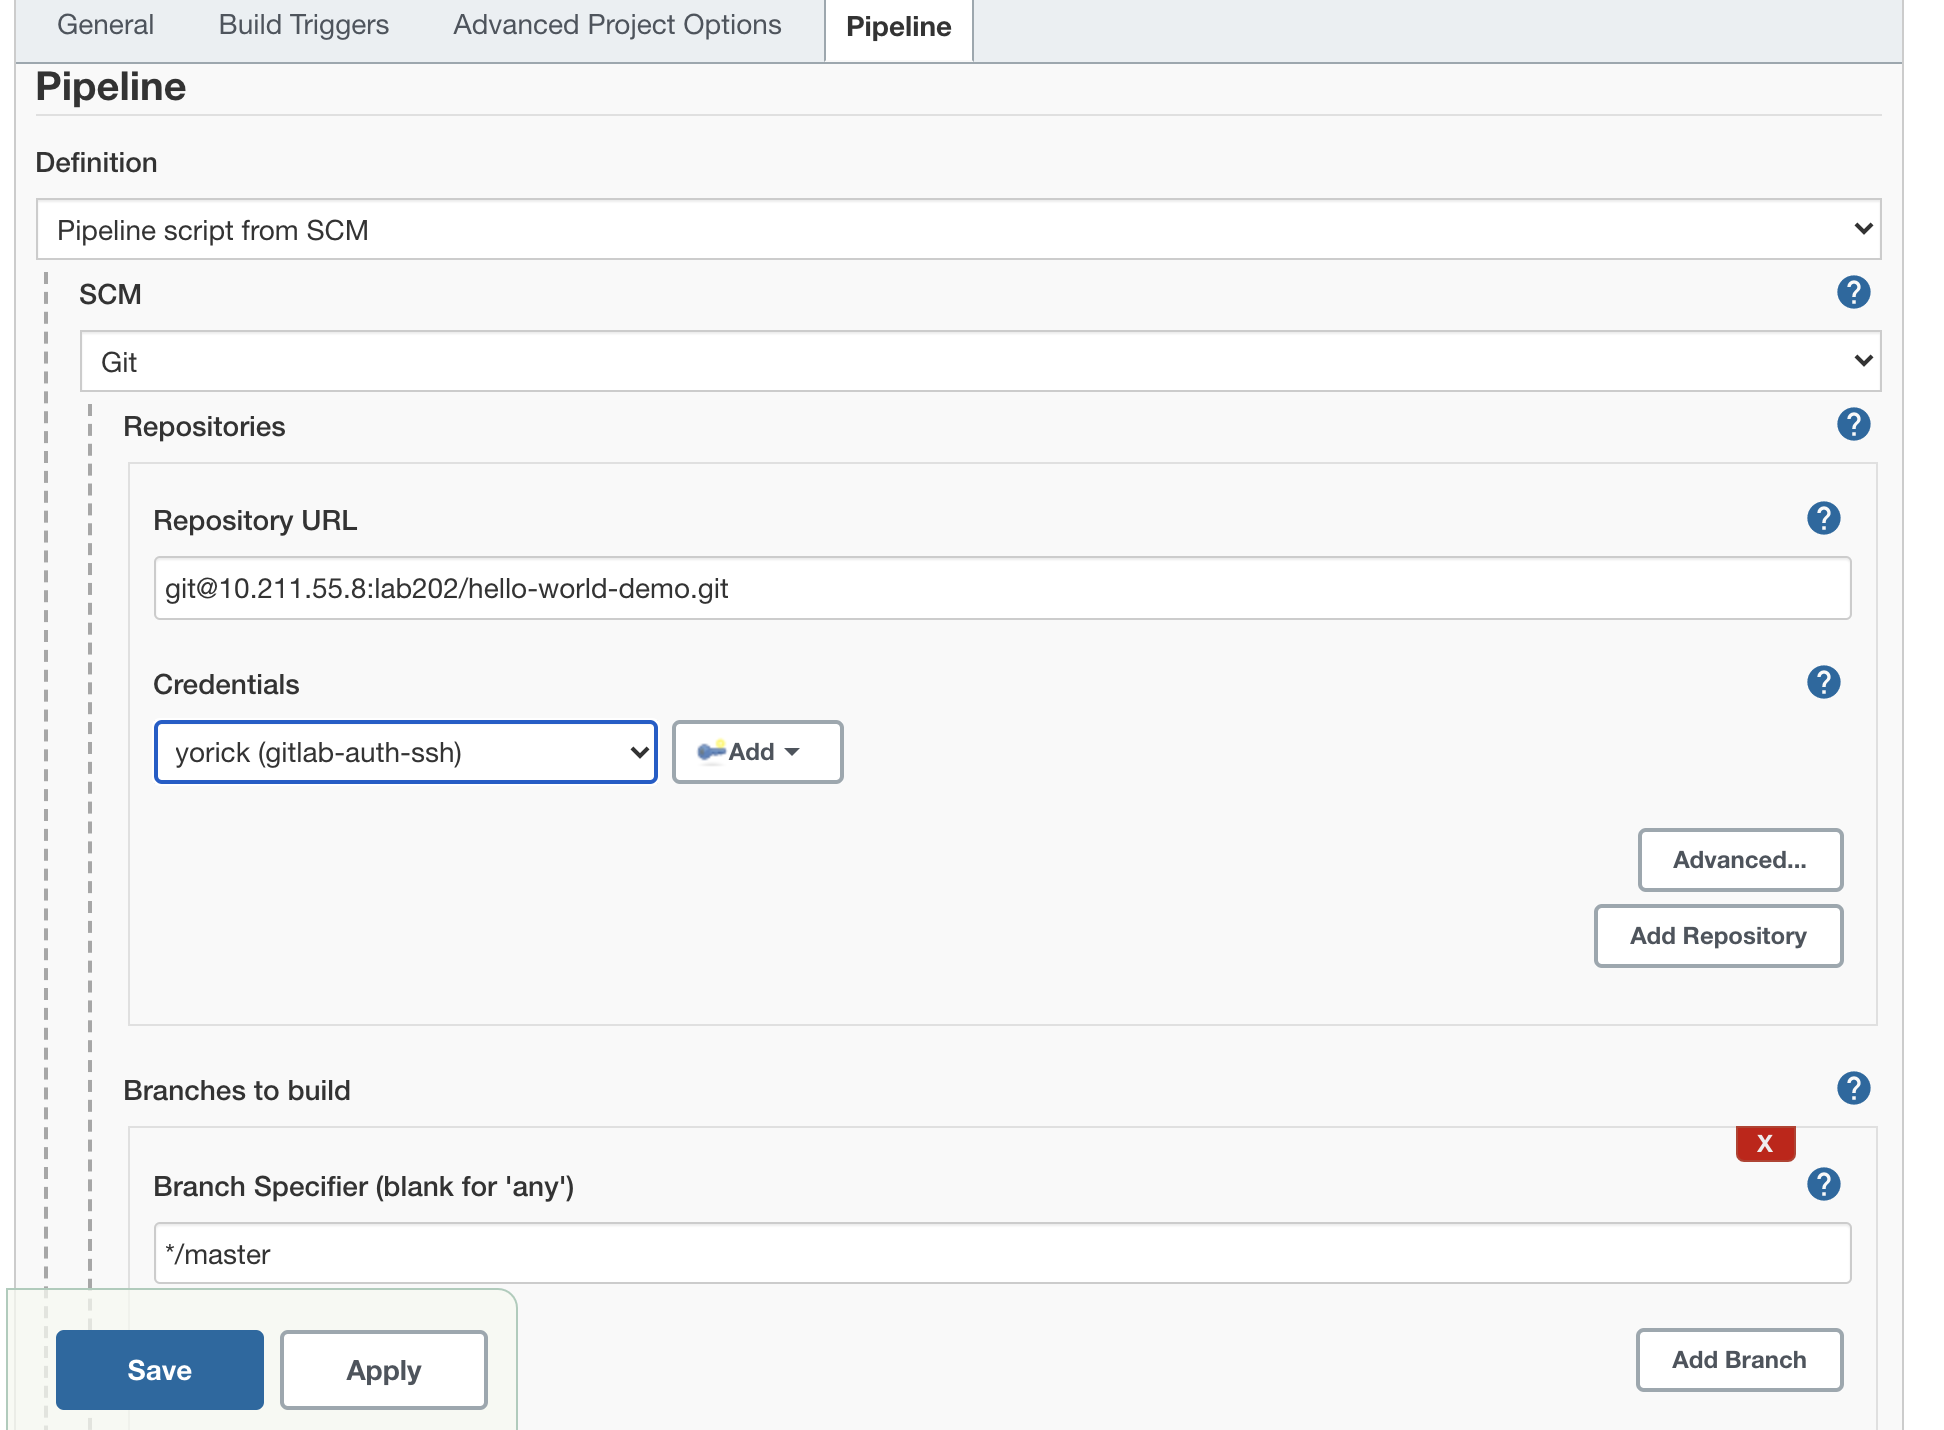
image-20210815082023344.png
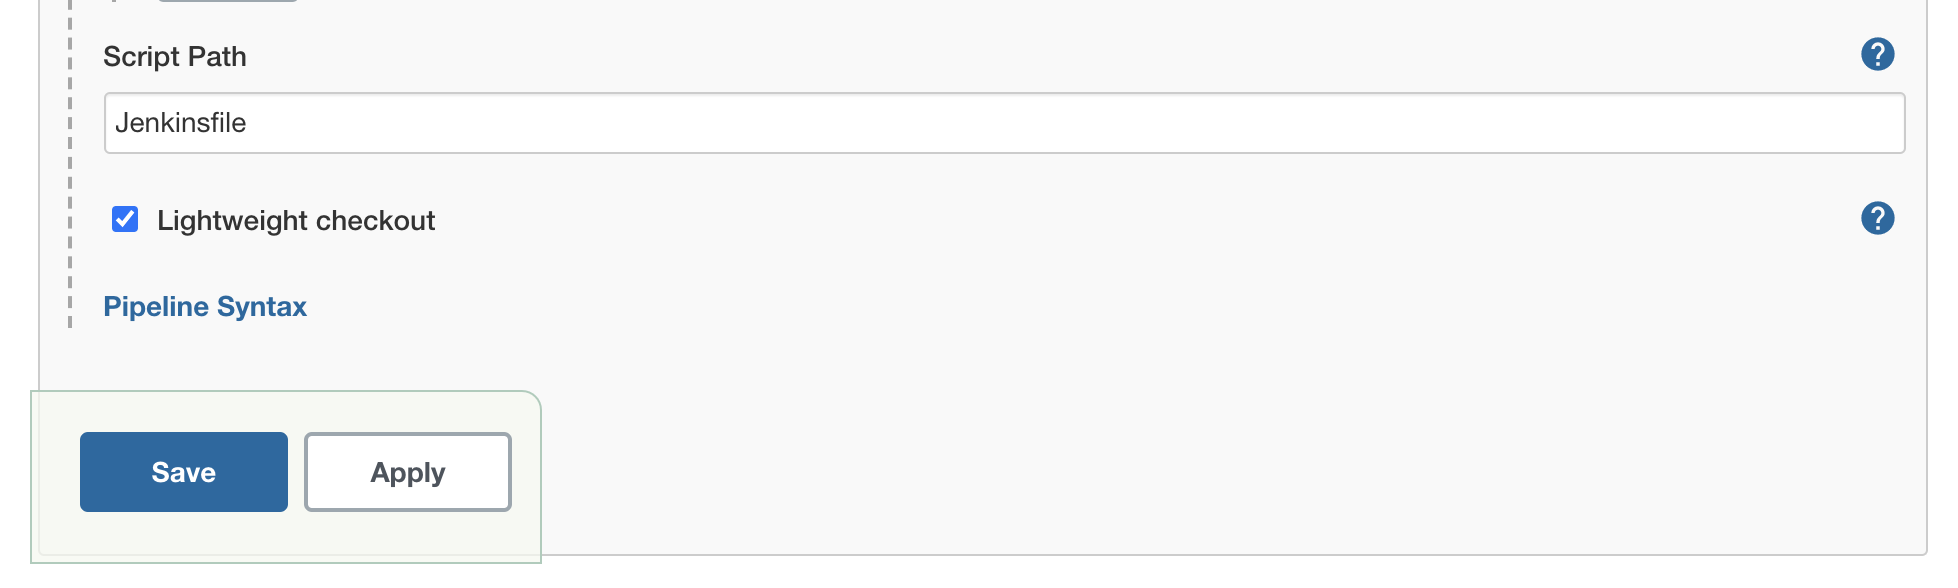
image-20210815082038186.png
2. 项目构建触发器
2.1 常用内置项目构建触发器
- 触发远程构建
- 其他工程构建后触发(Build after other projects are build)
- 定时构建(Build periodically)
- 轮询SCM(Poll SCM)
# 定时任务的表达式
每30分钟构建一次:H代表形参 H/30 * * * * 10:02 10:32每2个小时构建一次: H H/2 * * *每天的8点,12点,22点,一天构建3次: (多个时间点中间用逗号隔开) 0 8,12,22 * * *每天中午12点定时构建一次 H 12 * * *每天下午18点定时构建一次 H 18 * * *在每个小时的前半个小时内的每10分钟 H(0-29)/10 * * * *每两小时一次,每个工作日上午9点到下午5点(也许是上午10:38,下午12:38,下午2:38,下午4:38) H H(9-16)/2 * * 1-5
2.2 Git hook 自动触发构建
说明:利用Gitlab的webhook实现代码push到仓库,立即触发项目自动构建。
- 在Jenkins中安装GitlabHook的相关插件:Gitlab Hook 和 Gitlab
- Jenkins设置实验Gitlab hook进行自动构建,记录webhook URL之后配置到gitlab上面
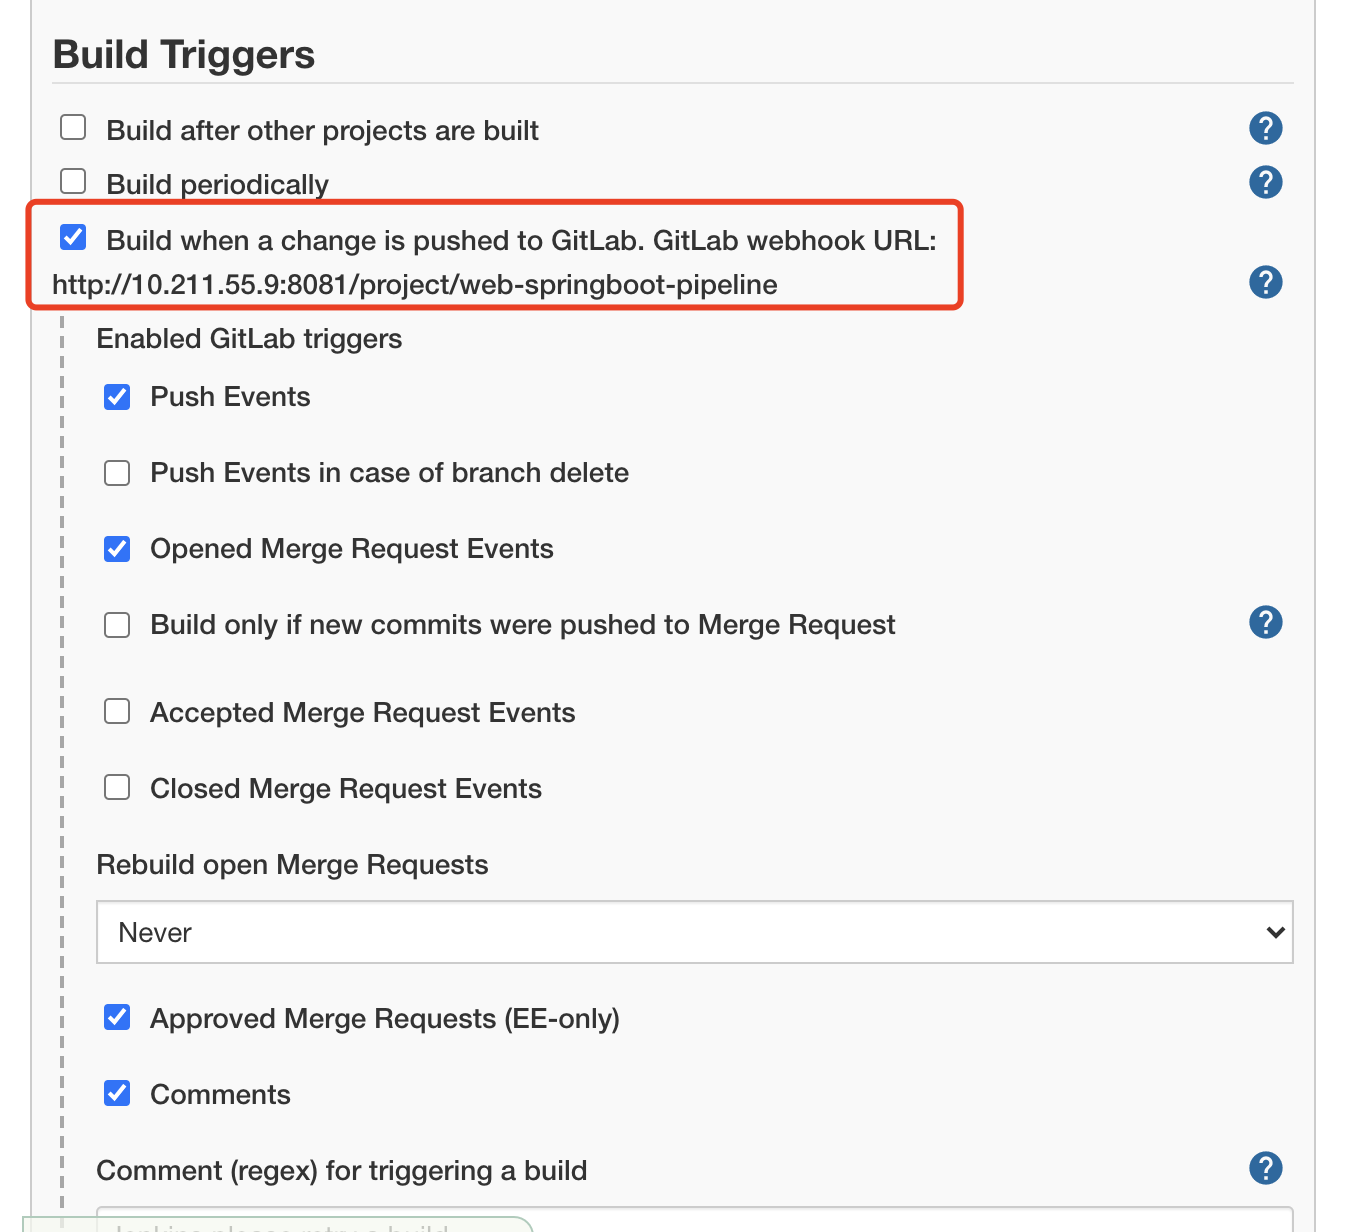
image-20210818101301941.png
- Gitlab配置webhook
1)开启webhook功能
使用root账户登录到后台,点击Admin Area -> Settings -> Network。勾选"Allow requests to the local network from web hooks and services" 让网络钩子允许请求本地网络
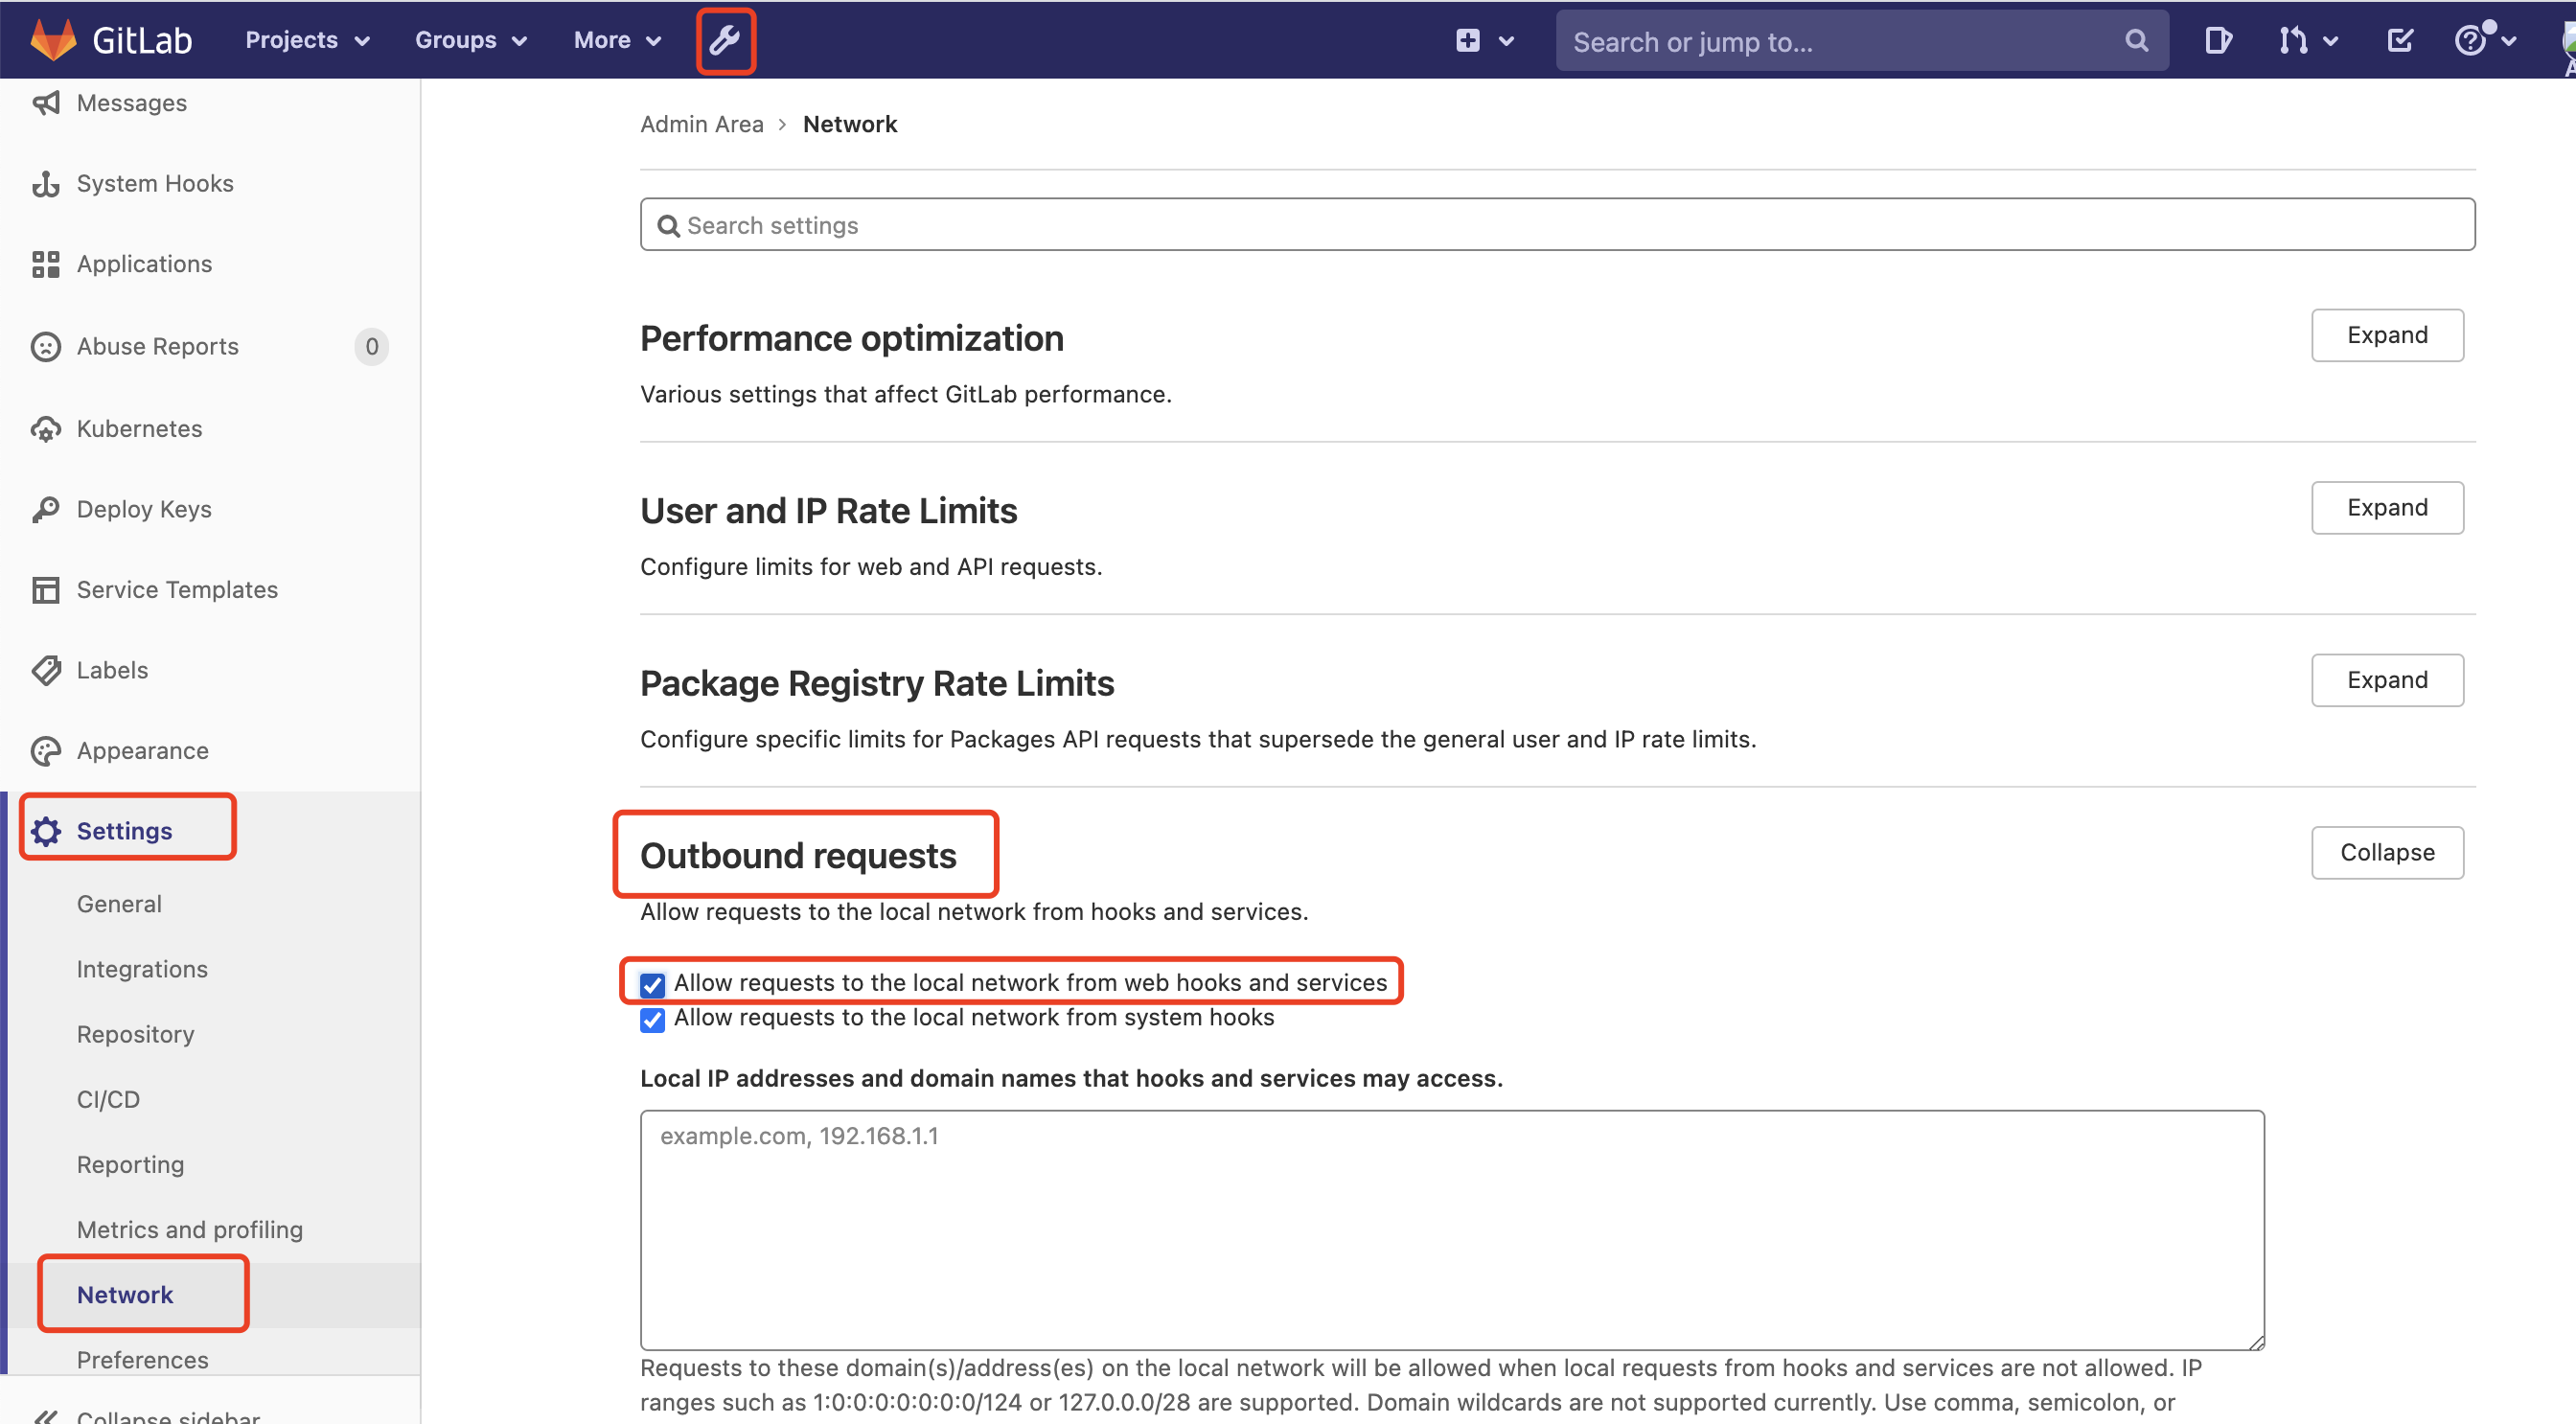
image-20210818101219587.png
2)在项目添加webhook
点击项目->Settings->Webhook Settings

image-20210818103620870.png
- Jenkins关闭认证功能
在Jenkins中,Manage Jenkins->Configure System
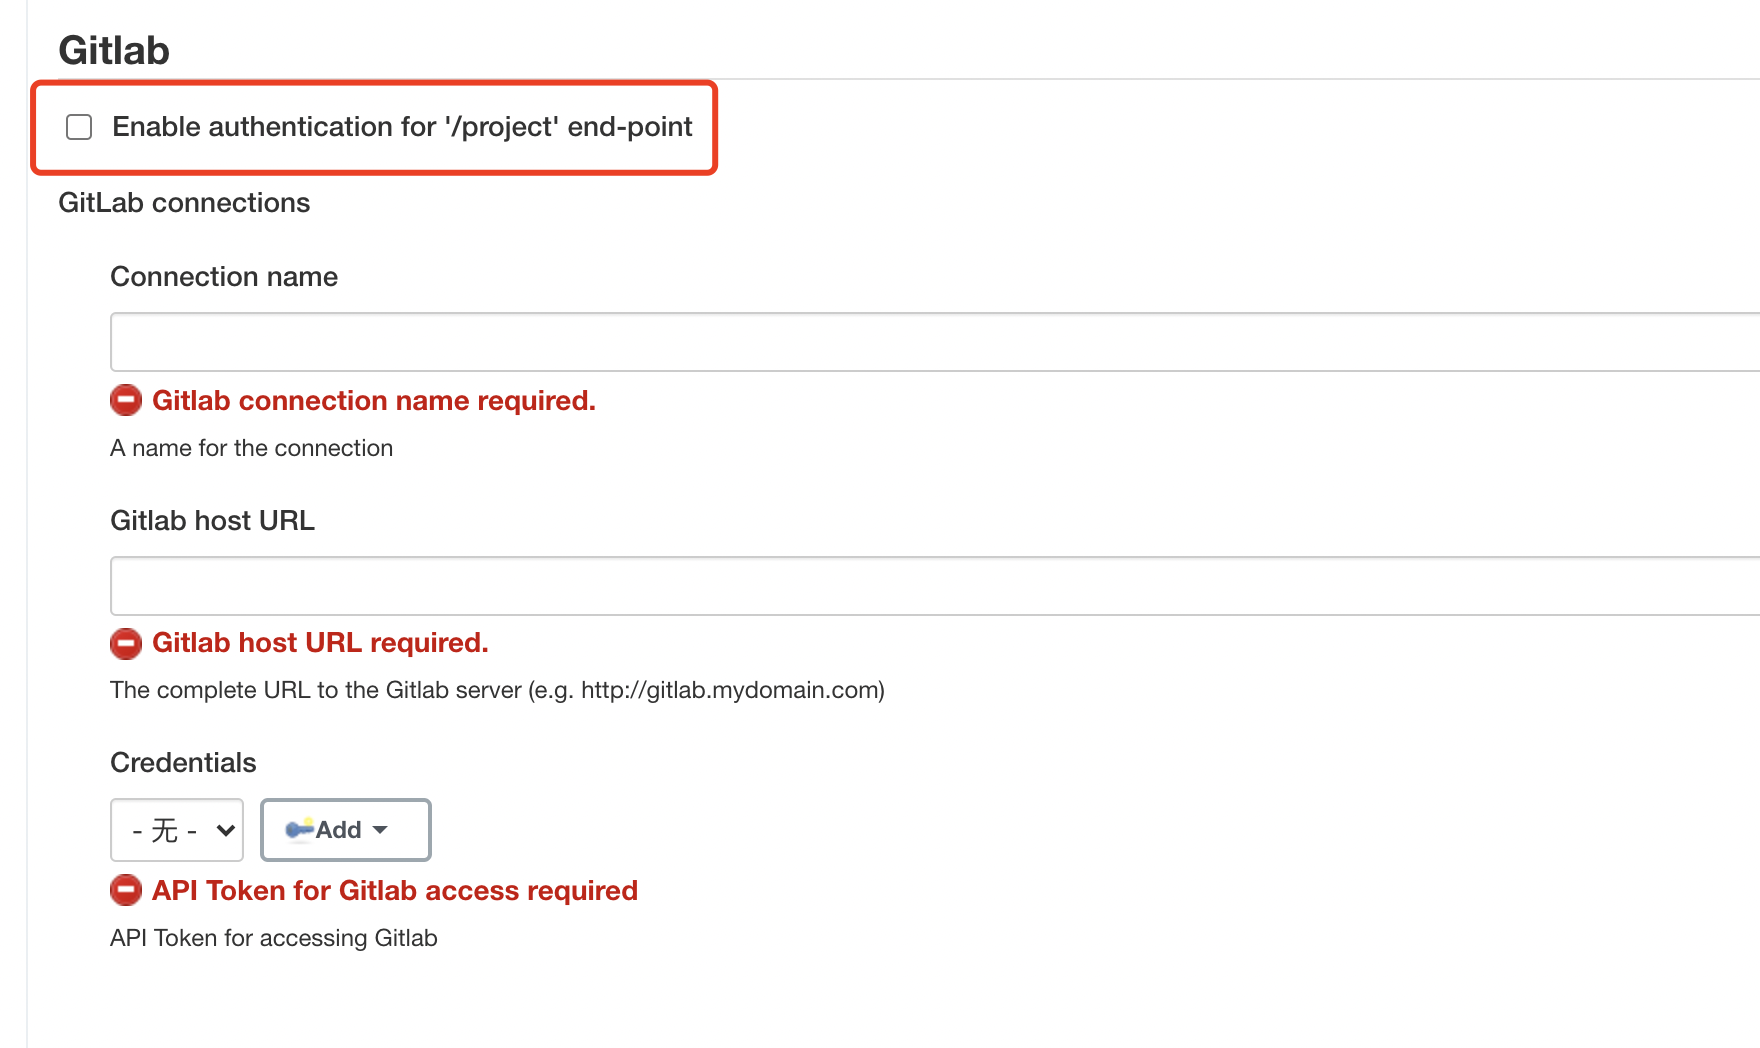
image-20210818103727017.png
- 测试webhook
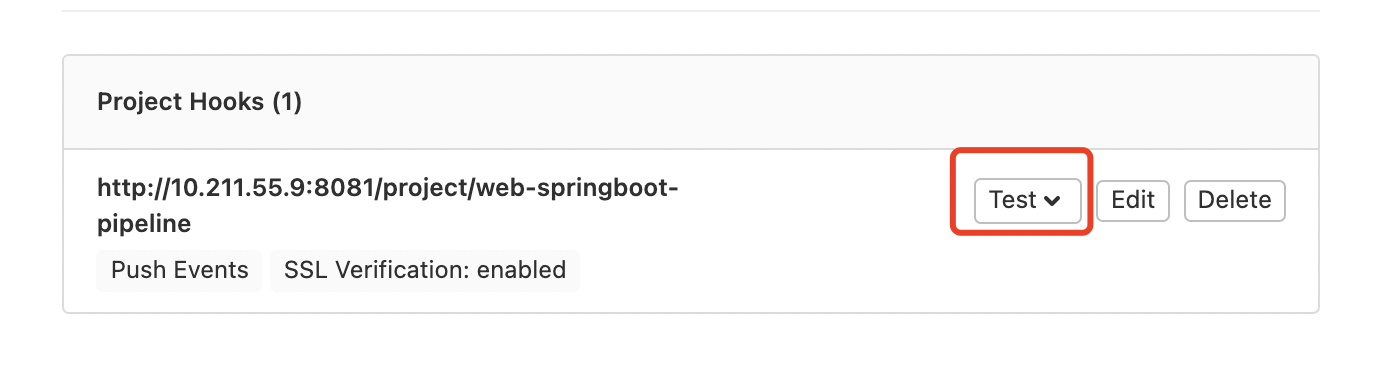
image-20210818104257935.png
2.3 Jenkins参数化构建
有时在项目构建的过程中,我们需要根据用户的输入 动态传入一些参数,从而影响整个构建结果。比如在原来Jenkinsfile中只指定了master分支,那么用参数构建可以替换分支为dev分支
新建dev分支,并提交到gitlab
在Jenkins的设置里添加字符串类型参数
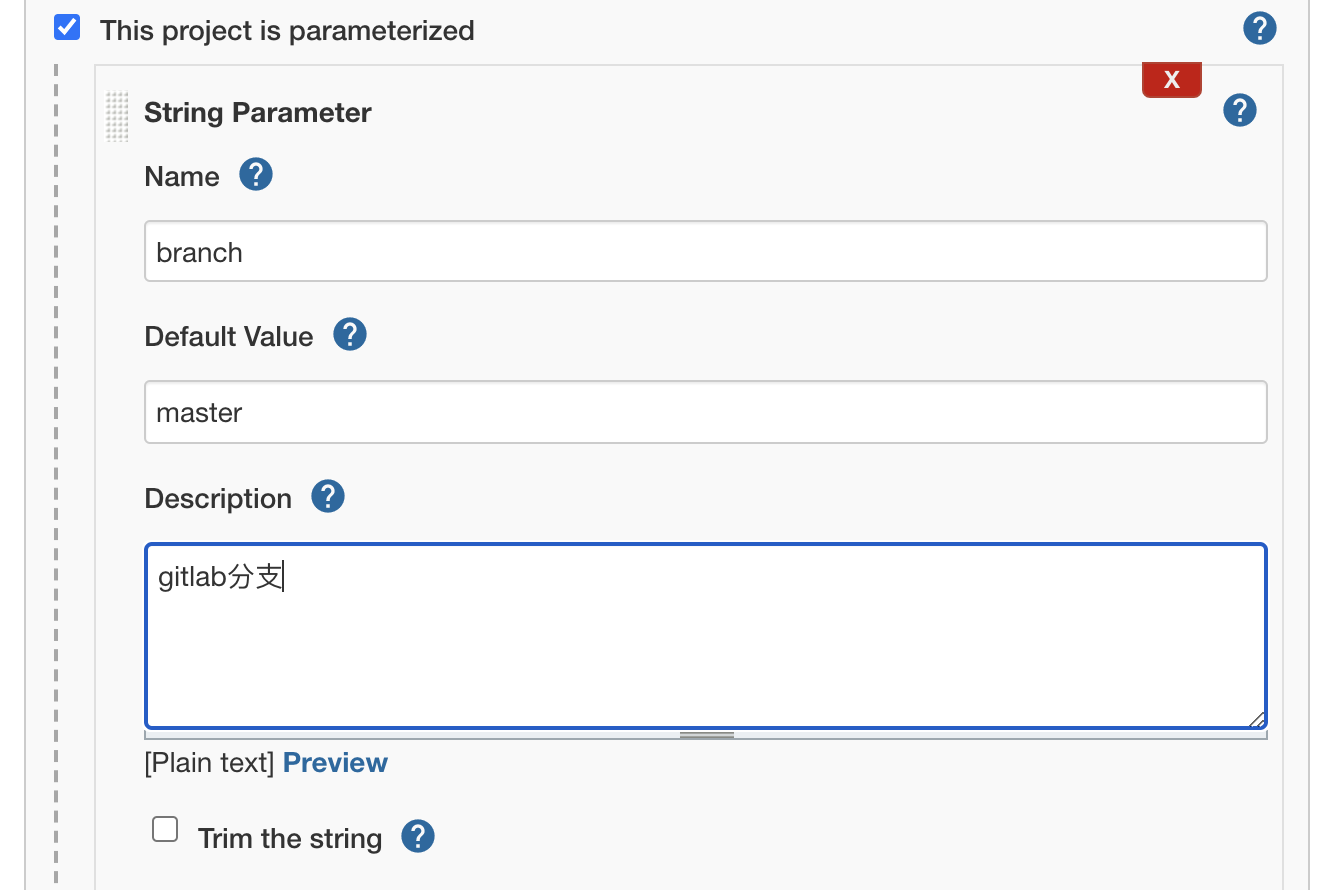
image-20210818110851283.png
- 修改pipeline的流水线代码,引用参数
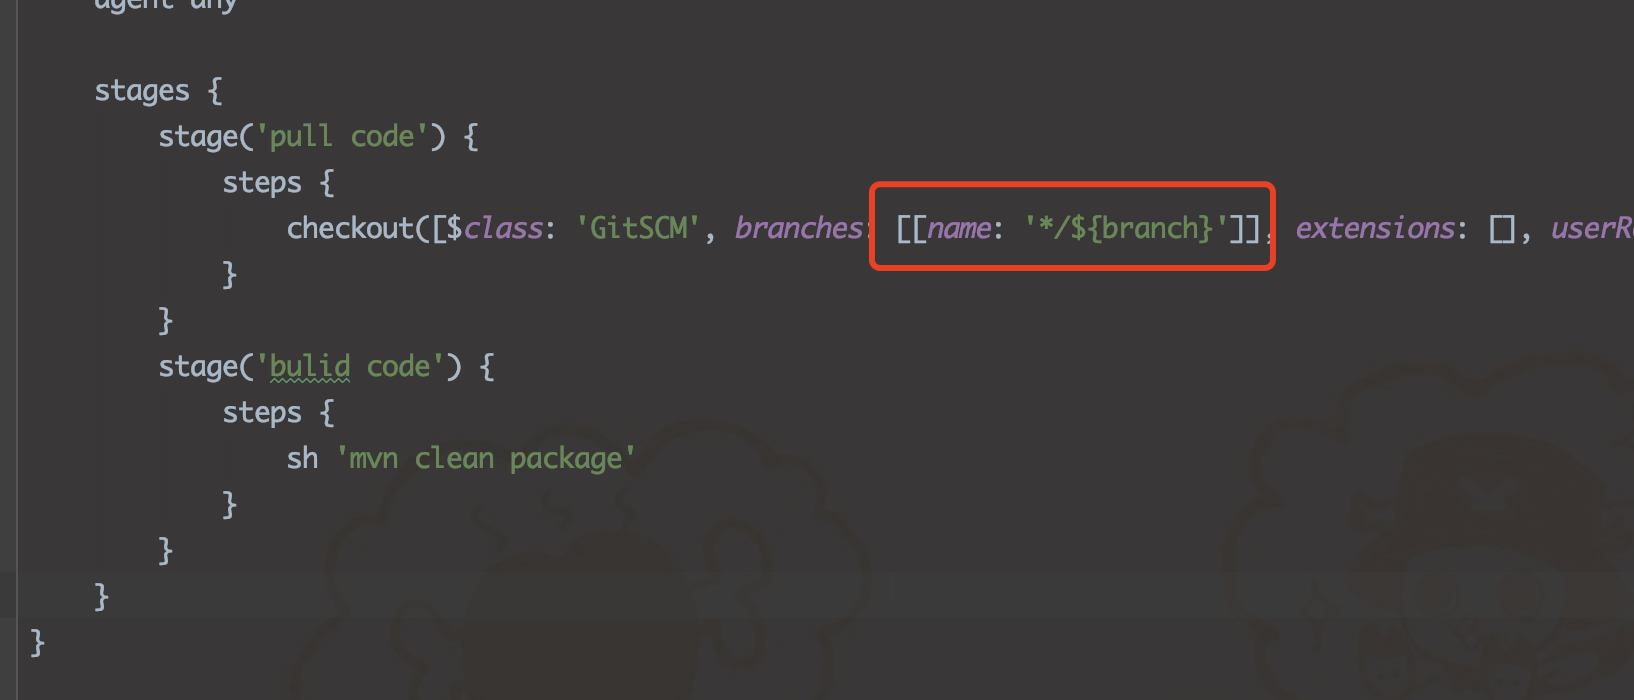
image-20210818112347596.png
- 使用参数构建项目
2.4 配置邮箱服务器发送构建结果
- 安装Email Extension插件
- 163邮箱开启smtp服务
image-20210818113432469.png
- 配置Jenkins admin账号邮箱
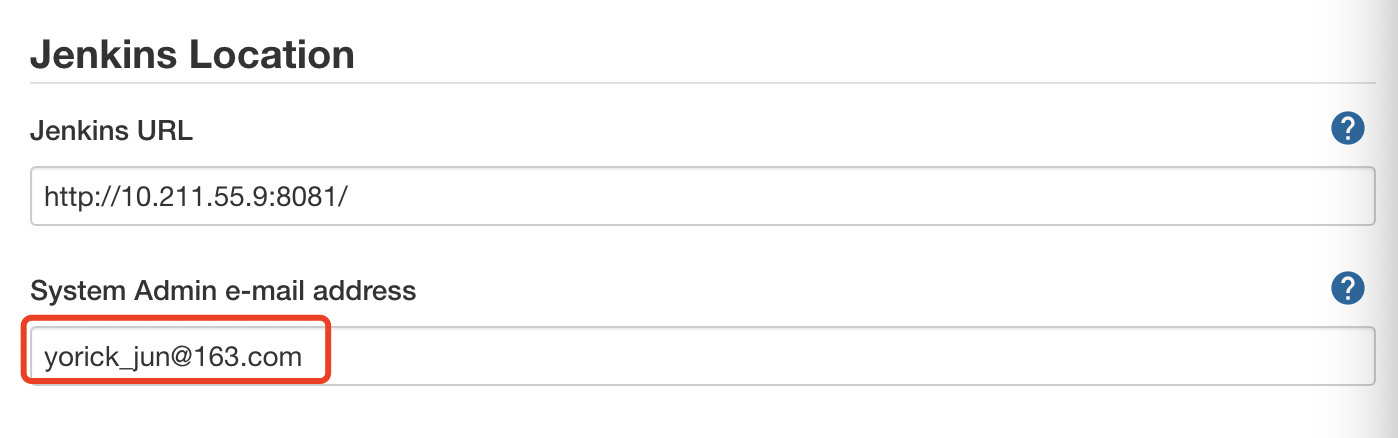
image-20210818133732798.png
- 配置 Email扩展通知
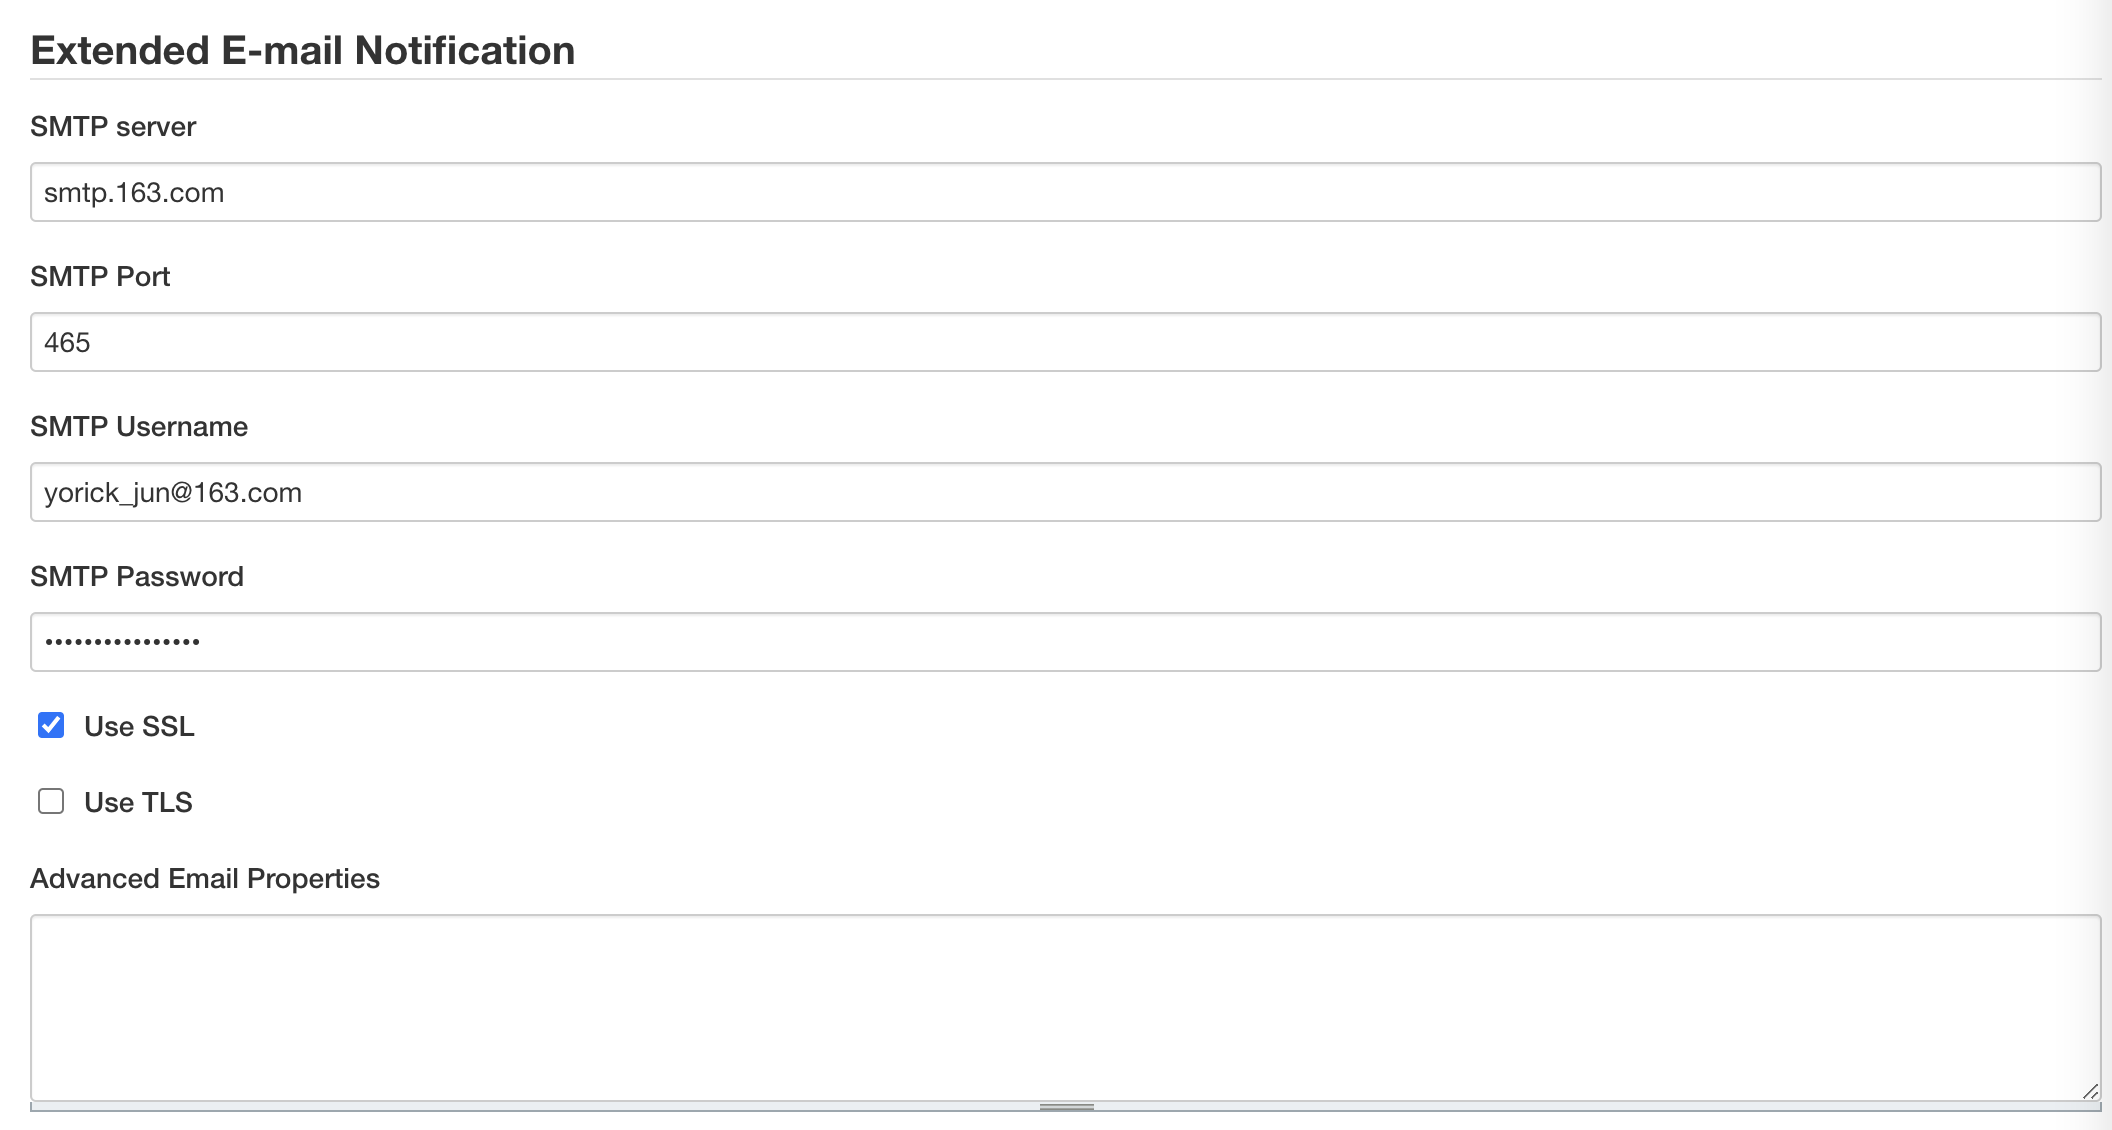
image-20210818134051027.png

image-20210818134113062.png
- 配置 Email通知
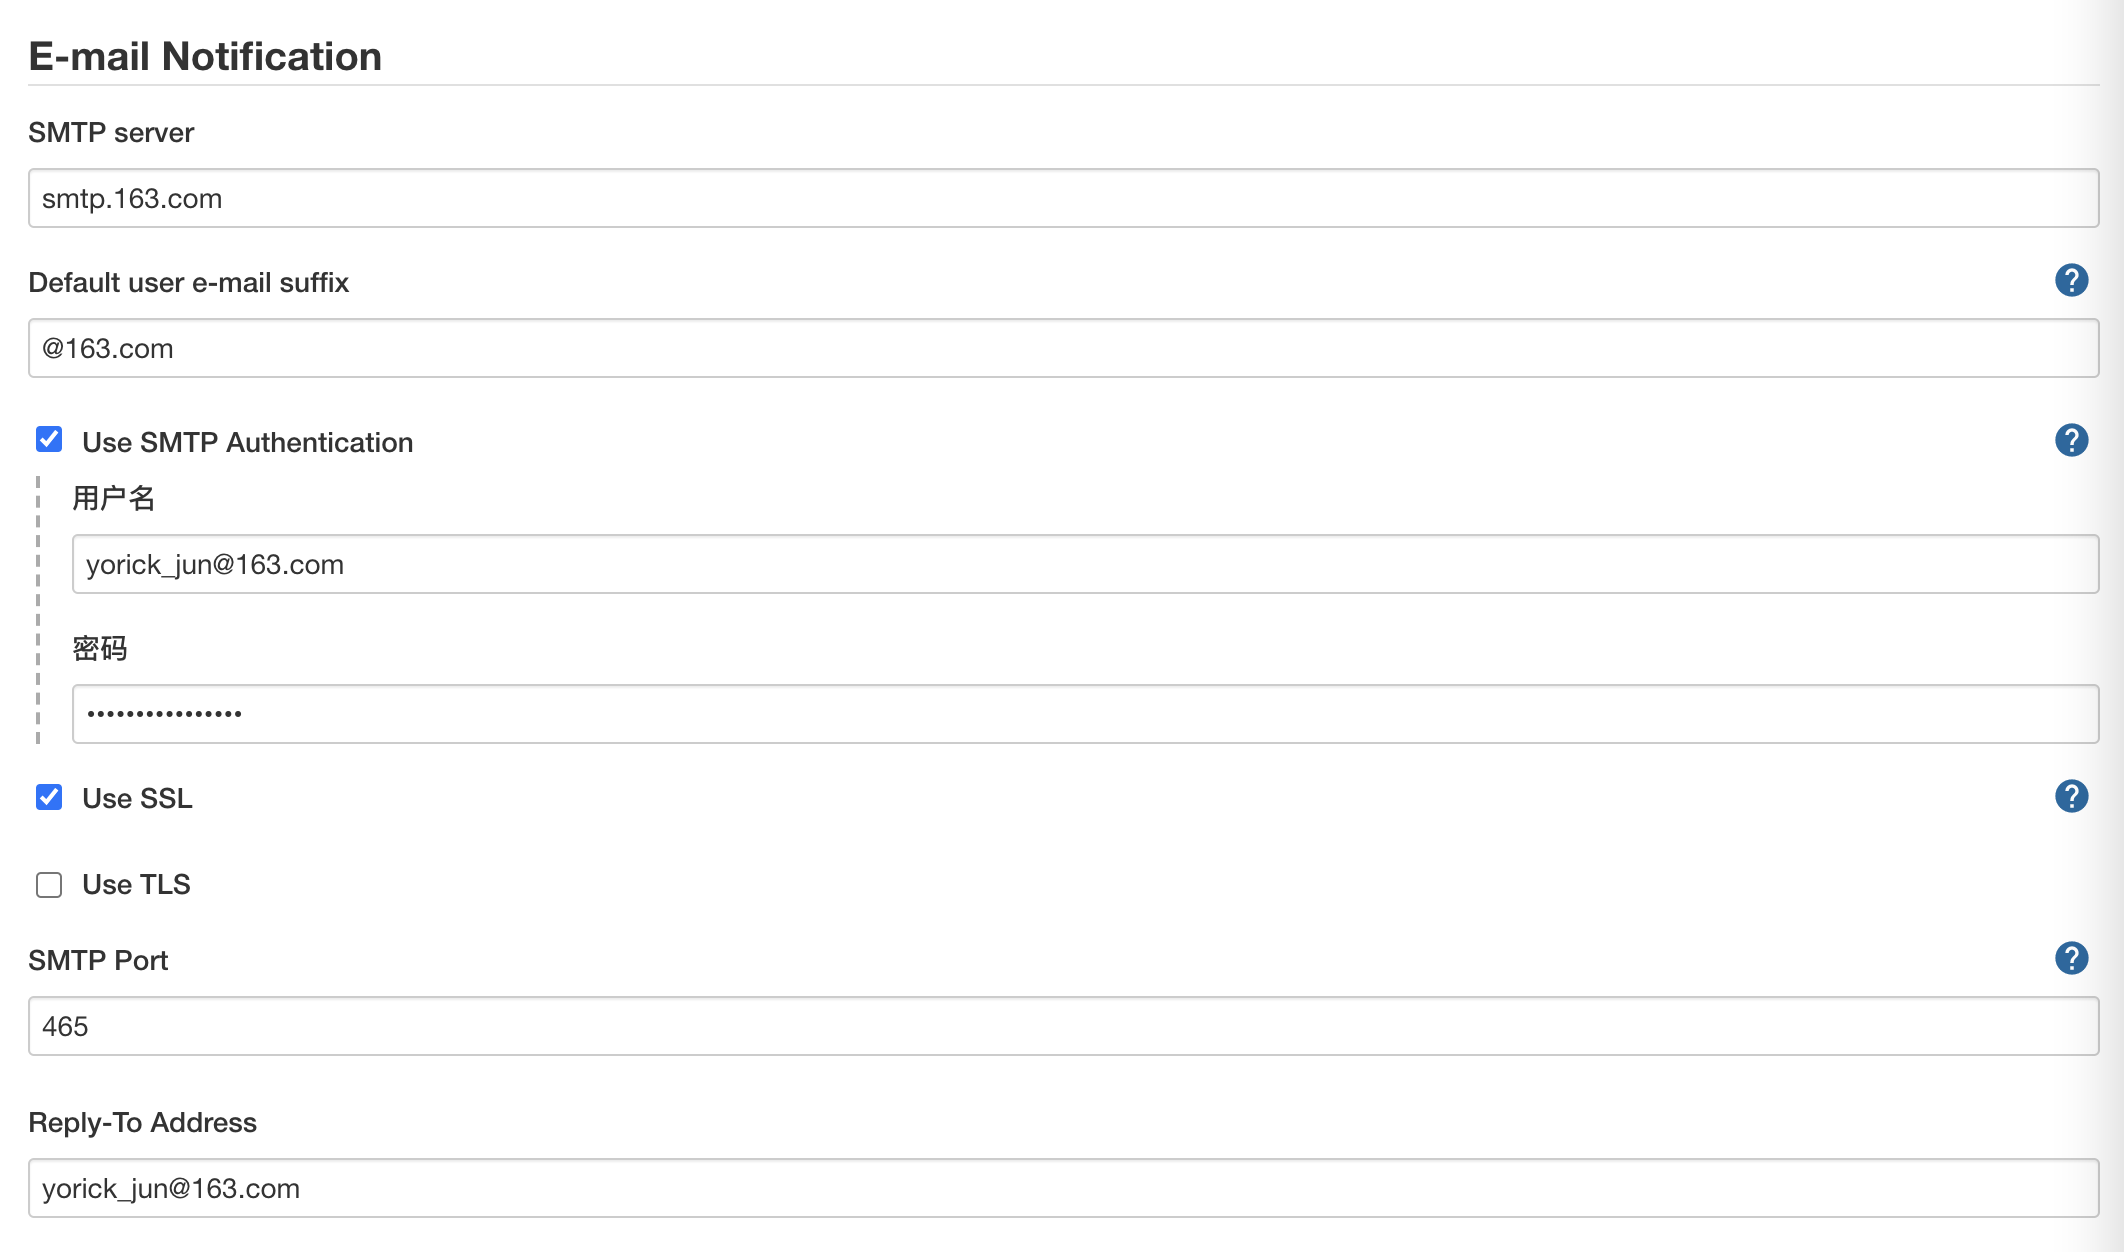
image-20210818134147171.png
- 测试是否可以发送邮件成功
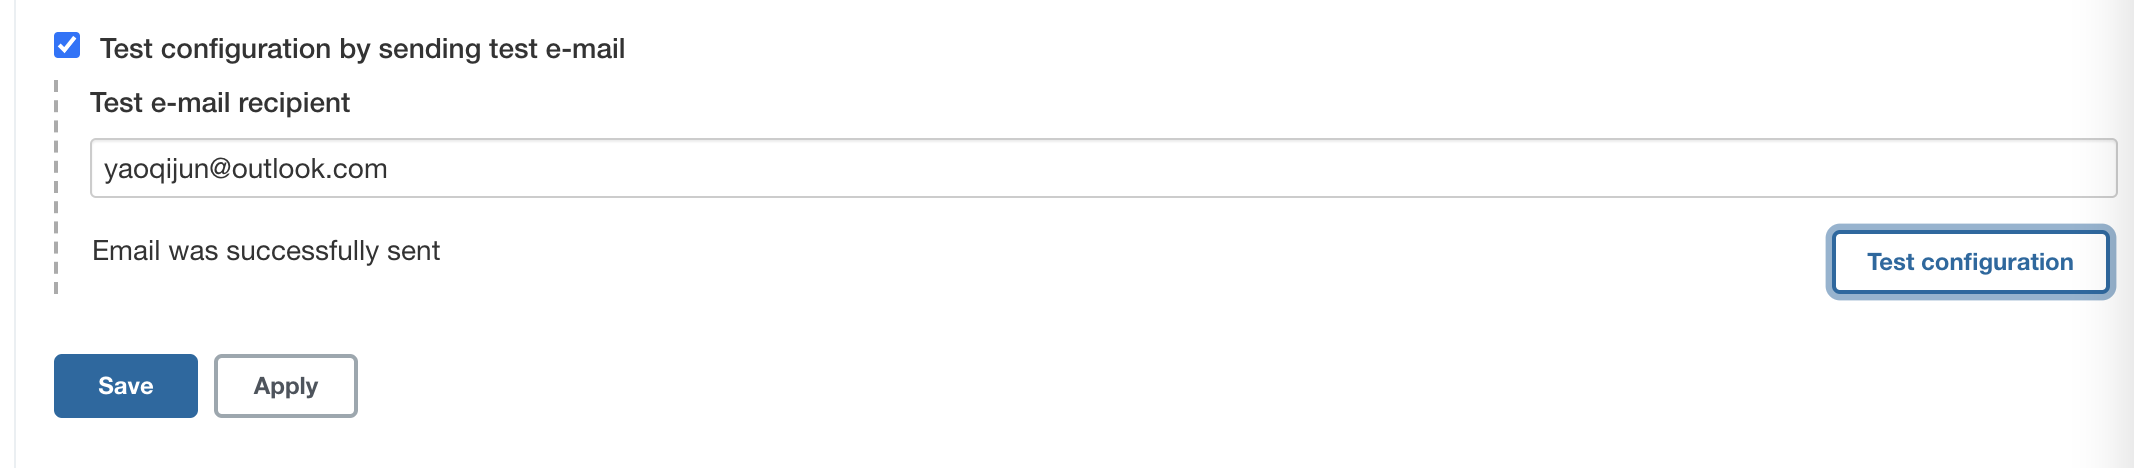
image-20210818134211686.png
- 在项目根目录下编写 email.html
<!DOCTYPE html>
<html><head><meta charset="UTF-8"><title>${ENV, var="JOB_NAME"}-第${BUILD_NUMBER}次构建日志</title></head><body leftmargin="8" marginwidth="0" topmargin="8" marginheight="4"offset="0"><table width="95%" cellpadding="0" cellspacing="0"style="font-size: 11pt; font-family: Tahoma, Arial, Helvetica, sansserif"><tr><td>(本邮件是程序自动下发的,请勿回复!)</td></tr><tr><td><h2><font color="#0000FF">构建结果 - ${BUILD_STATUS}</font></h2></td></tr><tr><td><br /><b><font color="#0B610B">构建信息</font></b><hr size="2" width="100%" align="center" /></td></tr><tr><td><ul><li>项目名称 : ${PROJECT_NAME}</li><li>构建编号 : 第${BUILD_NUMBER}次构建</li><li>触发原因: ${CAUSE}</li><li>构建日志: <ahref="${BUILD_URL}console">${BUILD_URL}console</a></li><li>构建 Url : <ahref="${BUILD_URL}">${BUILD_URL}</a></li><li>工作目录 : <ahref="${PROJECT_URL}ws">${PROJECT_URL}ws</a></li><li>项目 Url : <ahref="${PROJECT_URL}">${PROJECT_URL}</a></li></ul></td></tr><tr><td><b><font color="#0B610B">Changes Since LastSuccessful Build:</font></b><hr size="2" width="100%" align="center" /></td></tr><tr><td><ul><li>历史变更记录 : <ahref="${PROJECT_URL}changes">${PROJECT_URL}changes</a></li></ul> ${CHANGES_SINCE_LAST_SUCCESS,reverse=true, format="Changes forBuild #%n:<br />%c<br />",showPaths=true,changesFormat="<pre>[%a]<br
/>%m</pre>",pathFormat=" %p"}</td></tr><tr><td><b>Failed Test Results</b><hr size="2" width="100%" align="center" /></td></tr><tr><td><prestyle="font-size: 11pt; font-family: Tahoma, Arial, Helvetica,sans-serif">$FAILED_TESTS</pre><br /></td></tr><tr><td><b><font color="#0B610B">构建日志 (最后 100行):</font></b><hr size="2" width="100%" align="center" /></td></tr><tr><td><textarea cols="80" rows="30" readonly="readonly"style="font-family: Courier New">${BUILD_LOG,maxLines=100}</textarea></td></tr></table></body>
</html>- 修改Jenkinsfile,增加构建完成后发送邮件的功能,并将修改推送到gitlab
pipeline {agent anystages {stage('pull code') {steps {checkout([$class: 'GitSCM', branches: [[name: '*/${branch}']], extensions: [], userRemoteConfigs: [[credentialsId: 'a8cfc168-b4d4-42f5-a5fc-88ab0101de8f', url: 'git@10.211.55.8:lab202/hello-world-demo.git']]])}}stage('bulid code') {steps {sh 'mvn clean package'}}}post {always {emailext(subject: '构建通知:${PROJECT_NAME} - Build # ${BUILD_NUMBER} -${BUILD_STATUS}!',body: '${FILE,path="email.html"}',to: 'yaoqijun@outlook.com')}}}- 构建测试,发现成功发送邮件
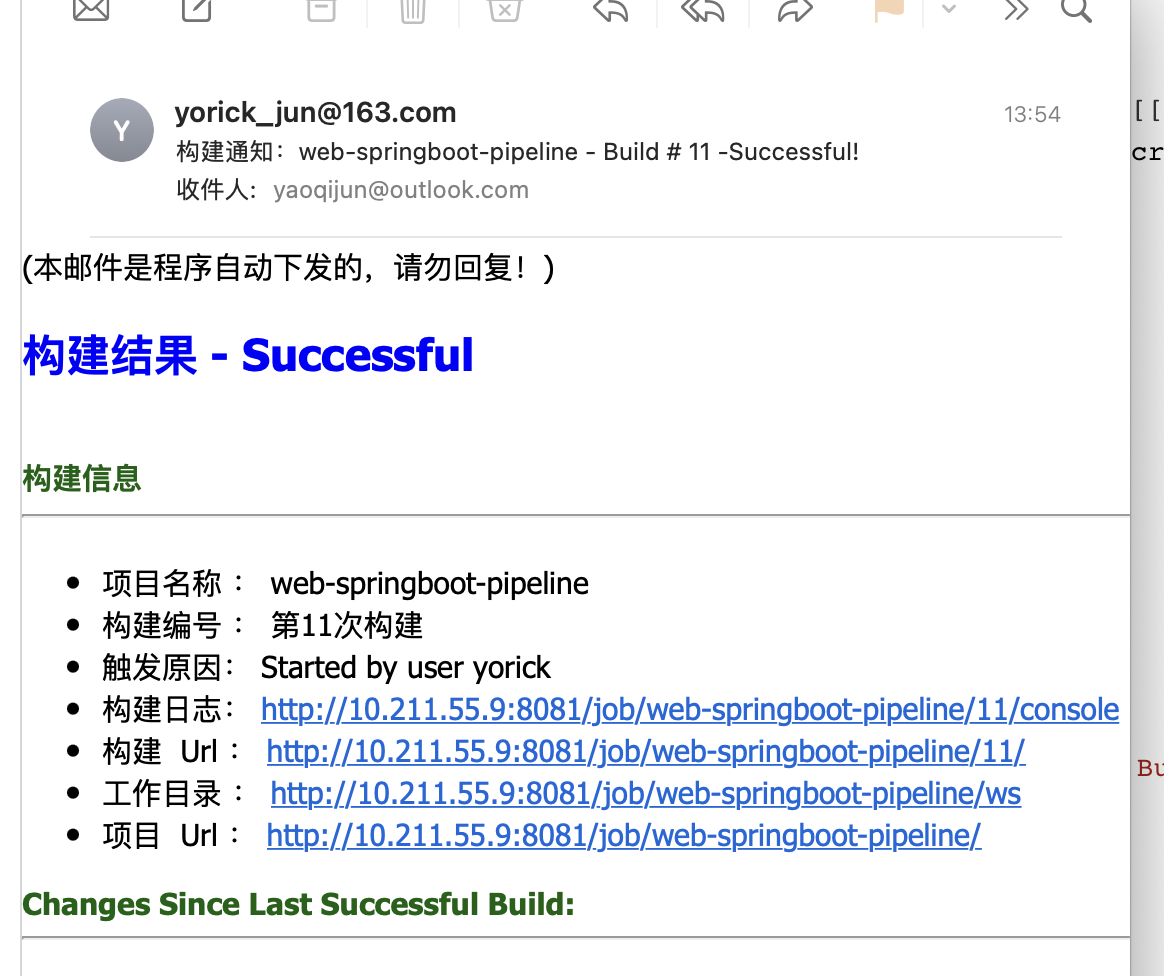
image-20210818135730344.png
3. Jenkins整合SonarQube代码审查
3.1 SonarKube安装(macos)
- 环境安装要求:jdk,mysql
- 创建SonarQube的数据库
create database sonar;- 下载sonar压缩包
# https://www.sonarqube.org/downloads/- 解压sonar,修改配置
# 解压与移动sonar文件
unzip sonarqube-6.4.zip
mv sonarqube-6.4.zip /opt# 修改配置
vim /opt/sonarqube-6.4/conf/sonar.properties# sonar.jdbc.username=root
# sonar.jdbc.password=199748
# sonar.jdbc.url=jdbc:mysql://localhost:3306/sonar?useUnicode=true&characterEncoding=utf8&rewriteBatchedStatements=true&useConfigs= maxPerformance&useSSL=false
# 端口默认为 9000
# 登录用户密码 默认为 admin/admin- sonarQube启动停止操作
cd /opt/sonarqube-6.4./bin/macosx-universal-64/sonar.sh start # 启动
./bin/macosx-universal-64/sonar.sh stop # 停止
./bin/macosx-universal-64/sonar.sh status # 查看状态- 创建token
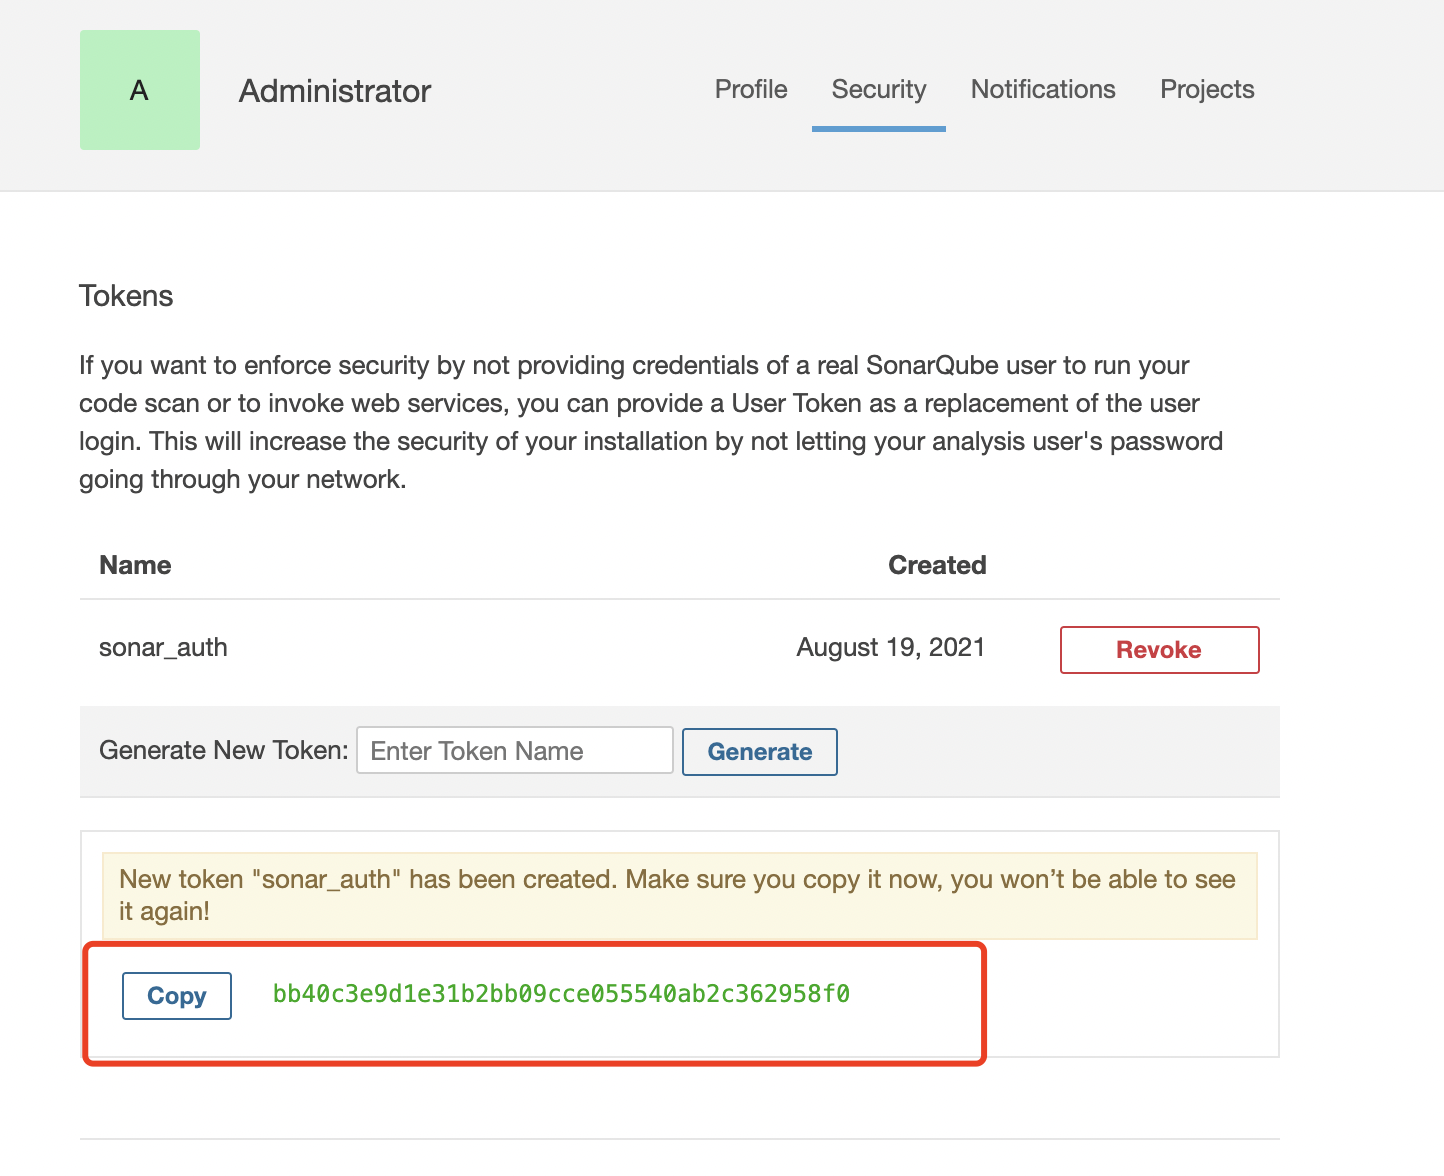
image-20210819102432390.png
3.2 Jenkins整合SonarQube代码审查
- 安装SonarQube Scanner插件
- Jenkins进行SonarQube配置
- Manage Jenkins->Configure System->SonarQube servers
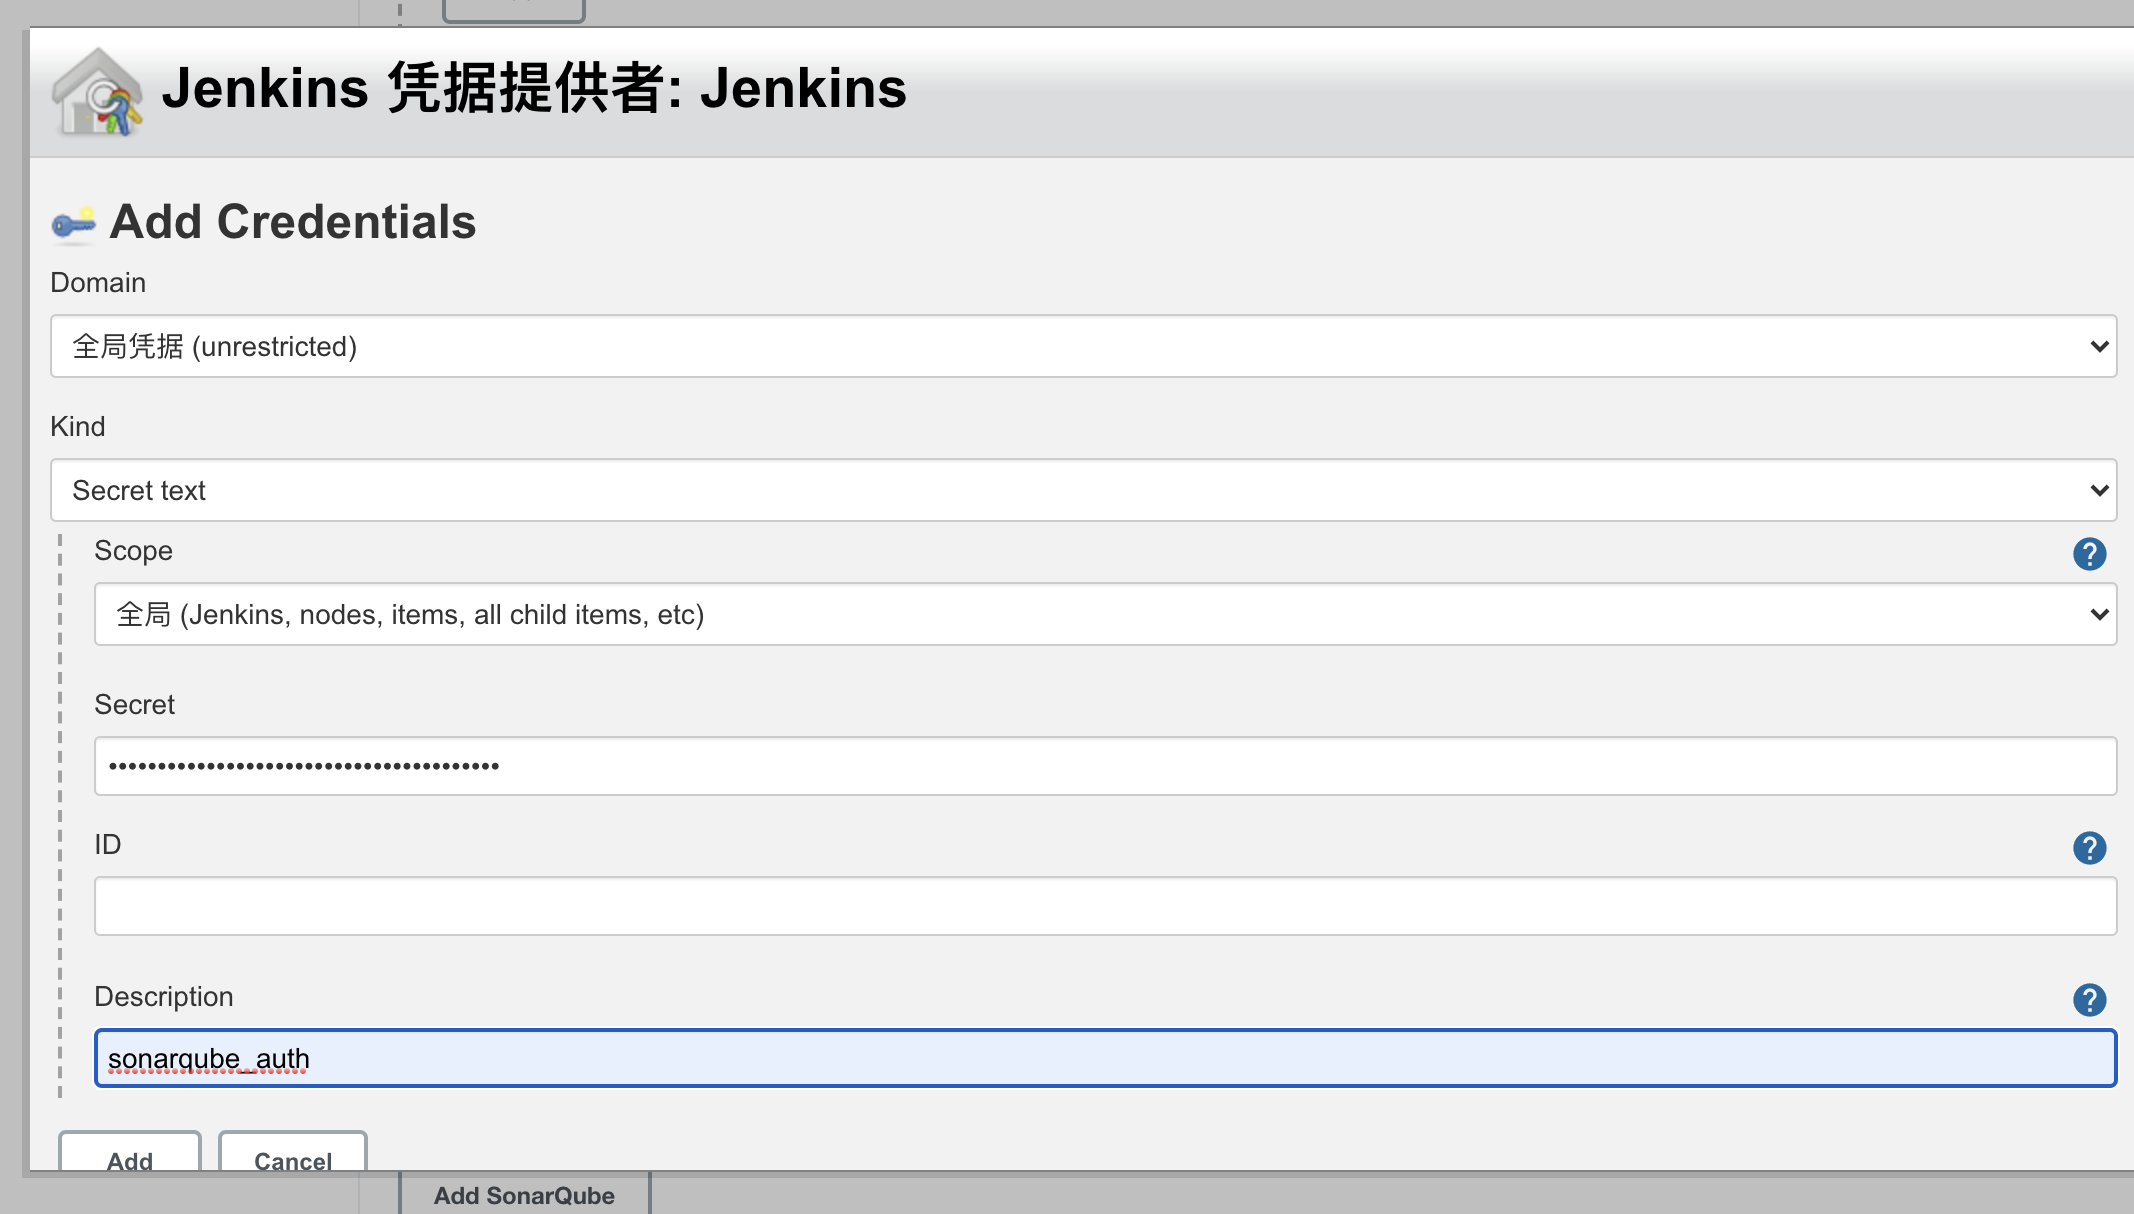
image-20210819104538059.png
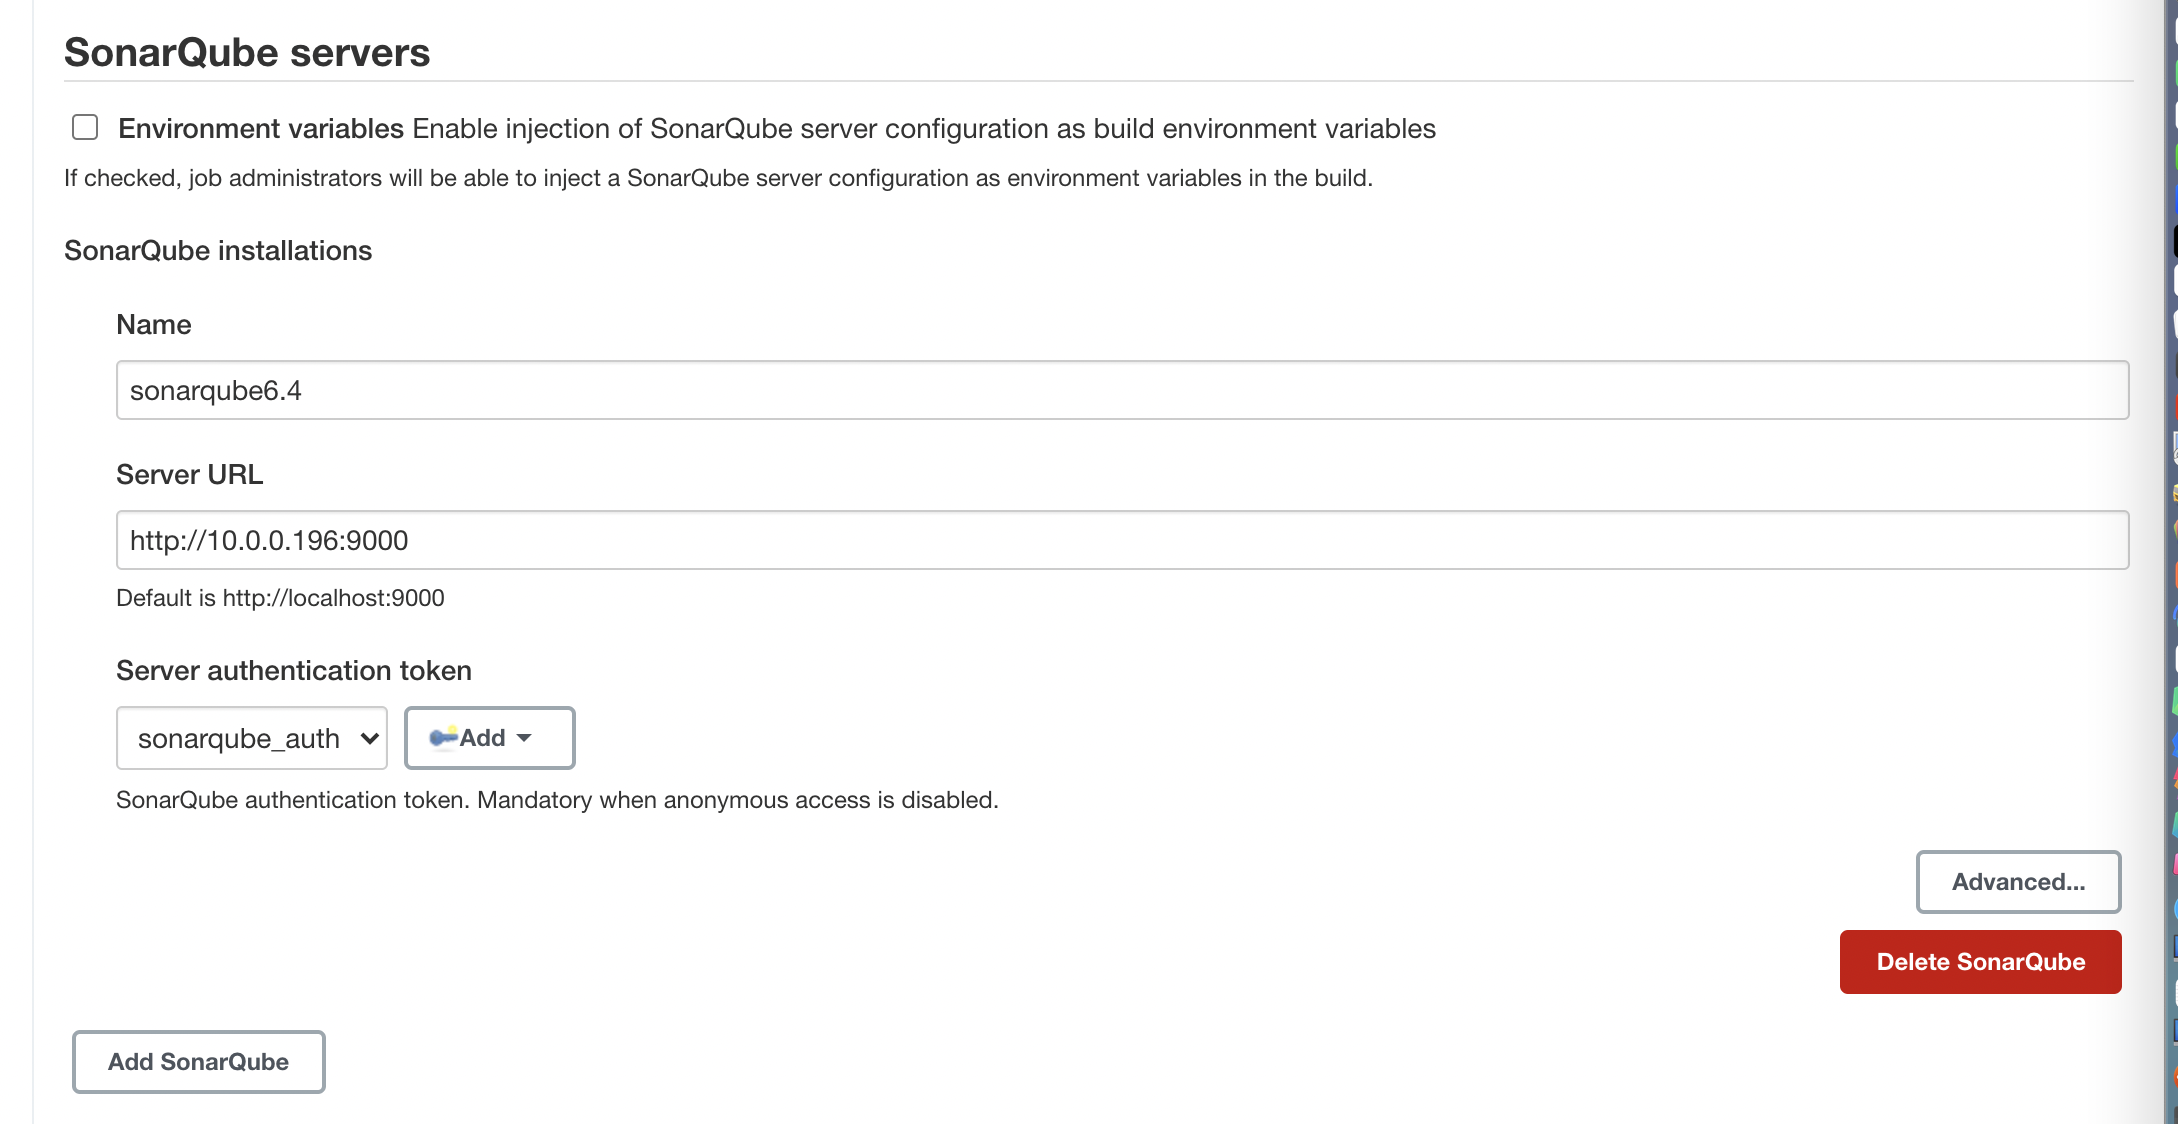
image-20210819104549539.png
- Manage Jenkins->Global Tool Configuration
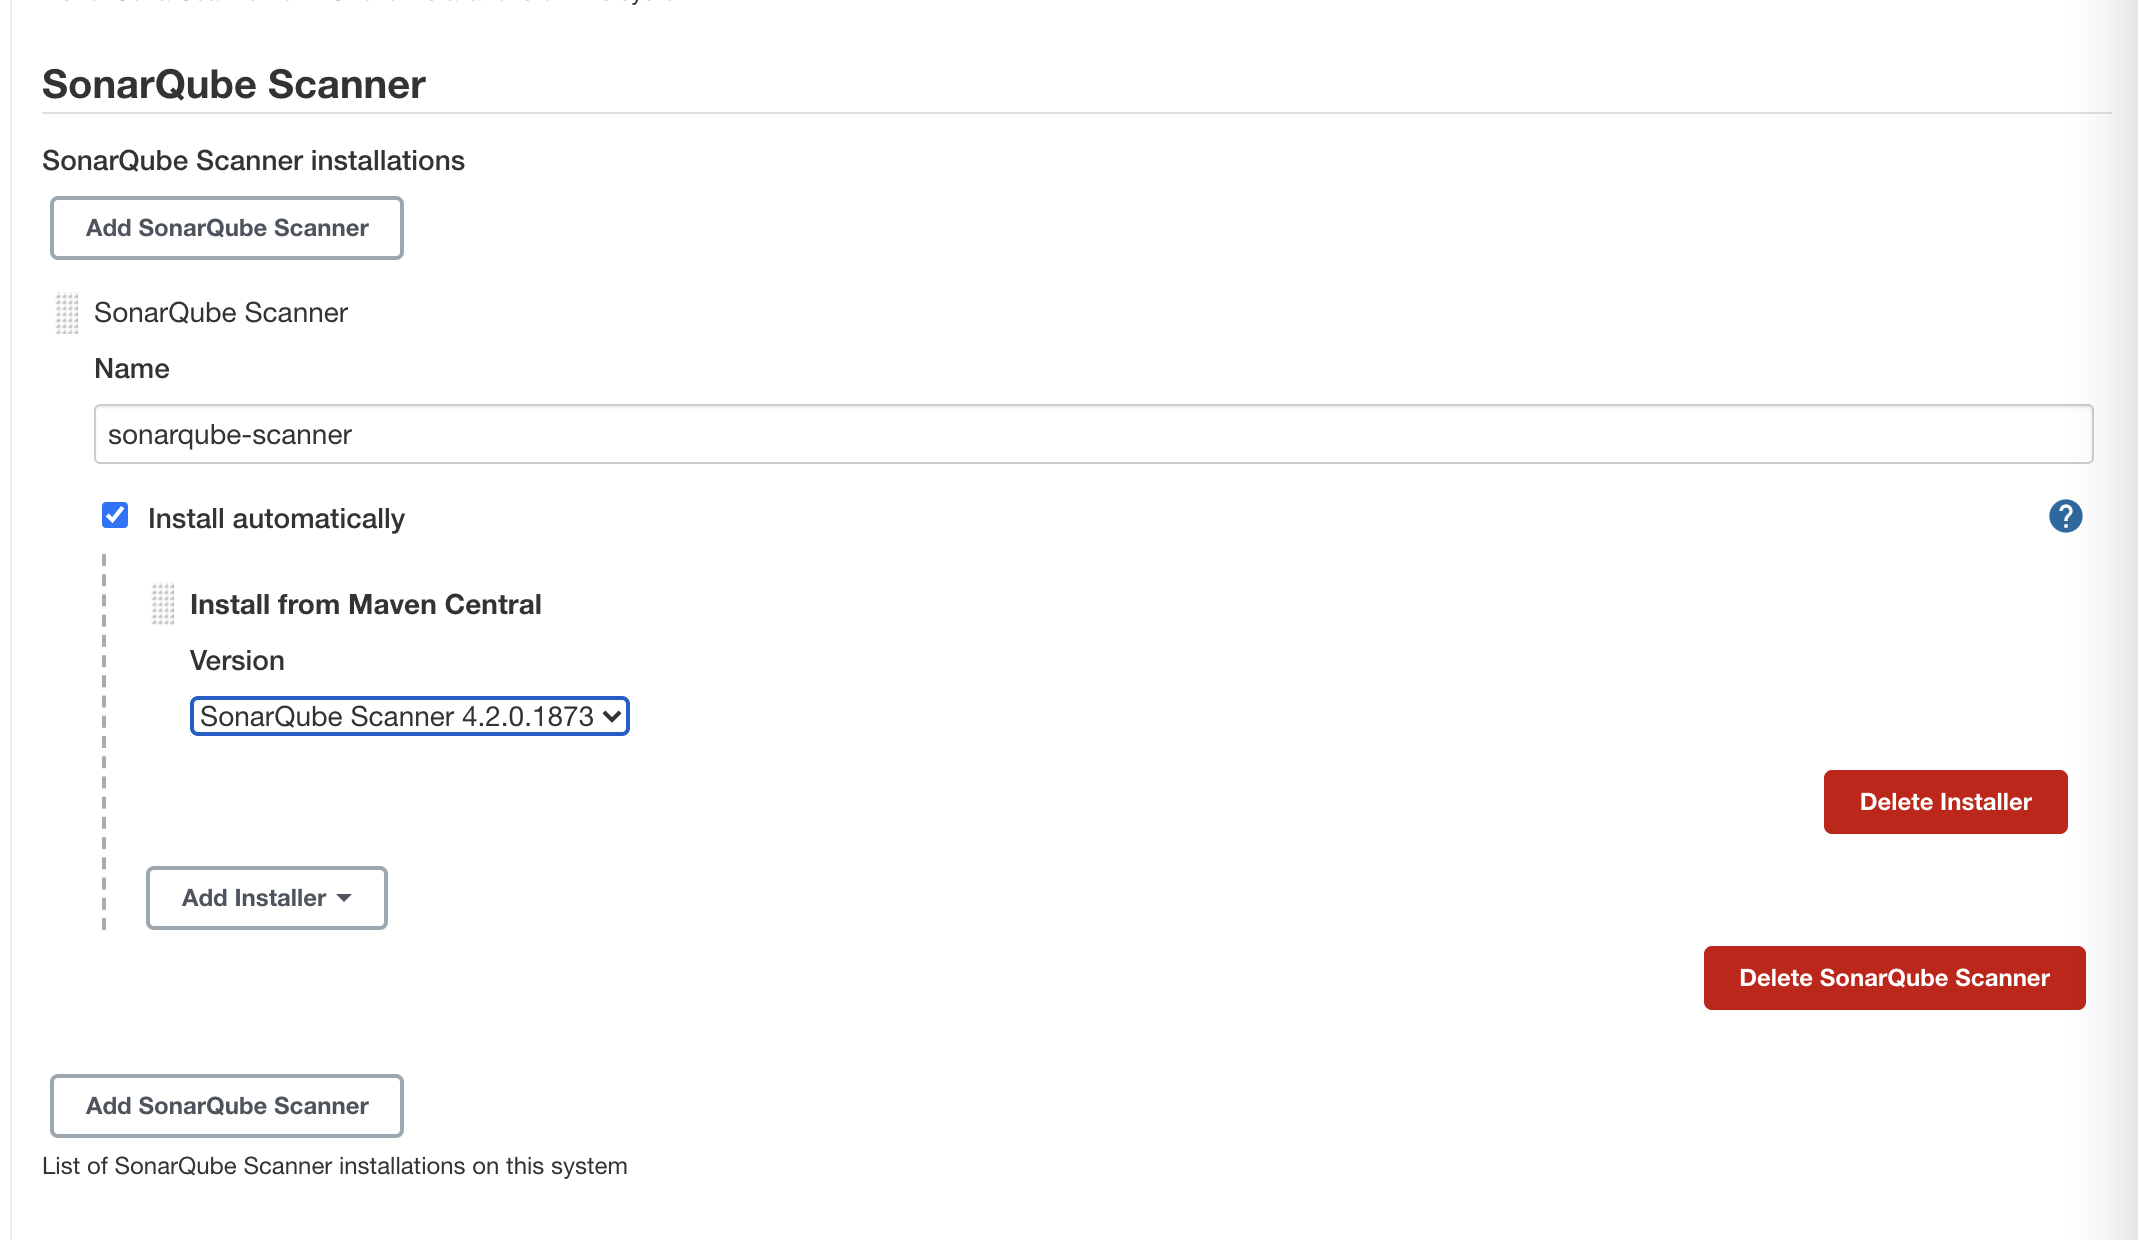
image-20210819104810649.png
- SonaQube关闭审查结果上传到SCM功能
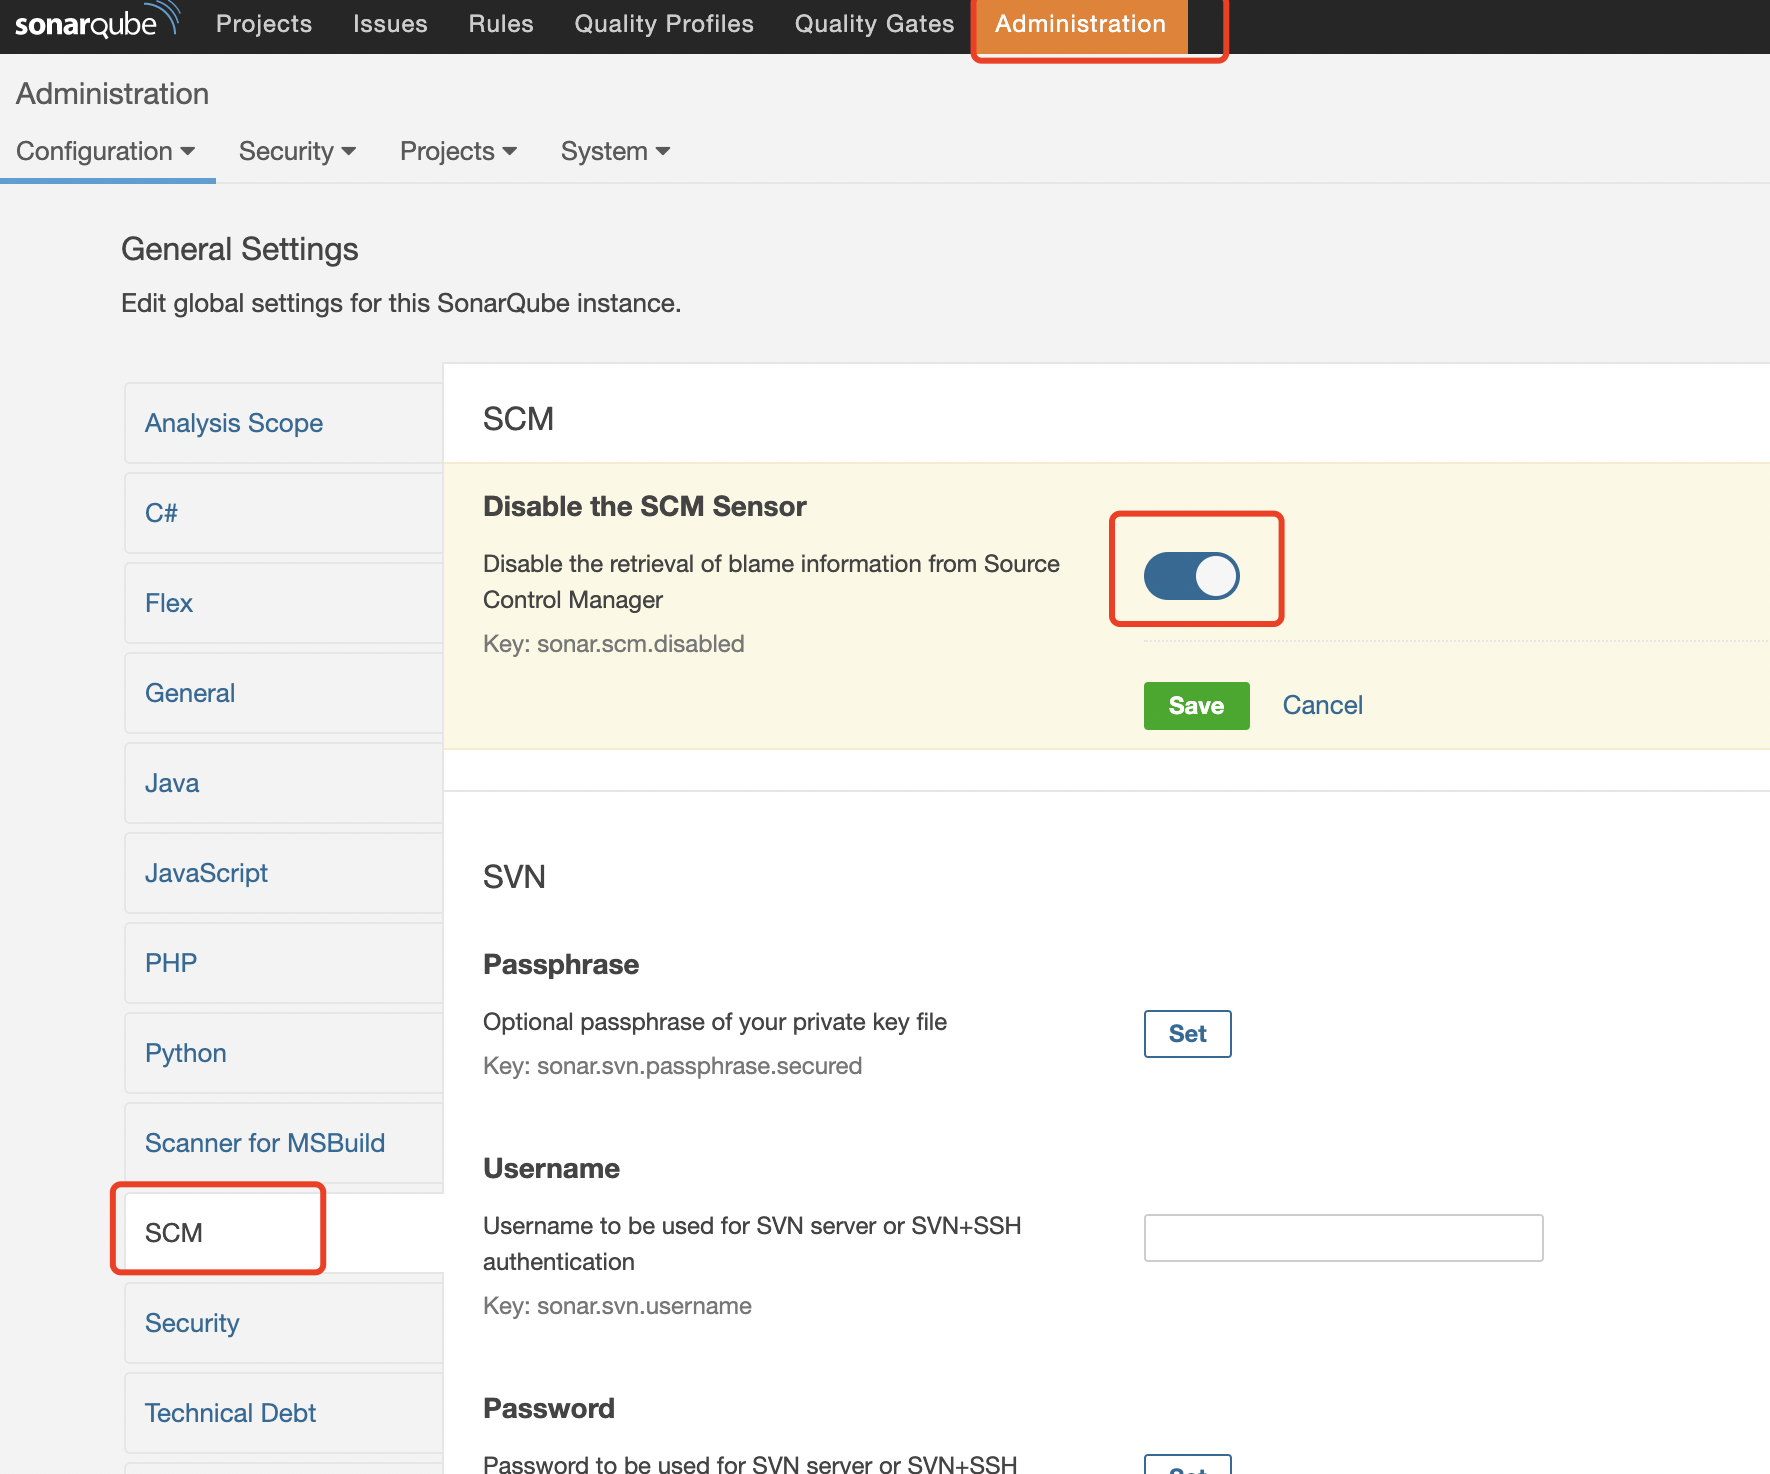
image-20210819105101417.png
3.3 在项目中添加sonarQube
- IDEA项目根目录下,创建sonar-project.properties文件
# must be unique in a given SonarQube instance
sonar.projectKey=hello_world_demo
# this is the name and version displayed in the SonarQube UI. Was mandatory prior to SonarQube 6.1.
sonar.projectName=hello_world_demo
sonar.projectVersion=1.0
# Path is relative to the sonar-project.properties file. Replace "\" by "/" on Windows.
# This property is optional if sonar.modules is set.
sonar.sources=.
sonar.exclusions=**/test/**,**/target/**
sonar.java.source=1.8
sonar.java.target=1.8
# Encoding of the source code. Default is default system encoding
sonar.sourceEncoding=UTF-8- 在DEA修改Jenkinsfile,加入SonarQube代码审查阶段
pipeline {agent anystages {stage('pull code') {steps {checkout([$class: 'GitSCM', branches: [[name: '*/${branch}']], extensions: [], userRemoteConfigs: [[credentialsId: 'a8cfc168-b4d4-42f5-a5fc-88ab0101de8f', url: 'git@10.211.55.8:lab202/hello-world-demo.git']]])}}stage('bulid code') {steps {sh 'mvn clean package'}}stage('SonarQube代码审查'){steps{script{scannerHome = tool 'sonarqube-scanner'//tool代表要引入Jenkins的一些工具,'sonarqube-scanner'是之前我们自己起的名字#自由风格默认会找全局工具}withSonarQubeEnv('sonarqube6.4'){//这个配置在系统配置里sh "${scannerHome}/bin/sonar-scanner"}}}}post {always {emailext(subject: '构建通知:${PROJECT_NAME} - Build # ${BUILD_NUMBER} -${BUILD_STATUS}!',body: '${FILE,path="email.html"}',to: 'yaoqijun@outlook.com')}}}- 到SonarQube的UI界面查看审查结果
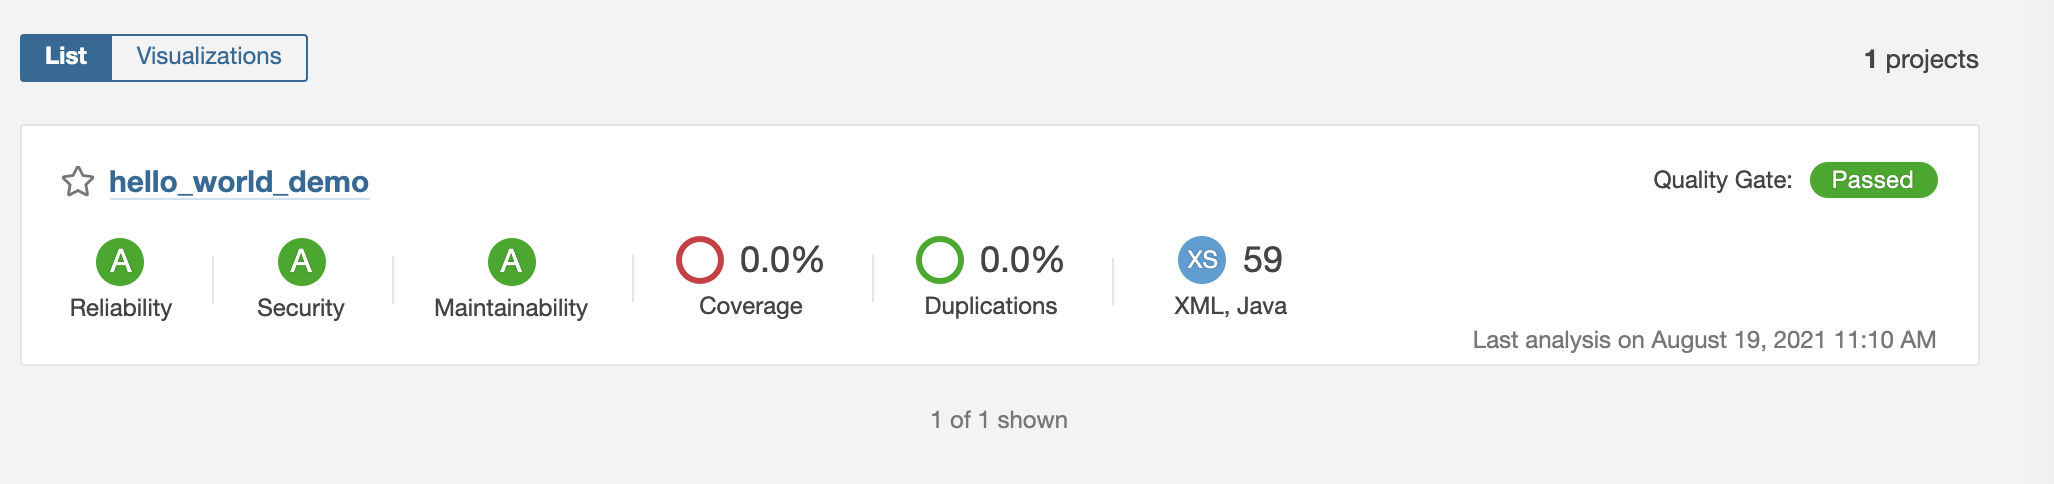
image-20210819111116871.png
4. Harbor安装(arm64)
- 安装docker并启动
- 安装docker-compose
apt install python3-pip
pip -V
pip3 install docker-compose
docker-compose -version- harbor安装
git clone https://github.com/fphub/harbor-arm64.git# 修改配置文件
# 修改hostname和port
vim make/harbor.yml
hostname: 192.168.66.102
port: 85make package_offline -e VERSIONTAG=v1.9.3 PKGVERSIONTAG=v1.9.3 UIVERSIONTAG=v1.9.3 DEVFLAG=false CLAIRFLAG=truecd make
./prepare
./install.sh- harbor操作
docker-compose up -d #启动docker-compose stop #停止docker-compose restart #重新启动- 访问
访问Harbor http://10.211.55.10:85
默认账户密码:admin/Harbor12345- 把镜像上传Harbor和拉取Harbor镜像
# 在harbor上创建名为springcloud-demo的项目,以及yorick用户,并给予yorick用户操作该项目的权利# 给镜像打上标签
docker tag hello-world:latest 10.211.55.10:85/springcloud-demo/hello-world:latest# 把Harbor地址加入到Docker信任列表
vim /etc/docker/daemon.json
{"registry-mirrors": ["https://registry.docker-cn.com"],"insecure-registries": ["10.211.55.10:85"]
}# 重启docker服务
systemctl restart docker
# 重启harbor
docker-compose restart# 登录Harbor
docker login -u 用户 -p 密码 192.168.66.102:85# 推送镜像
docker push 10.211.55.10:85/springcloud-demo/hello-world:latest# 拉取镜像(拉取镜像的服务器也要修改配置,然后重启docker)
docker pull 10.211.55.10:85/springcloud-demo/hello-world:latest